
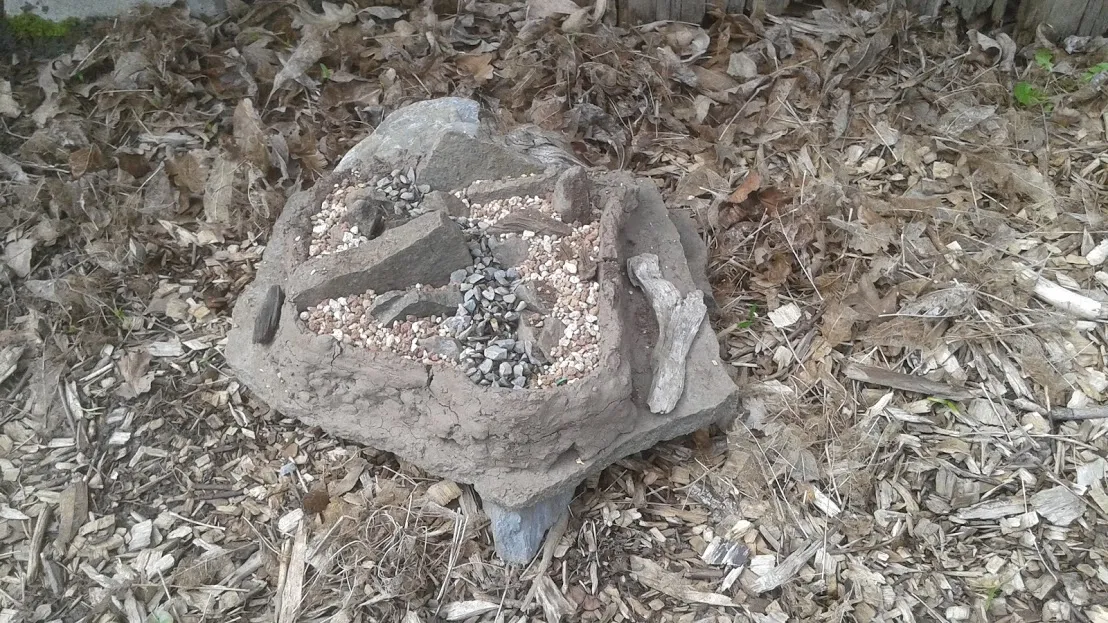
This is my miniature rock landscape design. It is made mostly from stones, rocks, mud, clay, wood, and some pieces of metal, plastic, wire pieces hidden under the surface.
Let's take a look at the constructed design, and then the final stages of how it was made.
Above you can see the gravel rocks slide were arranged to look like a mountain spill or a dry stream.

A piece of old bark becomes the petrified wood of dead tree stumps.

A rough stone still shows the blast marks of ash cinders. It stands strong and tall, as a sign of the shear power required to drop such a boulder from a volcano.

The rocks jam up behind the wall of the cliffs. The rocks flow around it, always searching for a way down.

The minerals of the rock slap fragment along the plate lines of its inner surface. Wedged upright, the puzzle pieces of the earth are exposed to view.

The natural ledge would be a dangerous walkway up to the summit of the highest cliff. Pebbles along the slanted surface and crumbled stone become hazardous traps to any fool who walks through unprepared.

The landscape itself is alive with potential energy.

In the final stage of this landscape build, I cut out a screen material (this one is a plastic cross-stitch sheet), and bent some wires to be tied and looped around the corners. While the outside mud dam wall is meant to be somewhat permanent in shape, the inner area will be used for growing tree seedling that will be later incorporated into the design. The screen and wires will allow me to lift out the inner section if maintenance is ever required on the trees, soil, or rocks.

Fill with loose potting bonsai potting soil. Mostly pine bark, lava rock, and pumice.

Select rocks to be featured throughout the design. They look best if buried somewhat into the soil. Rocks that match in color and shape are usually best. Angular rocks are more realistic in nature.

Sometimes I removed rocks because I did not like the color or shape next to other shapes. In this second design I found more matching colored rocks.

Top fill with rocky soil and gravel. You can use inorganic materials or organic materials, or a combination of both. I like to separate different colors of soil type to show a design. A stream, a pond, a beach, or any imagined water feature can be showing using a darker or lighter material to contrast against.
Save the largest materials left over to be used underneath. I had some large stones and pieces of dead wood I wedged underneath, and it provided a very solid and firm surface to lay my base stone on. It's not going anywhere. The addition of wood accents on the outside also help blend this landscape into the environment around it.
If you are interested in building a rock landscape like this one, you'll want to check out my past posts on the different phases of design I considered.
- Rock Hunt Treasure Trove
- Developing Rock Landscape Ideas for Seedlings
- Let's Build: Bonsai Rock Landscape
- Let's Build: Bonsai Rock Landscape, Bigger and Better
This is the first time I have made of of these, and it wasn't difficult or expensive, but I did have some expert advice along the way to help me fashion what I envisioned. For me, it was an enjoyable way to explore some artistic creativity. I find it is easiest to be creative when working with irregular shaped materials and few rules on how they should be used.

All photos are original works of my own.

Community Forums

Stay strong and resilient in times of hardship. Preserve the core of your character. The edges may crumble. The pressures of life applied to the sacred spirit within make it rare, priceless, and irreplaceable.