

Welcome || Bienvenidos
Cómo les comenté en haces unos días estimados amigos y lectores, compré hace poco algunas cositas para ir probando nuevas técnicas y estilos (esto me emociona!!! Ya que desde niña siempre quise realizar accesorios y en Hive es que estoy desarrollando y poniendo en práctica está habilidad) siempre me ha gustado la técnica de macramé para nadie es un secreto 😅 y las perlas también pues en mi opinión dan un toque de elegancia, así que día de hoy fusiones ambos gusto para realizar este tierno proyecto, y le digo así porque la temática de un lazo a mi le hace recordar la infancia, para realizar esta pulsera utilicé los siguientes materiales.
As I told you in a few days ago dear friends and readers, I recently bought some things to try new techniques and styles (this excites me!!!! Since I always wanted to make accessories and in Hive is that I am developing and putting into practice this skill) I have always liked the macramé technique for no one is a secret 😅 and pearls also because in my opinion give a touch of elegance, so today I merge both taste to make this tender project, and I say so because the theme of a bow to me reminds me of childhood, to make this bracelet I used the following materials.
Materials || Materiales
✨ Hilo chino color negro.
✨ Cinta métrica.
✨ Perlas.
✨ Tijera.
✨ Encendedor.
✨ Black Chinese thread.
✨ Tape measure.
✨ Beads.
✨ Scissors.
✨ Lighter.

Steps || pasos
✨ Paso 1.| Iniciaremos tomando nuestra cinta métrica y con ella vamos medir 4 tiras de hilos chino de 40 centimetro cada una.
✨ Step 1.| We will start by taking our tape measure and with it we will measure 4 strips of Chinese threads of 40 centimeters each.

✨ Paso 2.| Una vez que ya tenemos nuestras 4 tiras de hilo chino, vamos a tomar 2 de ellas y vamos introducir una perla, llevándola al centro de ambos hilos.
✨ Step 2.| Once we already have our 4 strips of Chinese thread, we are going to take 2 of them and we are going to introduce a pearl, bringing it to the center of both threads.

✨ Paso 3.| una vez que ya tenemos posicionada la primera perla, vamos a proceder a introducir en uno de los extremos de los hilos inferiores 2 perlas, seguidamente introducimos el otro hilo posicionado en la parte inferior en ambas perlas, pero lo haremos en sentido contrario del primero hilo.
✨ Step 3.| once we have already positioned the first bead, we will proceed to introduce in one of the ends of the lower threads 2 beads, then we introduce the other thread positioned at the bottom in both beads, but we will do it in the opposite direction of the first thread.


✨ Paso 4.| Ahora vamos a repetir el anterior paso pero con la diferencia que serán 3 perlas, y en la siente hilera 4, así habremos culminado la primera parte de nuestro lazo.
✨ Step 4.| Now we are going to repeat the previous step but with the difference that there will be 3 beads, and in the seventh row 4, so we will have finished the first part of our loop.


✨ Paso 5.| Repetiremos los pasos anteriores para realizar el otro extremo del lazo.
✨ Step 5.| We will repeat the previous steps to make the other end of the loop.


✨ Paso 6.| Una vez que ya tenemos nuestro lazo de perlas listo vamos a tomar 1 de las tiras de de hilo chino de 40 centimetro, y con ella vamos a realizar el entramado de los laterales de la pulsera, realizando un nudo plano, posicionamos nuestra pulsera de forma vertical y pasamos el hilo chino por debajo de los 2 hilos del costado de pulsera, tomamos el hilo chino que está en el costado derecho y lo vamos a llevar por encima de las tiras que están ubicadas en el centro y el hilo que está en la izquierda lo pasaremos por debajo de los hilos centrales y introduciremos en el oficio creado por el hilo derecho, ajustamos y así tendremos nuestro primer nudo plano, vamos a continuar hasta ocupar la totalidad del hilo.
✨ Step 6.| Once we already have our pearl loop ready we will take 1 of the strips of Chinese thread of 40 centimeters, and with it we will make the lattice of the sides of the bracelet, making a flat knot, we position our bracelet vertically and pass the Chinese thread under the 2 threads of the side of the bracelet, We take the Chinese thread that is on the right side and we are going to take it over the strips that are located in the center and the thread that is on the left we will pass it under the central threads and we will introduce it in the trade created by the right thread, we adjust and thus we will have our first flat knot, we will continue until occupying the totality of the thread.


✨ Paso 7.| Repetimos el paso anterior en el otro costado de la pulsera.
✨ Step 7.| We repeat the previous step on the other side of the bracelet.

✨ Paso 8.| Agregamos una perla en cada costado de la pulsera y realizamos un nudo clasico, en este punto la pulsera puse quedar así o para mejor acabado se.puede realizar un nudo plano entre sus extremos facilitando el uso de la pulsera.
✨ Step 8.| Add a bead on each side of the bracelet and make a classic knot, at this point the bracelet can be left like this or for a better finish you can make a flat knot between its ends to facilitate the use of the bracelet.


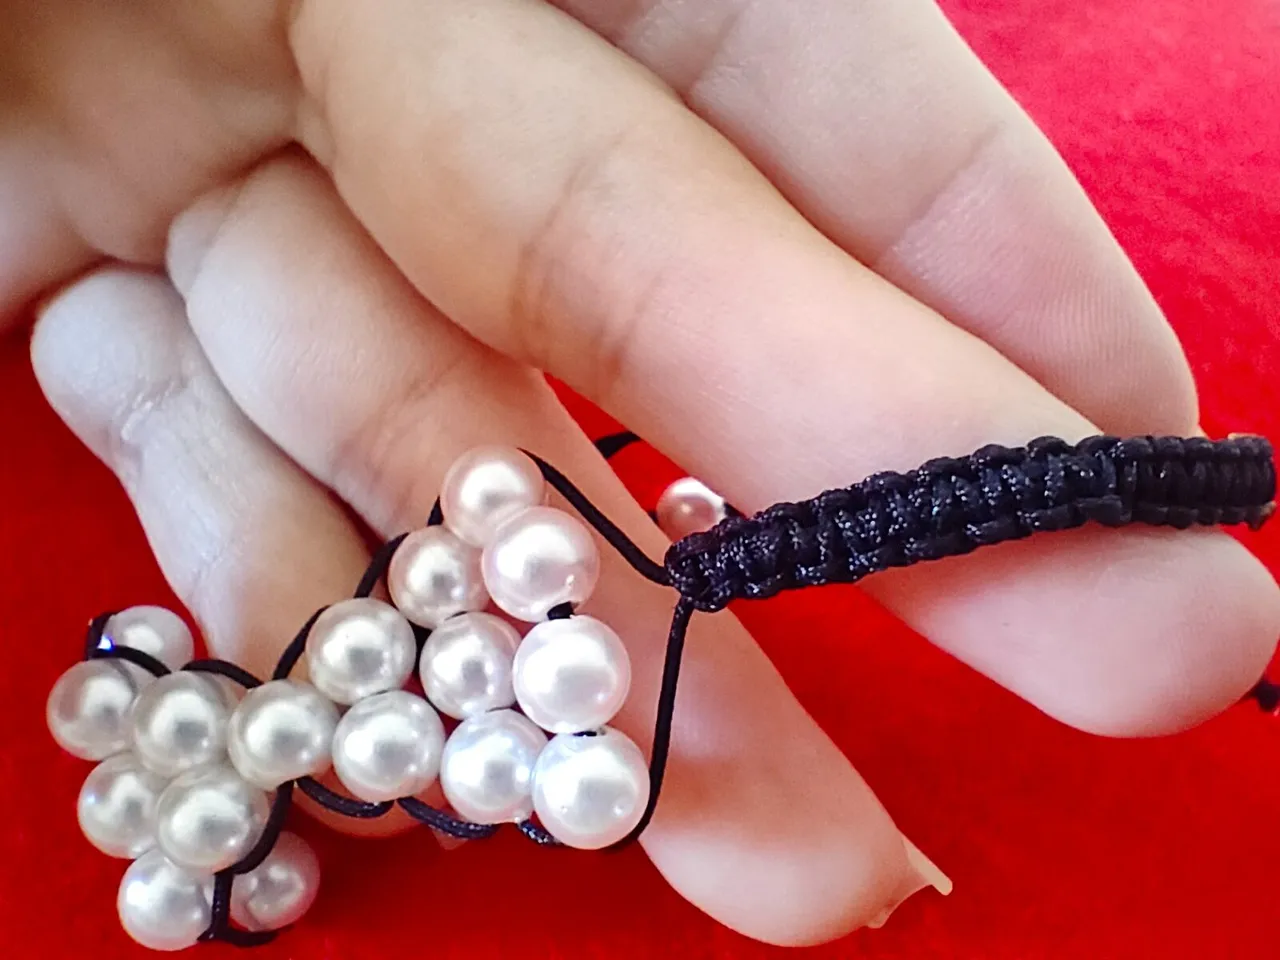
De esta manera ha remos concluido nuestra pulsera con temática de lazo, realizada con perlas y un entramado de nudo plano en sus costados.
This is how our ribbon-themed bracelet, made with pearls and a flat knot weave on its sides, was completed.
Result || Resultado


Espero sea de su agrado el resultado de esta ocasión y se anime a recrearlo e mi caso está pulsera es para mi hija de 2 años, por lo cual a la hora de recrear este proyecto deben considerar el tamaño de la mano de la persona para quien la harán, como siempre agradecida por su tiempo, atención apoyo y comentarios estimados amigos, esperando que se encuentren bien se despide su amiga hasta un próximo post.
I hope you like the result of this occasion and is encouraged to recreate it and my case this bracelet is for my 2 year old daughter, so when recreating this project should consider the size of the hand of the person for whom they will do, as always grateful for your time, attention, support and comments dear friends, hoping you are well your friend says goodbye until a next post.

✒️Autoría del texto y fotografías.| Author of the text and photographs.
🎥Imágenes y vídeo creados con: |Images and video created with: Youcut video| Giphy | Canva |
🇪🇸 Traducido con DeepL
