Yesterday I posted a video of the making of this new shot, but today I wanted to go into more detail about the location, settings, and what gear I used to capture it. The photo is also clickable so you can see it much larger than in the video if you wish. The photo adventure video can be found HERE.
Eagle Falls is an incredible location any time of the year, but especially in the spring when the snow is melting and the falls are huge. The falls are located above Emerald Bay in the South Lake Tahoe area. It's about a 45-minute drive from my house in Truckee but only about a 15-minute drive from the casinos and hotels in South Lake Tahoe. There is a big pay-to-park parking lot there but there is also a dirt lot right across from the falls that you can park for free at (as long as there is space). The falls are a short walk from the road, less than a minute, but it is a rocky little trail and not wheelchair accessible. You can cross the river above the falls to access more incredible views if you are agile and can hop across rocks.
I find this location to be better for sunrises because you are facing the sun during that time of day which makes it more likely that you will see color in the sky. There are also usually fewer people there during that time of day, Eagle Falls can get incredibly crowded in the summer months. It is possible to get color in the sky at sunset and this photo was indeed shot at sunset (8:01 pm). However, I have been there many times for sunset only to have the sky light up with color behind me (to the west) and not have any color looking toward Lake Tahoe (looking more east).
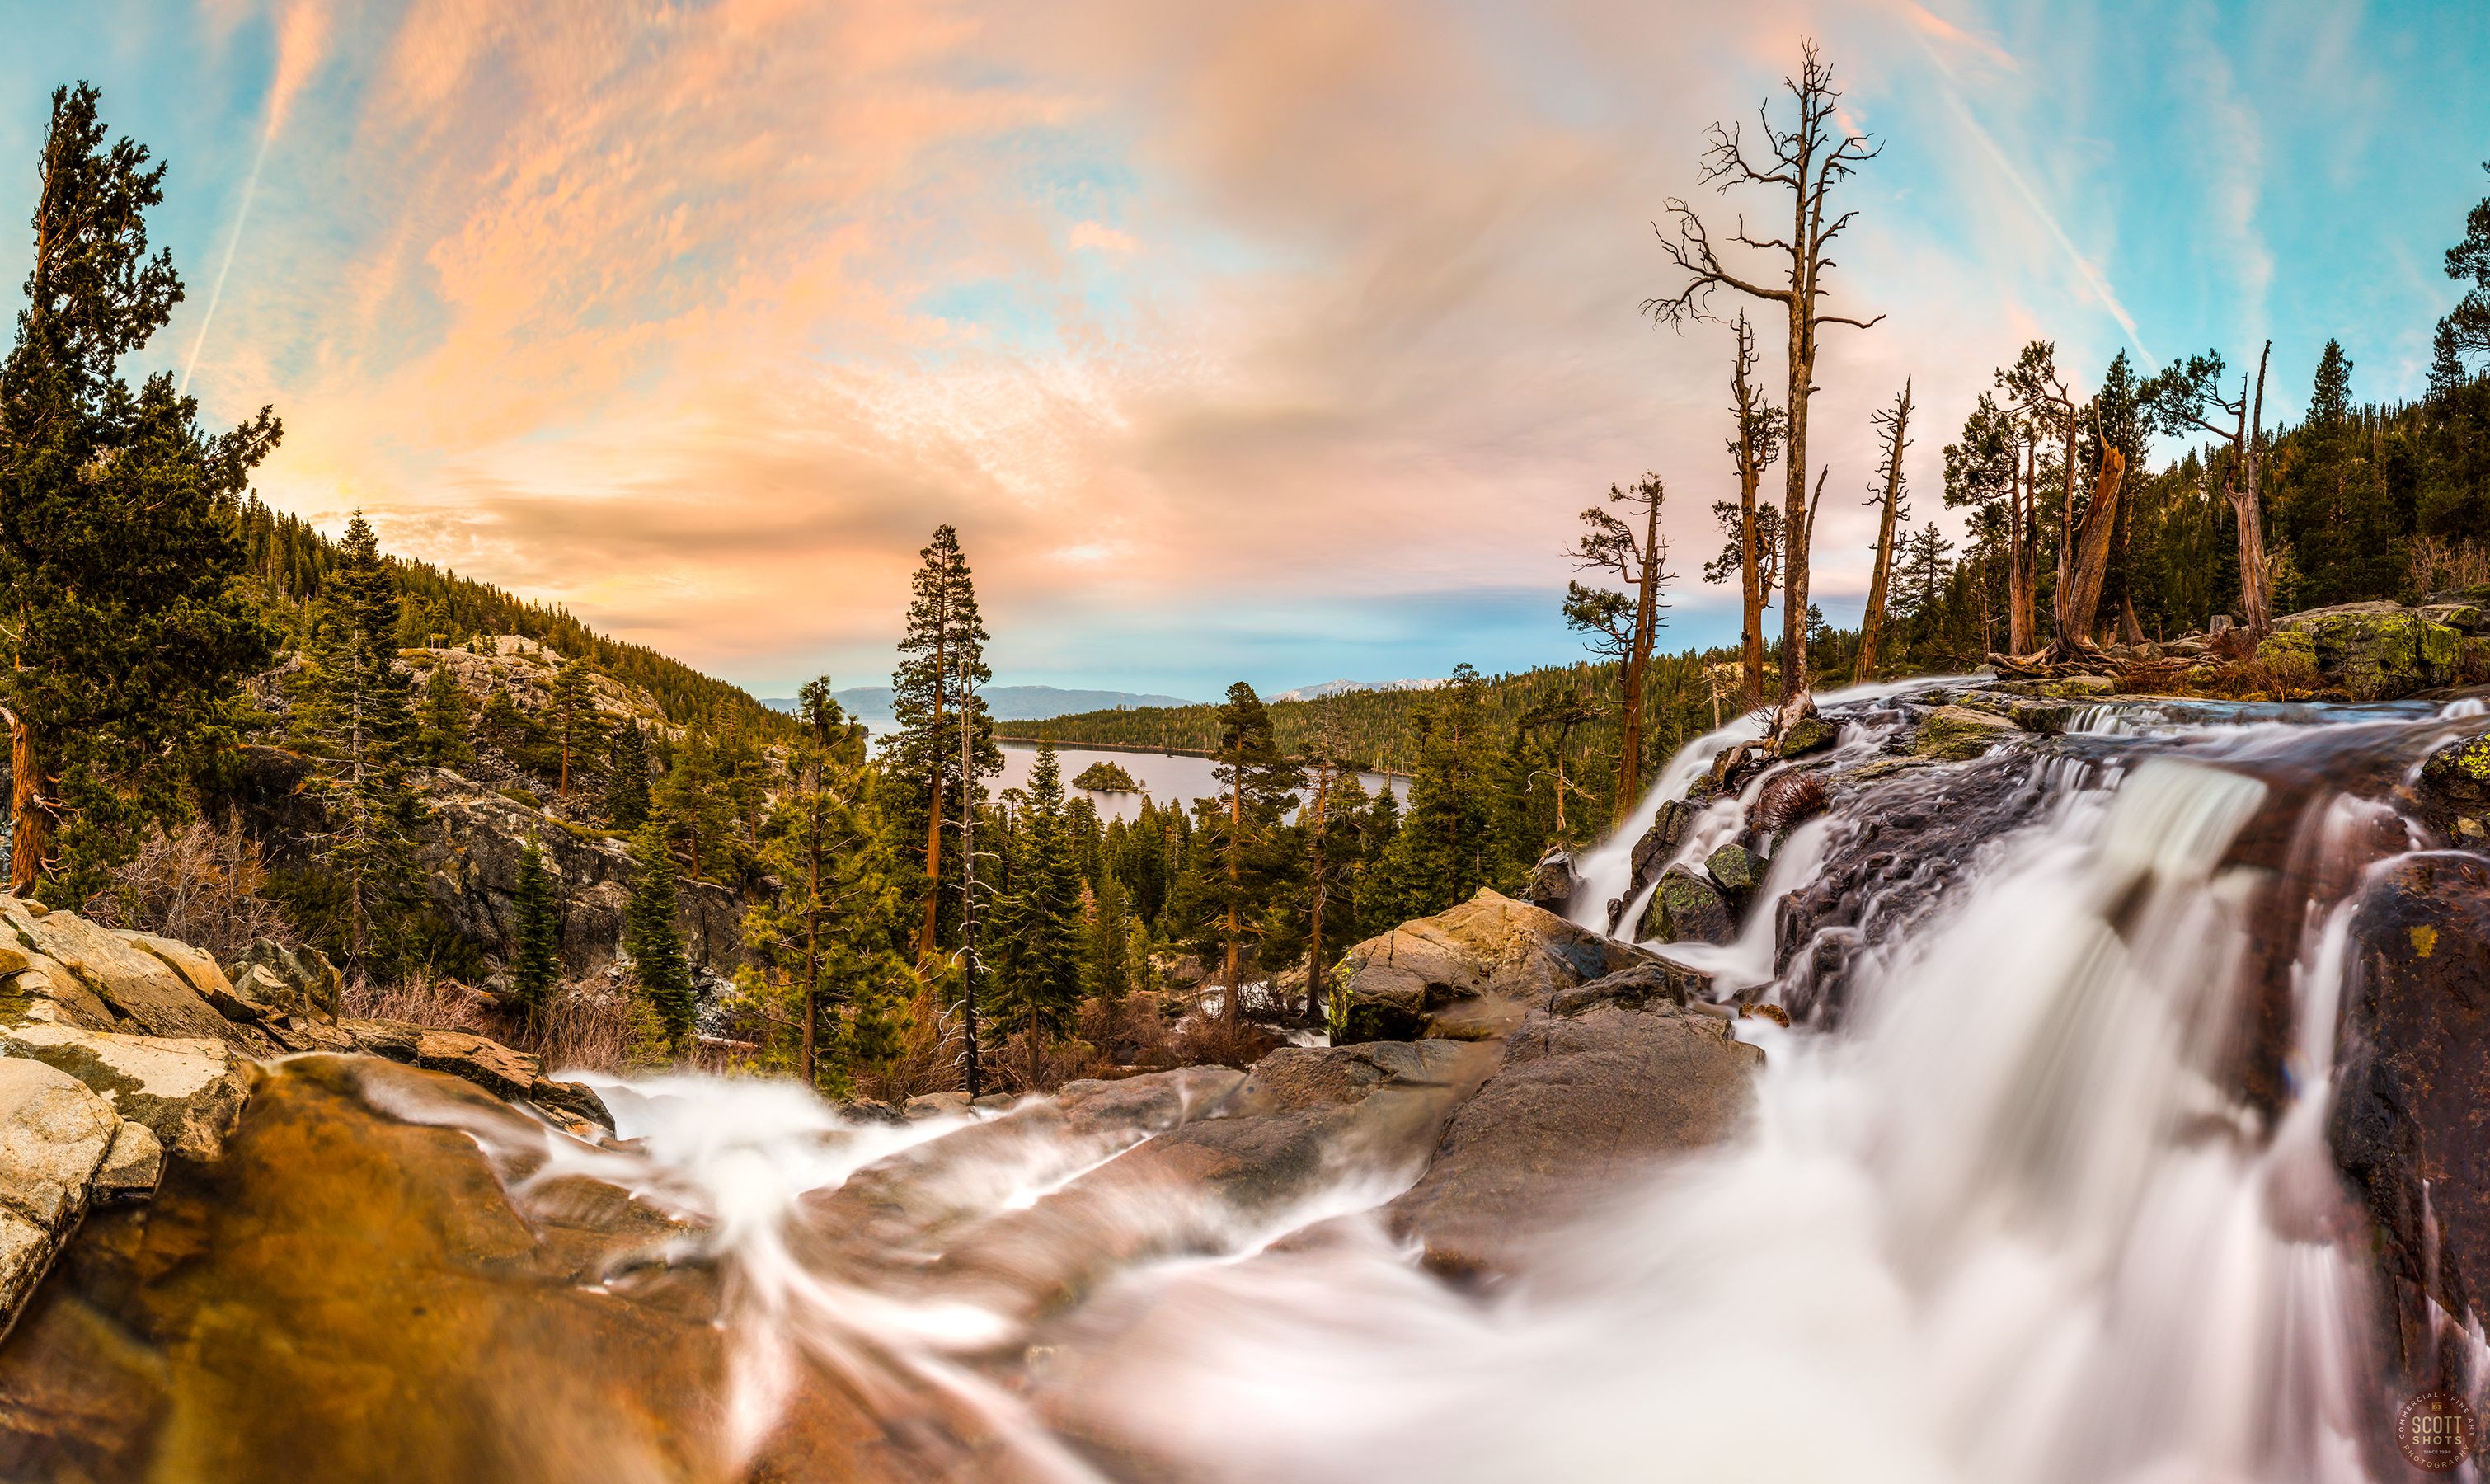
For this photo, I used a 50.6 megapixel Canon 5Dsr camera with a 16-35mm lens, set at 16mm. The camera was set up to shoot vertically, I shot 21 photos while moving or panning the camera a little bit at a time between each shot (this technique can be seen in the video at the 3:40 mark). Once I was back in my studio, I stitched the vertical photos together using Photoshop's photomerge feature to create a panoramic photo with a resolution of 12,891 x 7,684 pixels which is equivalent to a 99-megapixel image. This one can be printed huge and still have great detail. Shooting vertical instead of horizontal allows for me to capture a very wide angle so I could see a good amount of the waterfall and of the sky.
The camera settings were ISO 50, the lowest and least light-sensitive my camera has available. The aperture was f22 for two reasons. One, I wanted the small aperture so I could get a good depth of field and have the foreground and the background in sharp focus. The small aperture also does not allow a lot of light onto the image sensor so I could use a longer shutter speed. Each of the 21 stitched images were 3.2 seconds long, in the video I said they were one second long but the "keeper" images were a little bit later in the evening when it got a bit darker out. The 3.2 second long exposures is what allows the water to move during the shot and create that smooth silky look.
The filter used on the front of the lens was a Lee graduated neutral density filter. The Lee filter system is pricey but there are less expensive alternatives. The dark part of the filter was placed over the sky in the composition in order to darken it a bit and balance the sky exposure with the foreground exposure.
Each of the 21 photos were shot in RAW mode (not jpg) and worked on in Adobe's Camera Raw feature. There I was able to bring up more shadow detail, darken the highlights a bit, adjust the color balance, and bring out a little more color saturation in the clouds. RAW images always look a bit dull and flat, they are intended to be worked on so the photographer can make decisions about the image's look instead of the little computer in the camera making those decisions when shooting in jpg mode. The edges of the stitched panoramic photo were cropped off, I always shoot more image than necessary when shooting stitched panoramics so I can dial in the composition better at the computer.
I really look forward to printing up a big canvas print of this image on my Epson 9900 for the Vista Gallery (where I sell my work) but I think this one would also look incredible as a big metal print. Pro tip - my favorite lab lately for getting high quality metal prints is Reed Art and Imaging, located in Colorado, USA (they can crate ship huge prints directly to my customers). Metal prints are a lot pricier than canvas prints but it's a great look that I have been getting a lot of requests for lately.
Question: When you view photo prints these days, do you prefer looking at canvas prints, framed traditional prints, or images printed on metal?
Thank you for looking, watching, and reading!
Scott Thompson
Scott Shots Photography
For more videos with some 
- Improving Your Photography With @scottshots - Part 1 of 3
- #Fail!!! The Importance Of Accepting Failure When Shooting Landscape Photography
- Wildflower Photo Adventure At Sagehen Meadows - And A Bit Of How-To
- Eagle Falls, Lake Tahoe Photo Adventure, And A Bit Of How-To
Just a reminder, I now can sell prints in trade for STEEM. Please contact me through my website www.ScottShotsPhoto.com if interested.