
At first I never really thought that this simple lines would result to a beautiful flower like this, so now I will share to everyone the process on how to come up with this.
Design Process
- First, I made a 500 x 500 pixel artboard at 300 ppi.

- It would look something like this.

- Then, I made a circle in the center of the artboard with the dimensions: 86 x 86 pixels.

- Then using the star tool, I made one at the center of the circle with the dimensions: 133 x 63 pixels with 10 points.

- Then I created a bigger star still at the center of the circle with the dimensions: 185 x 122 pixels with 10 points.

- I selected all the end points of the outer star.

- Then with the points selected, I converted the anchor points to smooth curves.

- After that I applied the same process to the inner star.
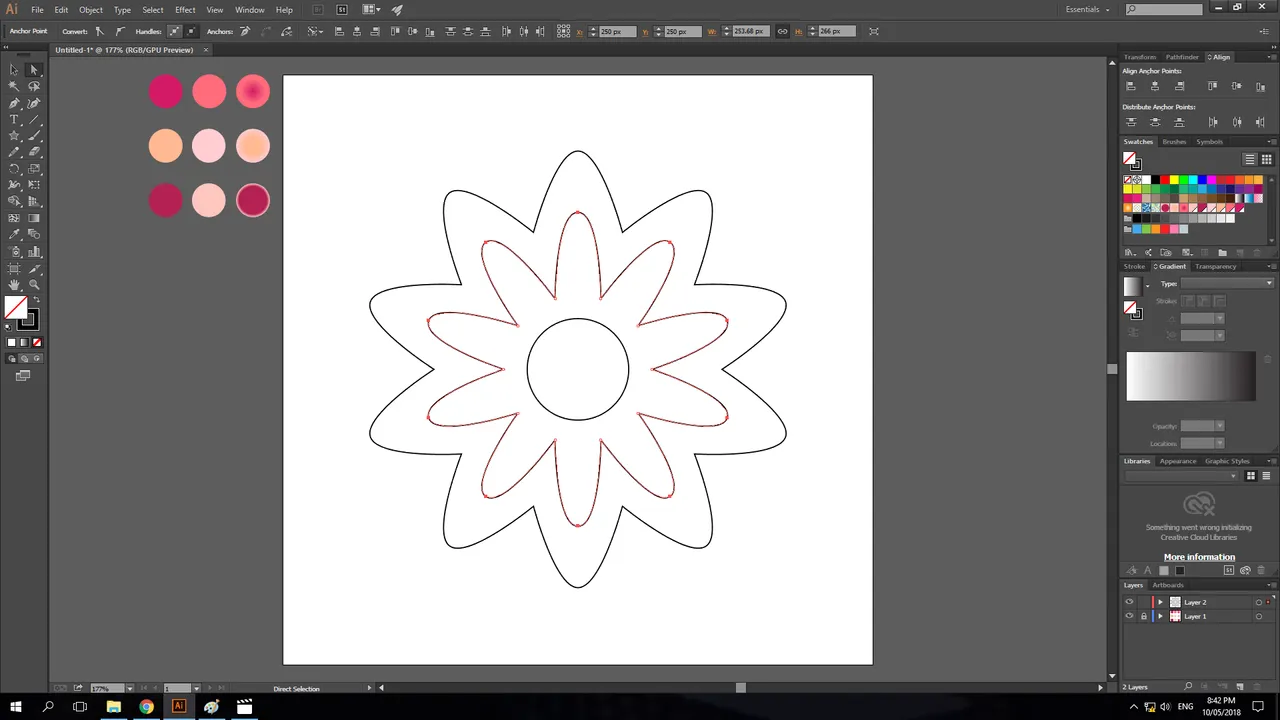
- Then I manually adjusted the handles to obtain curves on the inner part of the outer star.

- After manually adjusting it all, this is how it will look like.

- After that, I selected all the objects then changed its stroke weight to 0.3 pt.

- Then I added a radial gradient to the stroke of the outer star.

- After that, I added a radial gradient to the stroke of the inner star.

- Then I added a radial gradient to the stroke of the circle in the middle.

- I then edited the values of the blend. I selected first all the objects, then I went to Object > Blend > Blend Options. For the spacing I choose, Specified Steps: 400.

- Then after that, to apply the blend, I went to Object > Blend > Make.

- After the blend is applied, this is how it will look like.

- I added an effect. I went to Effect > Distort & Transform > Pucker & Bloat. Then I set the percentage to 60%.

- After applying the effect, this is how it will look like.

- I then added another effect. I went to Effect > Distort & Transform > Zig Zag. I then set the values to 15px for the Size then 7 for the Ridges Per Segment and the Smooth option for the Point.

- After the Zig Zag Effect is applied it will look something like this.

- Then lastly, I made a new circle at the middle and filled it with gradient with the other color of the gradient's fill opacity set to 0.

- This is the final output of the design in png.

Creative Commons License
This work is licensed under a Creative Commons Attribution 4.0 International License.

Download
If you would like to try it out and make something like this, I had provided a working file with the finished design and the colors that I had used.
If you would be interested to join a group of like minded people & quality content creators who support, guide & learn from one another, then I am extending an invitation to our #dynamicsteemians discord. Here you can connect with people from all over the world, your country included. Together with  and
and  feel free to promote your posts in the relevant channels and receive a support.
and feel free to promote your posts in the relevant channels and receive a support.
