
Hi everyone, today I'm going to show you how easy it is to create your own linoleum block print. Without spending too much money or having little to no artistic ability, you too can create some pretty cool prints. So before we get started, here is a list of supplies that you will need in order to do it yourself. The links under the item will take you a site where you can buy them online. While these are pretty inexpensive, you may be able to find them cheaper on Amazon.
 |  |
|---|---|
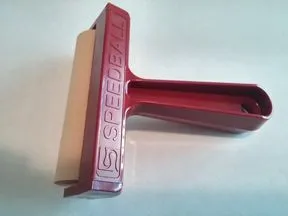
| Lino Cutter | Brayer/ink roller |
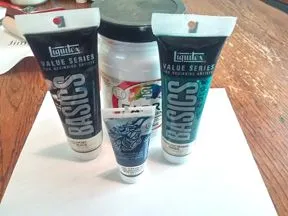 |  |
| Inks | Unmounted Linoleum |
That is all you need to get started along with some paper of course. Because this is a beginners course we are not going to go into technique and theory too much. Usually printers will buy special paper like rice paper that absorbs the ink more than just standard printer paper. But we are going to skip that for now.
If this is your first time trying this, start small. It might be less frustration in the long run. If you have purchased a large piece of unmounted linoleum, you will probably want to cut it down to a more manageable size. In order to do that use a straight edge and an Xacto knife to score/cut the surface once or twice. (On the front side.)

You do not have to cut it all the way through. Once you have scored the surface on the line you wish to split your linoleum, simply fold it backward and the linoleum should split on that line. You will then need to cut the fibers on the back.
Now we need a design to print and there are a couple different ways to get that design onto your linoleum. You could draw directly onto the linoleum. I've done this many times, but always remember your print will print out reversed. So if you are going with this method hold it up in front of a mirror to get a better idea of what your print will look like.
You could also photocopy your image on an old fashioned photocopier. (Laserjet printers and the like don't work as well.) Then, place the image on the linoleum and use an iron to transfer the image to your block iron on style.
Lastly you can do what I did. Use transfer paper or make a poor mans version to get your image onto the linoleum.
 | Because I'm using letters in my design, I reversed the image ahead of time and printed it out. |
|---|---|
| On the back side of my image, I just took a pencil and shaded over the parts of my image I wanted to transfer. Be sure to get a nice layer of pencil on there. | 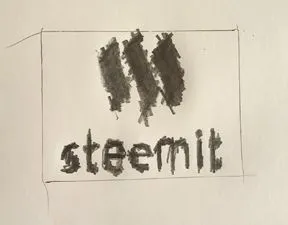 |
 | With the pencil side of you image on the surface of linoleum, trace over your design to give you an idea of how it will look on the block. Be sure not to move the paper while tracing. |
| Once you have that, use a pen or fine tip sharpie to fill in your image as best as possible. The pencil will eventually smudge and you might lose the image. |  |
Whew! Now it's time to carve.

A few tips before we start carving.
1.) Your blade will slip so always make sure you are cutting away from your body or hand. (yes I did knick myself while making this one)
2.) You do not need to cut super deep. If you are cutting all the way through to the fibers in the back, that's too deep.
3.) Block prints rarely turn out exactly as you imagine them to be. That is what I like to call the evolution of art and that is a major reason I like block printing so much.
4.) Linoleum cuts easier if it is warmed up. Use a towel over the linoleum and iron it for a few minutes.
Ok so lets get started. First I like to take the smallest blade and cut around all of my lines. The smallest blade will slip the most so take your time.

Then switch to the larger V blade and cut the remaining area that you do not want to show up on your print. Some of the ridges of the cut away portion will show up on your print. This I believe is what adds to the coolness of printing this way. As you can see below, I cut away in sort of a uniform fashion and left some on the sides as a border.

Carving blocks does take some practice so don't be discouraged. You will become more comfortable the more you try it.
Now to print!

| Using a flat piece of glass or a flat plate, roll out the ink and get your brayer totally covered.Don't use too much ink to start. If it sounds gloopy it's too much. It should just sound slightly tacky while rolling in the ink. |  |
|---|
Roll the ink onto your block making sure everything you want printed has ink on it.
 | You can buy special barens for pressing your paper onto the inked block but I just use a spoon or wooden spoon. |
|---|
pushing down with your spoon, rub all areas of the paper onto the block. When you are done just peel up the paper from a corner and set aside to dry.

And there you have it. One thing to know while printing is this. The first few prints will have either too much ink or not enough ink. It might not be until your fourth or fifth print before you start seeing the results you like.
So those are the basics. I would love to hear any feedback or questions in the comments. Until then . Keep Steemin!
