Hello steemit community, a few months ago, I met a friend and just as he approached me, I could see that one of the closures of his backpack or backpack was damaged, a week later I returned it to see but I was using another backpack, I immediately asked him about the one he had previously, he simply told me that he was not using it because his closure had been damaged, I asked him the next time we saw him I would bring it to see if I I could repair it, and that's how it was, I could change the damaged closure, now my friend is very grateful because he also liked his backpack very much and will be able to use it for much longer.
Since then I have been doing some repairs and I want to share a step by step where I teach you how to repair your backpack.
Since then I have been doing some repairs and I want to share a step by step where I teach you how to repair your backpack.

Step one
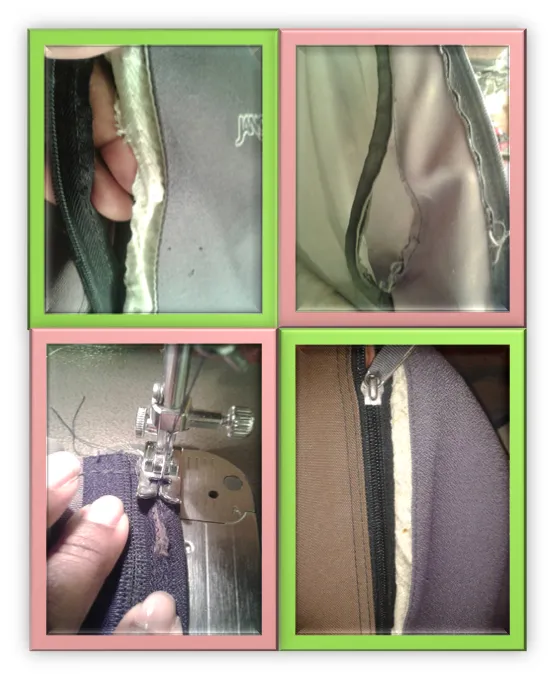
First of all you must observe what the damage is that the backpack has, and define what tools and materials you will need to perform the repair or replacement as the case may be, with that idea in mind get to work. It is clearly seen that we must sew the closure of the small pocket and replace the larger pocket closure.
Do you have to undo both closures?
That's right, let's take the opportunity to use the seam ripper that will facilitate the work.

Step Two
Do you know what's next?
Do you know what's next?
It is very easy, in the case of closing the small pocket we simply separate it from the fabric, we match the frayed fabric with the scissors, and with a burner or tinder burner the lint left in the fabric.

Step three
It took me a long time to decide where to sew the closure, the best option was to undo the inside of the backpack, pull and adjust the closure to sew with a straight stitch.
The truth was a good decision to sew from the inside, there are the results, in my opinion it was very good, you can not see those ugly stitches.
Step four
What I want to show you now, is the obvious damage of the larger pocket closure, it will be necessary to replace it.
What I want to show you now, is the obvious damage of the larger pocket closure, it will be necessary to replace it.
Repeat the steps, unstitch, separate the closure of the fabric, cut and burn the lint.

Additionally, we will make a medium and wide zigzag seam along the sides to make sure the fabric does not fray again.

With a chalk to mark fabric, the centers of the fabrics and the center of the closure are marked in order to facilitate the location of the same.
The fabrics and the closure are secured with small pliers so that nothing moves while we sew.
The fabrics and the closure are secured with small pliers so that nothing moves while we sew.
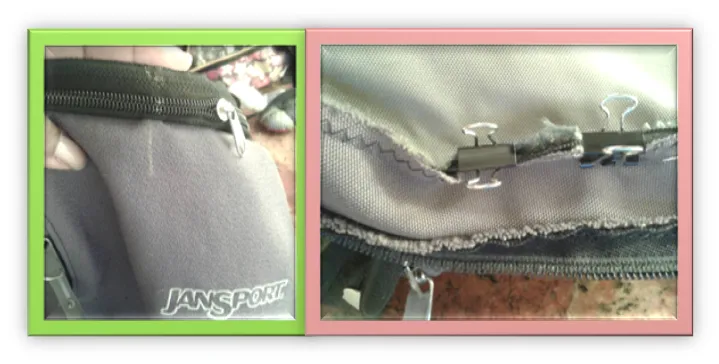
The last thing we sew is a ribbon to reinforce the seams, it is sewn with a medium long straight seam, and finally you will see the results worth it, you can continue using the backpack that you like so much longer.

You know, if you have any questions you can ask or comment if you wish, thanks for reading my dear steemian.
Step by step guide to repair your backpack or backpack authorship of 