
Hey guys! I'm back with another tutorial. This time I'll teach you how to make a Stereoscopic Artwork.
If you don't know what I'm talking about or haven't heard of Stereoscopic Images before, it's basically 2 set of images side by side that looks similar but in reality, the angles are a bit different than the other.
Kind of like looking with just your left eye, compared to looking with just your right eye. The difference is slight, but enough so that you can perceive depth.
Here's how our final product should look like:

This can be viewed using the Cross-Eyed Method. For those who don't know how to view it, here's a quick tutorial.
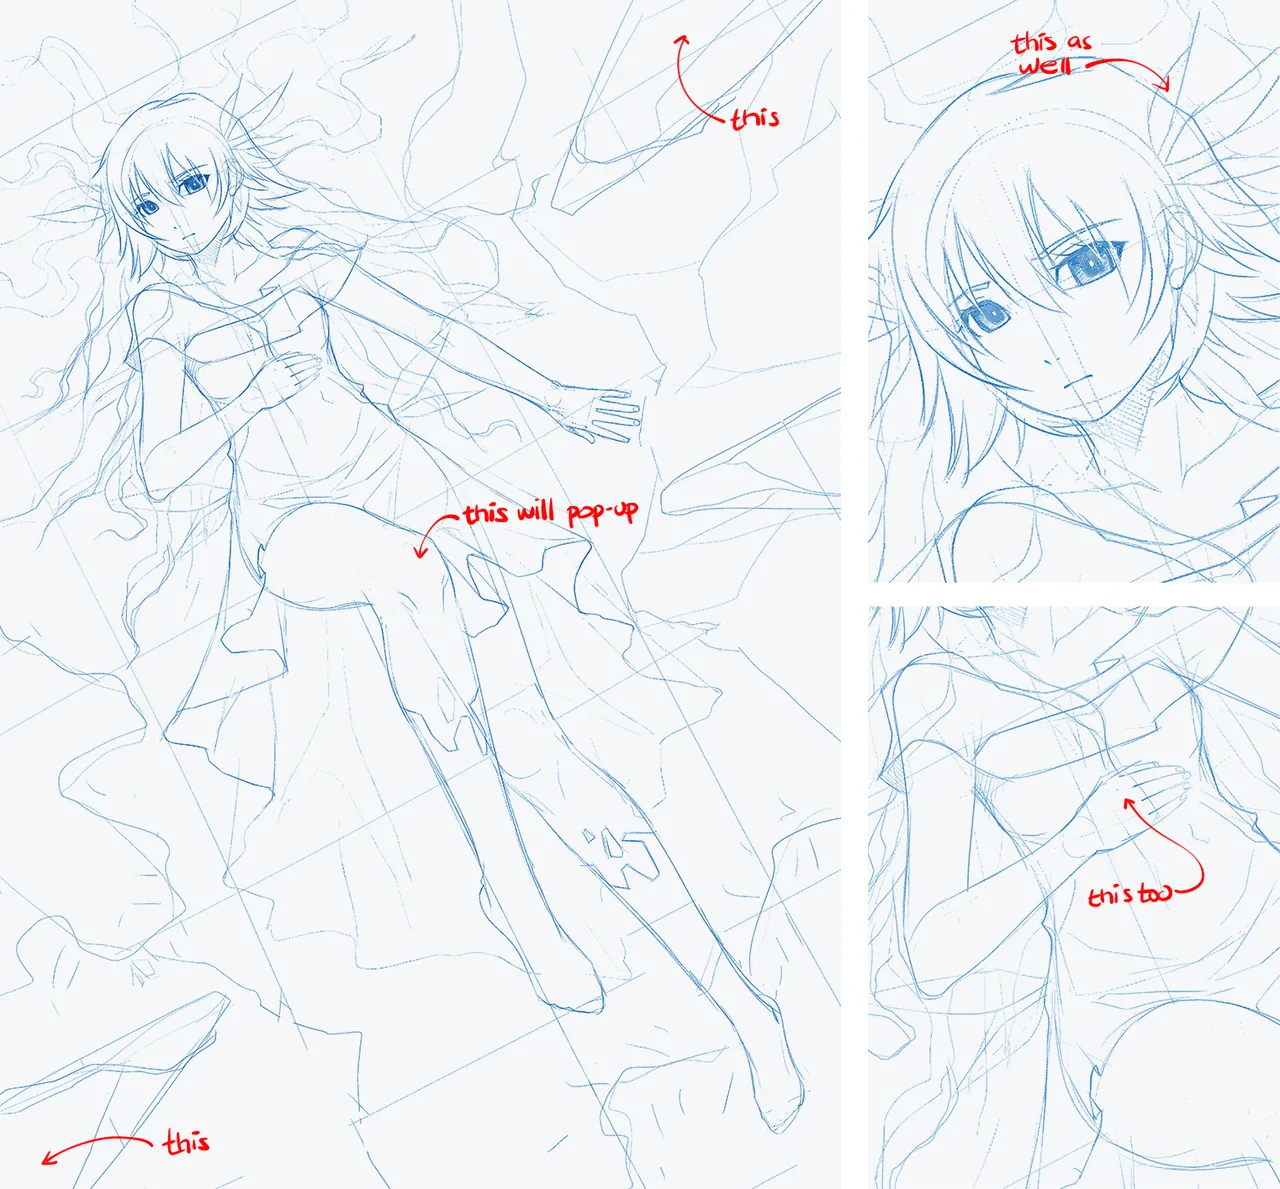
Sketching
Sketching an artwork that you plan to make into a stereoscopic image will be a bit different than normal. While you do the sketch, you must imagine what parts of the artwork you would like to pop-up. Doing that earlier will help you plan it well and not get confused later.
Inking & Applying Flats
If you think that planning where parts pop-up while sketching is hard, THIS is harder. You will have to ink and flat all the parts separately. Head is separate. Hair is separate. Legs, fins, post, almost everything is separate. It's very important that you keep all of their purpose in your mind. Because the moment you forget why you inked and flat that part that way in the first place, you're going to have a hard time.

Painting
If you're thinking, "I bet this step will be harder!", congratulations! You're correct! The hard part here is, since you've separated some parts that belongs to a single item (like dress and limbs), you'll have trouble painting them seamlessly. One way of getting around that is inking the whole artwork first, paint it, chop them, then fill in the parts that was left by cutting the parts. I didn't do that because my style of making an artwork would make some complications later if I chose that series of steps.
Warning: the following images might appear morbid than I originally intended.

If you can't see the smaller details, right-click on the image & open it on a new tab to see a bigger version.


Needless to say, painting an artwork that you'll turn into a stereoscopic image later on will take longer than usual. Especially if it will be your first time. This one took me almost 3 weeks to make. Excluding the stereoscopic procedure. Which I will go into on Part 2.
Stereoscopic Version
Before I teach you how to make the artwork stereoscopic, let me show you the stereoscopic version again.
Here's the Anaglyph version for those people having a hard time with the Cross-Eyed Method. I will also include this on Part 2.

That's it for now! I'll see you next time on Part 2 where I will explain how to convert our artwork from a static image to a 3D stereo!
-lires