The Versatility of Implosions
If you've see some of my previous posts you know a few different things you can do with a basic implosion. If you haven't this post: https://steemit.com/art/@spc/new-pendant-with-tutorial is a good place to start! While the basic disk shape you end up with after imploding is great for pendants, it can easily be manipulated to take the form of something different!
Below I'll be showing the process behind making a glass turtle with an implosion shell. As always, I'll show the final piece now:
The Final Piece

The Process
To get there, we start in the usual way, with a gather of clear glass like this:

Next, we want to create a flat surface on the bottom of the clear gather by pressing the hot glass on a graphite pad.

This should create a hemisphere type shape like this:

This flat surface is now where we can add dots of color using thin rods of blue and white colored glass. We add the dots one at a time starting at the center and working our way out until the flat surface is covered.

Next we want to melt these dots in so they are flush with the clear glass.

After continual heat the gather should have no bumps on the bottom and look like this:

This step begins the implosion process, as the dots are absorbed by the clear glass the dots don't actually become flat, they are absorbed as tiny spheres inside the clear, which gives them their three dimensional look.
Next, we want to repeat the flattening process and add another layer of dots like so:
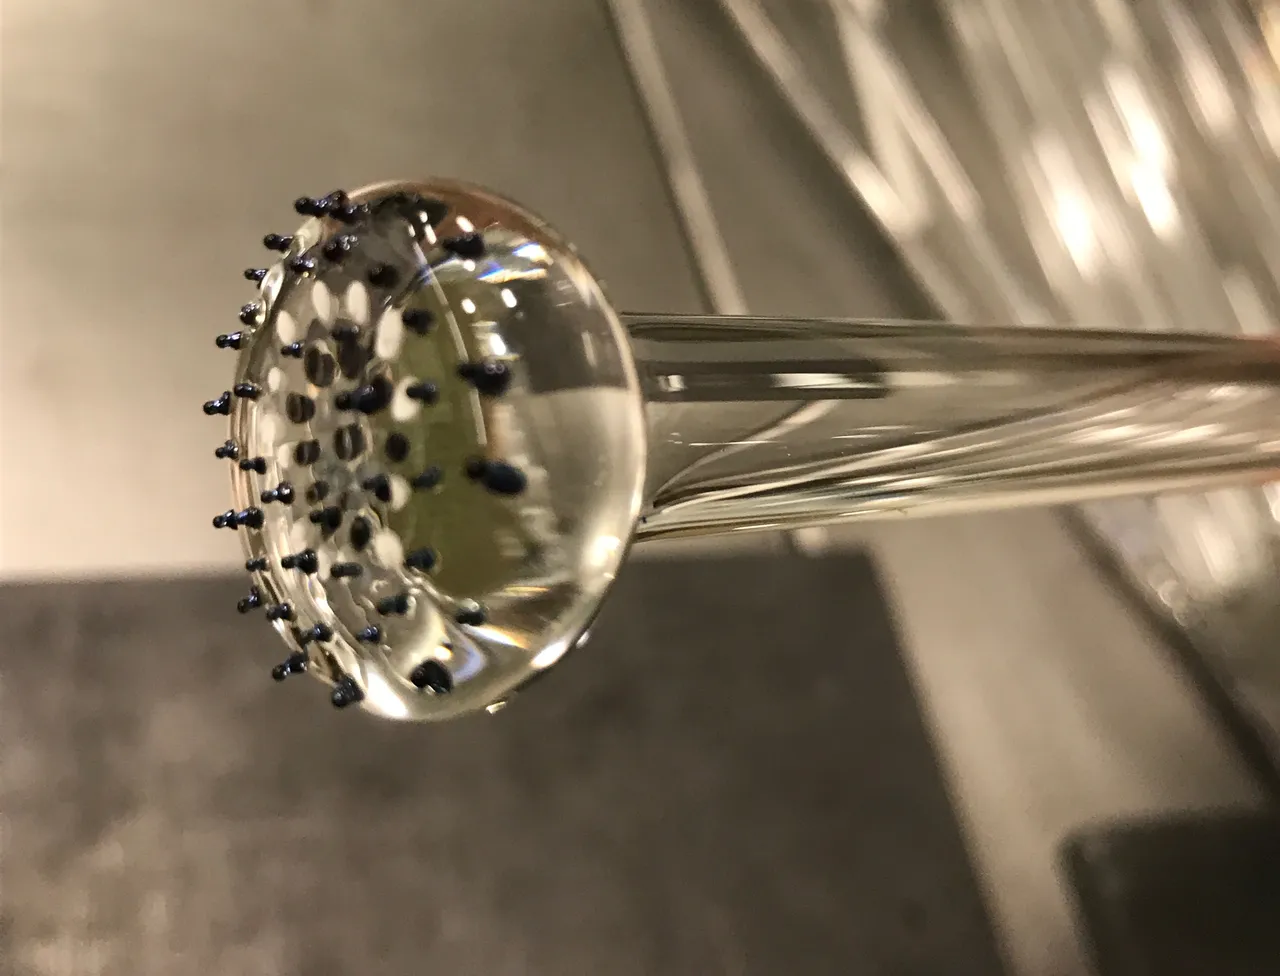
In this picture, you can begin to see the dots' three dimensional characteristics devoloping:

From here, we want to melt in the new dots the same way we melted in the first layer and flatten the bottom. Every time we flatten the bottom more clear glass from the sides of the hemisphere is pushed upward. This creates a bigger implosion and thus spreads out the dots and pushes them further up. In theory you could push the dots upward as many times as you want, but doing it too much usually results in asymmetric pieces that look messy.
Once you have a flat bottom, it is time to add a background color. In this case, I chose white. Using white frit (finely ground glass, which looks like powder), we can stamp the bottom of the hot piece onto the frit and collect it.

This step should be repeated until there is an even coat of color.
After an even coat is applied, we can attach a thin clear rod to the bottom of the piece and flame cut the connection between the piece and the thick rod. The thin rod allows us to hold the piece from a different axis and flame polish the top until it is round. (this step takes two hands and I was taking pictures for this so I was unable to show this process, for a more detailed description please contact me). After the flame cut and polish you should have a standard implosion pendant shape:

Again, we can change the axis of the piece to allow for the next step, which is stretching the bottom. To do this we need to get the left or right half of the piece very hot. It is important for this heat to have sunk in throughout the piece so that the bottom half pulls evenly. Once the left or right half is hot, attach another clear rod and pull from both ends. The cold half will remain stationary while the hot half will pull into the tail of the turtle.

Now, we have the basic shape for the turtle's body. This step demonstrates one variation of the basic implosion pendant shape.
At this stage, we can begin adding legs and a head. For each leg we want to attach a thin rod of color (in this case blue) to the side of the piece. It is important that the piece and the color rod are the same temperature at the point of connection (otherwise they are likely to crack or break off during the cooling process).

Repeat this process again for the upper left leg and then exactly the same way on the other side. It can be difficult to get all the legs to be the same size and shape but practice will get you there.

Lastly, we want to add the same color for the head. Because the head us bulbous a the top we want to add more glass than for a leg and stretch out the connection to create a neck. The piece should look like this after flame cutting the color rod:

The extra material at the end can be melted down into a spherical shape to create the head.
The last step is to add two small dots for the eyes, and voilà, you've made an implosion turtle!

As with most glass, the color before and after the cooling process will almost always be slightly different.
Here are few glamor shots of the turtle!


Thank you for reading!
To support my work, please upvote and follow!
If you'd like to purchase any of my work please contact me or follow this link to my etsy page:
https://www.etsy.com/shop/SteveChadwickGlass?ref=pr_shop_more