Your DIY guy is back with a "quick" project to get rid of that annoying block-heater cord hanging out the front of your diesel rig. Granted this is kind of one of those projects that not all people would fully understand its purpose. Besides the fact that is just looks better, it's more convenient, and safer. I will explain this all as I make my way through this little DIY project.

What finally made me pull the trigger on this project was the fact that my Engine Block-Heater on my 2001 Ford Excursion with a 7.3 Powerstroke Diesel wasn't working. I was having to start it up and let it sit there and idle for a few minutes to warm up. In my neck of the woods winter time...is... cold. As I was doing this project is was only 42 F outside and we haven’t really gotten into winter just yet. We see temps well below freezing for a good amount of time and if your running a Diesel engine in you vehicle Block-heaters are awesome!! When working properly, I can leave the defrost on when I turn one off the vehicle. Plug it into a 120v outlet over night and when my gas engine vehicle has a frosty windshield, the diesel windshield is about 1/4 thawed out. Also I can jump right in, start it up and hit the road with the heater blowing out... I would call it “warm” air... It’s not warm enough to thaw out your hands after you brush the snow off the car without gloves but it is slightly warm. This pre-heating of the engine during the cold months also causes less wear and tear on the engine along with zero idle in the driveways time. Going... Green??? Well the Excursion is Green and the diesel fuel is green... Anyway my Ford Excursion has nearly 230,000 miles, starts up every time and purrs like a kitten.
It has happened to the best of us diesel owners, forgetting to unplug the extension cord connected to the block-heater and driving off. This can damage the cord and possibly the heater itself. Plus you might tear and extension cord in half when you are running late for work and it gets caught under your tire somehow??? Ya, never happened to me... moving on...
Okay now that you all have a little understanding of the importance of a properly working block-heater in the colder climates, let’s get into this little project shall we?
Now I am just going to be removing the excess wire that dangles out of the front of my 2 - Diesel vehicles. Not the whole thing, I still want/need the block-heater. This isn’t about getting rid of the whole cord, just changing the end of it. I will be then installing a waterproof flush mounted 120v male plug into the bumper. See look at all the excess wire tucked behind the bumper...
But it all tucks back inside the bumper really nice doesn’t it?


First I needed to find the plugs I am going to be installing. After a quick search I came across these on Amazon and thought they would work great. Also for $17 I thought the price was pretty reasonable and ordered 2. One for the Excursion and one for the F350 dually (The Beast)

Now you don’t really need a ton of tools and parts for this project. Granted it took some digging around in my various cabinets and tool storage areas to find them but I had everything “laying” around.
~Wire Strippers/crimpers - Black Electrical Tape - Butt Connectors - Heat Shrink tubing - and some Lineman Pliers... okay just some type of cutter to cut the cord - a heat gun or a lighter will work~
Also a Drill with a 1/16 inch bit and Phillips head screwdriver bit and a 2 inch hole saw bit


One thing I do want to mention is the fact that I highly recommend getting some self tapping screws to replace the screws provided with the plug. Trial and error led to this conclusion, as I broke a couple of their cheap screws off when installing them, even after drilling a pilot hole. The black ones are just a little weak to be screwing into a steel bumper.

Like I said, I was having problems with the block-heater on my Excursion I decided to run new wire all the way to the block heater itself. Sorry I might have fibbed a bit earlier in the post. Granted this would make it to where I have 2 places where the wire is spliced together but it will be fine because when done right the splices should cause any problems. Silly me, I totally forgot to get photos of the splicing part... stupid stupid stupid!
Good practice when splicing the 2 ends together is to stagger your butt splices. This way the splices don’t sit next to each other and create a huge lump in the cord. Also just incase you damage the outside of the splice it won’t be contacting the other splice. Even with the heat shrink on it this is still a good practice. Reminder Don’t forget to put the heat shrink tubing on before you crimp the other side of the butt connector together. Nope, I’ve never done that, nope not once :wink:wink. Then using the black electrical tape, tape the livin’ ish out of it. I put about 4... maybe 10 layers of tape on just for good measure.
Since the cord from the new plug isn’t long enough to reach all the way to the block-heater. (Which is located just about the oil filter on the 7.3 Powerstroke Diesel engine) I had to find some wire to do so and then I will just slice it past the block-heater a little ways. Then secure it to the other wiring with a few zip ties. Crap, I forgot to mention that you need a few of those.

The hard part is locating a flat spot on the bumper to drill out the hole for the plug. I could go on the side of the bumper but that just didn’t look right. A big black square right in the middle of the shiny chrome bumper... Nope I ended up choosing a spot lower on the bumper offset to the driver’s side on some of the plastic molding stuff.

Now my Truck on the other hand has an aftermarket winch bumper that has all kinds of flat areas on it. So ya, it doesn’t really matter where is drill the hole as long as I like it’s location. Find a spot, center it up and drill it out.
When drilling out the hole just take it nice and easy. Let the bit do the work. Don’t apply a bunch of pressure because that bit can get hung up and your drill will become a wrist breaker. Ya you don’t want that to happen it hurts... trust me... Even though you are taking your time, maintain a good secure grip with both hands close to your body. Since the bit is going clockwise, the drill will want to turn counter clockwise. When or if they grab, you better be ready.
Welp, there we have ourselves a hole

It may look like just plastic but behind it is a steel bumper. It did take some time for the hole saw bit to work it’s way through the bumper but it made it. Just be patient and take your time.
Ok remember how I mentioned the screws breaking? Ya it happened to one when I was attaching the plug on the Excursion. Then when the screw head broke off it damaged the plastic next to it!! DANG IT!!
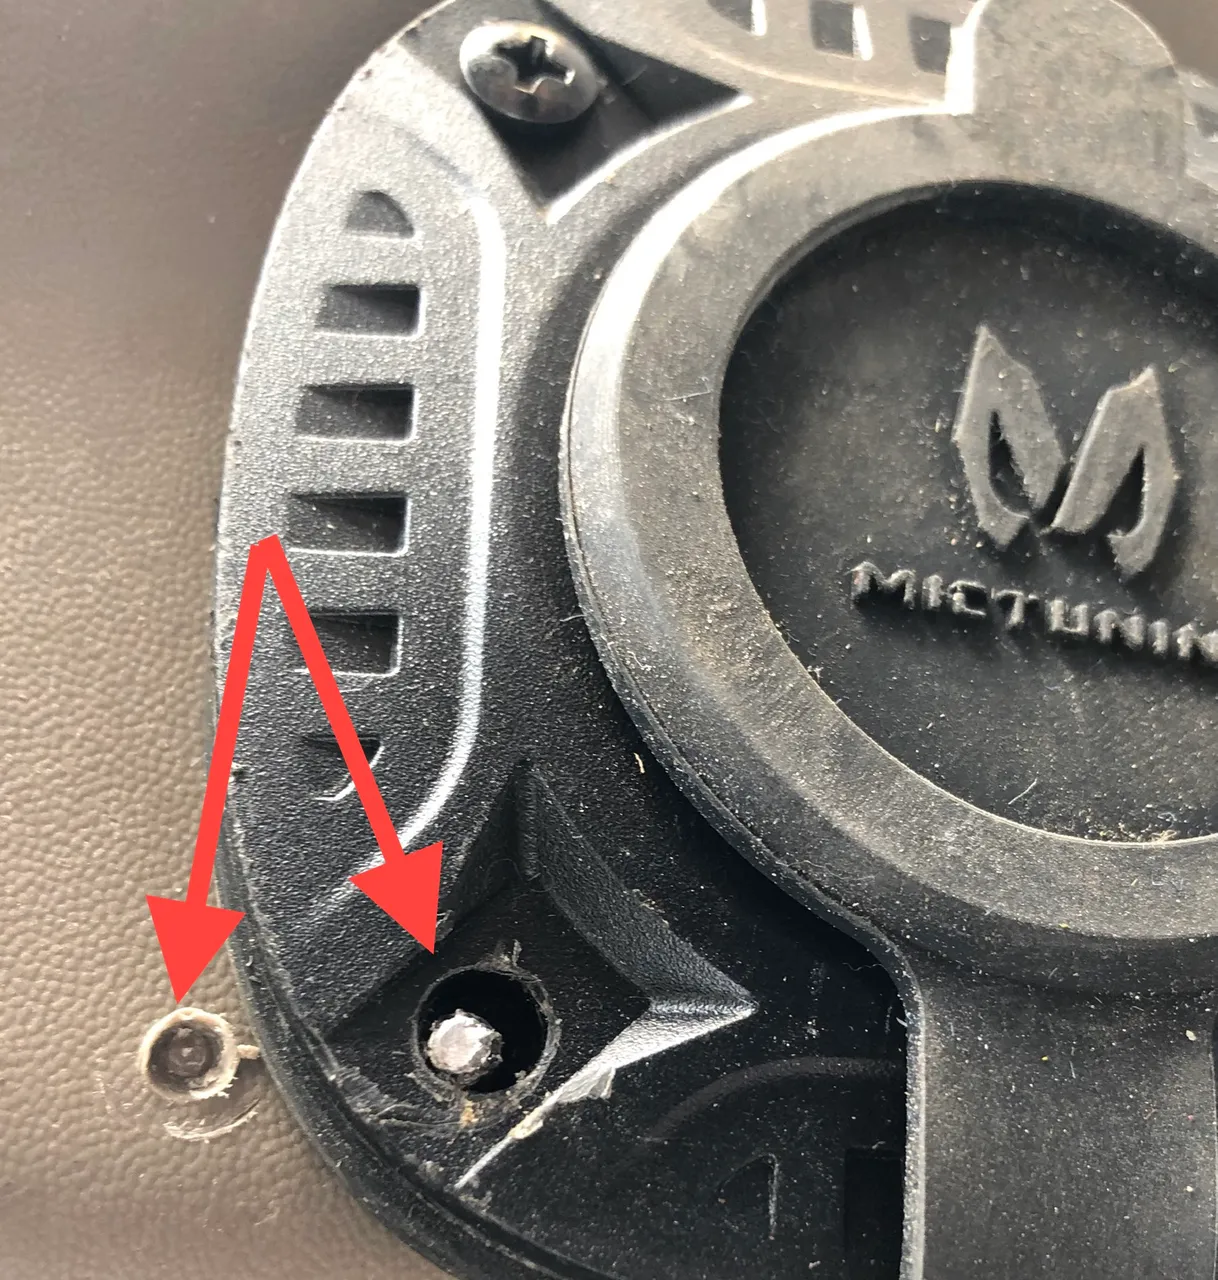
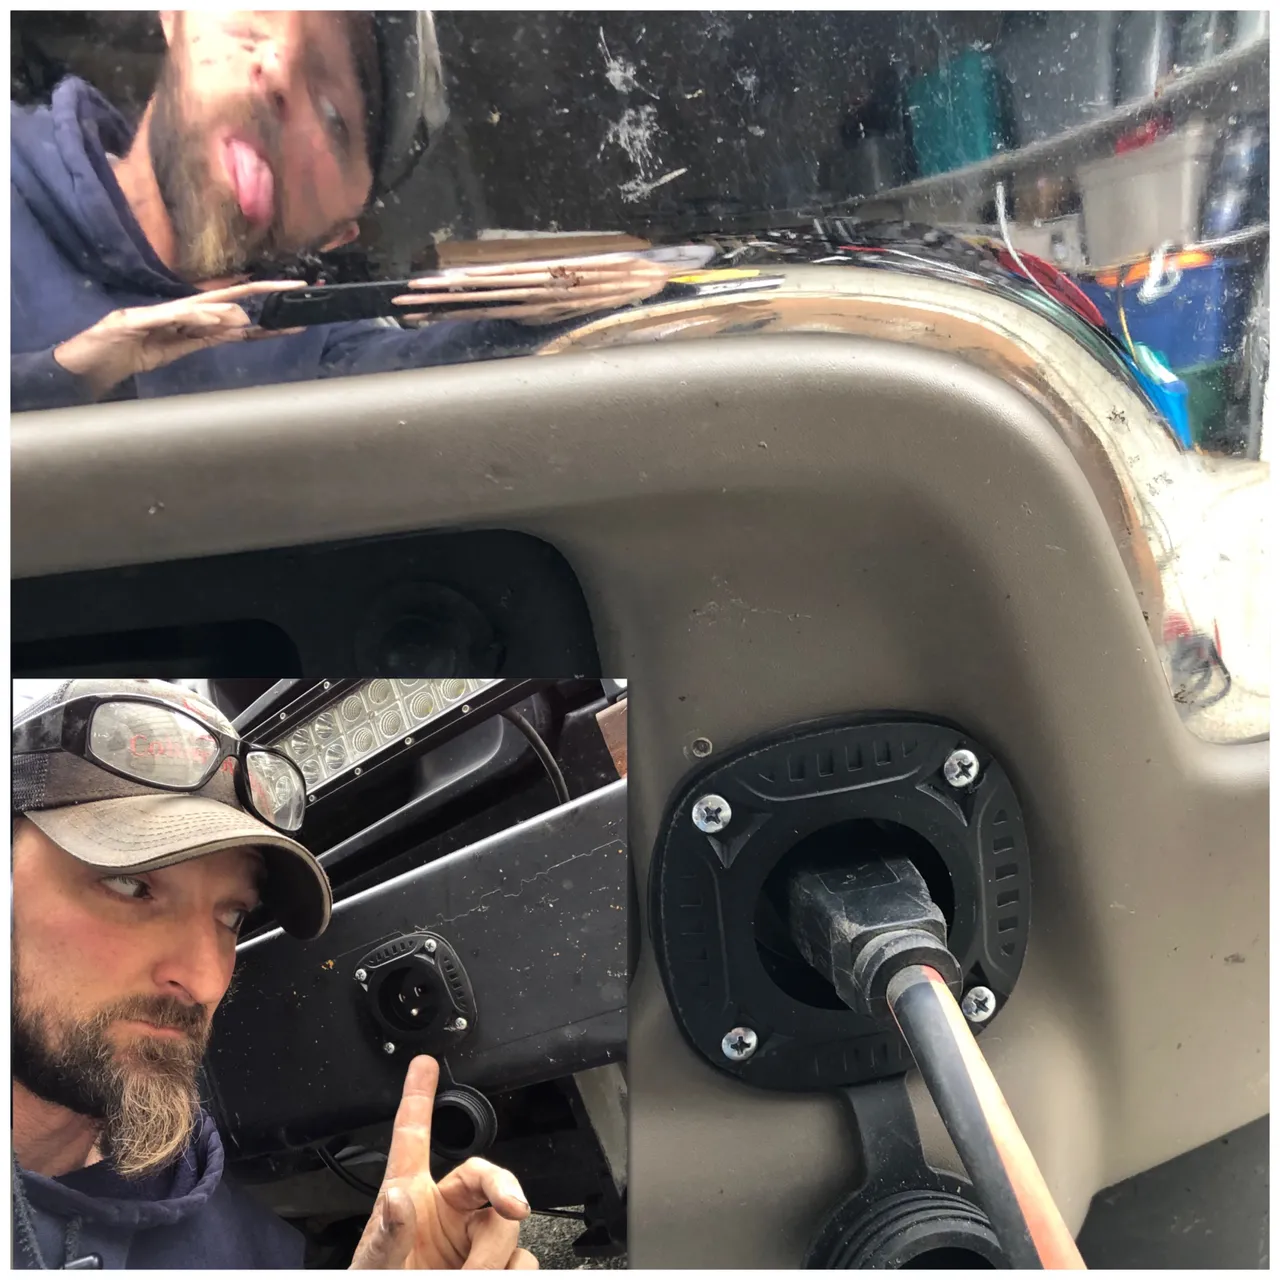
I was going to leave the broken one in the Excursion bumper until I starting installing the plug on my Truck. Um ya, the front bumper on my Truck is a little thicker and those screws were breaking even when I pre-drilled them with a 3/32 inch bit. That is when I decided to dig into my coffee can of screws and see what I could find for self-tapping screws. Even though I couldn’t find any black self-tappers, I think the contrast of the silver screws looks pretty good. Of course after I had to remove all the screws so I could turn the plug 90 degrees because I installed both of them with the cap opening to the side instead on flipping open in a downward motion. See that is what happens when you are not paying attention. You have to do things twice or maybe 4 times.
How do they look?

I think they turned out really well and look a whole lot “cleaner” than having some cord hanging out the front of the vehicle. Plus if for some reason I forget to unplug it and drive away, it won’t yank on the cord that is attached to the block-heater. It will just pull the extension cord out or the plug. A guy I work with actually had his 7.3 Powerstroke literally burn to the ground in his driveway. They believe it was from a damaged block-heater/cord. So an extra precaution mine is connected to a GFCI plug so if some sort of fault should happen, the plug “should” trip and kill the power :fingers-crossed
Well my fellow DIY’ers that wraps up another DIY project done by yours truly. Now if I could complete a few of my other larger projects I would be feeling pretty good myself. For instance, I need to finish my Washtub Burn Barrel and my New Fancy Fence/Gate that has all my neighbors jealous. :wink:wink.
Until Next Time...

Steem On
and
DIY
and
Save Money
Don’t forget to mention
when you encounter a post that deserves a good Splattin’
by the 
Join the
On Steemauto.com
Where we catch those
Splatworthy Posts
Hot off the Press


