Hello, steemians! Welcome to my page, eh!
About 3 or so weeks ago, I finally started working on this Ampeg guitar amp for my friend. This amp is most probably 1966 production, judging by the date codes on various parts in the amp, including the original speaker. This amp has "been around the block" as they say.

The amp had been stored in less than optimum conditions at some point in it's life, and looks like it has seen a lot of use. They don't tend to look like this from sitting around in someone's studio. I'm guessing that this amp was dragged around to various venues for a lot of years, and it survived the handling that comes with that kind of use.
I did a Dtube video about 3 weeks ago on this amp, basically taking the chassis out of the cabinet and talking about the parts inside the amp. In case you'd like to watch that, the link for that video is here.
https://steemit.com/guitar-amp/@amberyooper/035y8r4w
After getting the parts that I needed to repair the amp, I got to work on replacing them. I tend to forget to take pictures until I'm half way through the repair, but I did remember to get a few pictures.
This is a wider shot of the parts in the chassis.

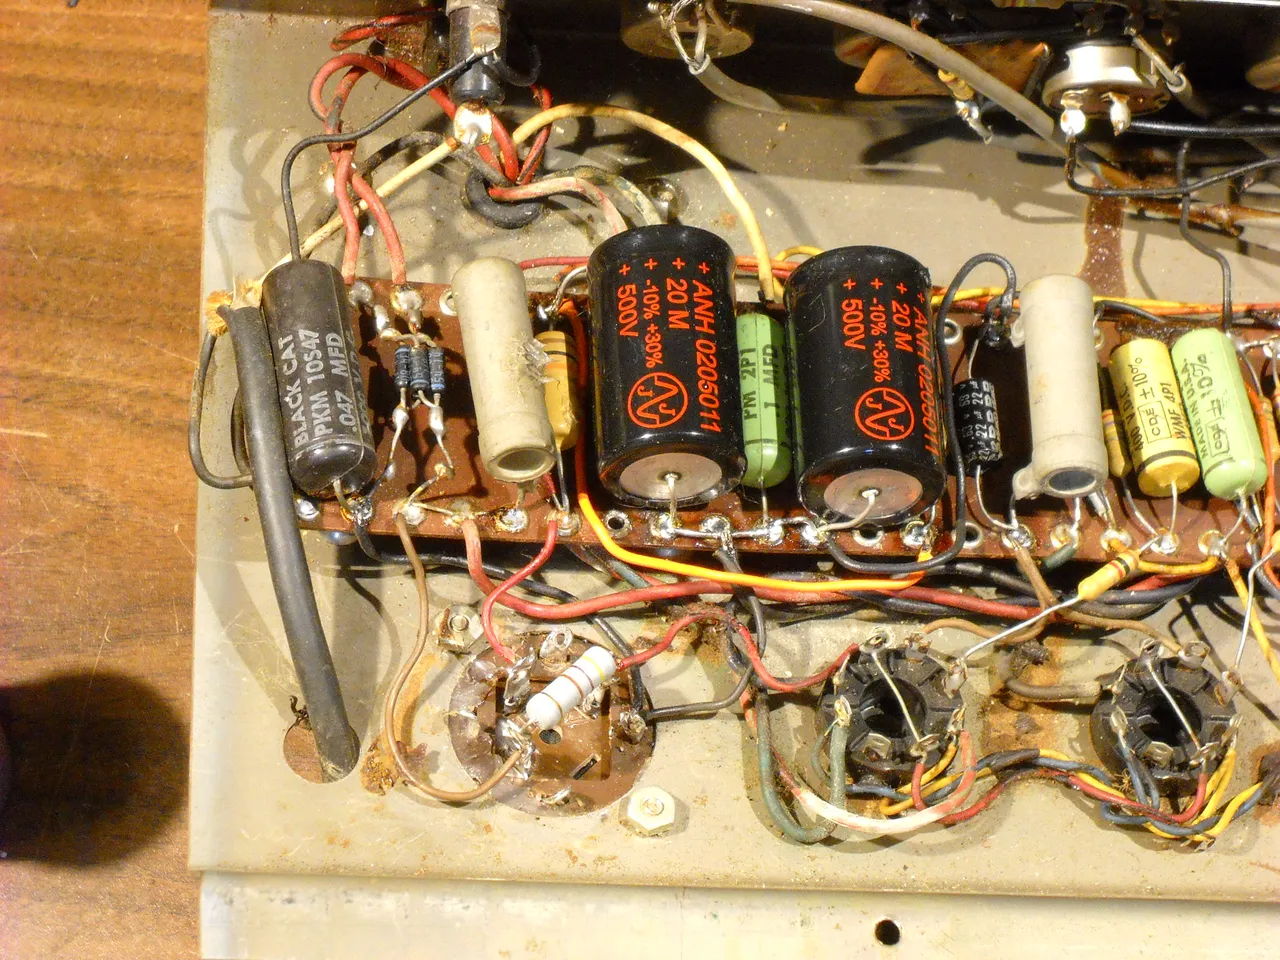
Here you get a better look at the 2 power supply capacitors that I changed on the circuit board. The old capacitors were bad and needed to be replaces, quite typical of these old amps if they haven't been serviced in the past. I did a bit of rewiring on the circuit board to get the capacitors to fit. The 2 large black cylinders with the red printing on them are the replacement caps.
I also had to replace the primary capacitor "can". This is a multi section capacitor that has an aluminum outer housing and mounts on the chassis instead of on the circuit board. I was able to get a direct replacement for this capacitor can, which I was happy to find at the on line store where I get my parts. With amps this old, you don't know if you're going to be able to get direct replacement parts. Here's the old capacitor can on the workbench next to the chassis with the new cap can mounted in place. The tan colored thing on the old capacitor can is a burnt resistor that also had to be replaced for the new cap can.

I've got the amp back together now, so I'm going to have to test it to see if it works now. It still has the old 2 wire power cord on it, which I'll probably replace with a 3 wire cord for safety. If this amp was in pristine condition, I'd be more hesitant about replacing the power cord because of collector value considerations, but I don't have to worry about that so much with this amp. If this amp is going to continue to be used, it's better to have the 3 wire grounded plug for it.
I plugged it in with my isolation transformer, turned it on, and tested the voltages with the tubes in it, and it seems to have the proper voltages, so I'm pretty hopeful that it will work when I test it with the guitar. However, you can never really know until you test it. I know the vibrato won't work on the amp because the Ampeg specific part that drives the tremolo circuit is bad. I may be able to find a replacement for that part, if not, it just won't work.
Once I've tested it to make sure that it works, I'll probably do a short video to demonstrate the amp. The mic on my camera isn't all that great, but at least it will give an idea of the sound of the amp. I'm looking forward to hearing that old 12 inch Jensen speaker putting out a bit of guitar noise.
Well, that's all I have for this post, I hope you found it interesting!
Thanks for stopping by my page to check out my post, eh!


