After printing my first miniature tanks with Formlabs grey resin, I think I've found my new favourite! The results aren't perfect, there are still some changes I need to make, but I'm quite happy with the results thus far.
In the interest of continuity, you may wish to read an earlier article that I wrote providing some tips for printing miniature tanks, which I wrote primarily for Wargaming 3D, before you proceed with reading this one.
What initially attracted me to Formlabs grey resin was the combination of physical properties similar to white resin, while also having the ability to print in 25 micron layers. Because of how stereolithography printing works, thicker layers result in a larger effective layer spot size, so small features end up being larger in all directions. This is visible on very thin wire-like features, such as the guns on model ships.

Look very closely at the smaller gun turrets on the Borodino-class battleship (the one on the right), and you'll see that the gun barrels run together on the white model, but are clearly separate on the grey model. You may also be able to see that the gun barrels on the Pallada-class cruiser are slightly thicker on the white model, but without a frame of reference, it's difficult to tell from a photograph.
(I uploaded this one first - it's always the first one that gets cut off for some reason)

I also experimented with some different backgrounds besides my improvised photo booth (a shoebox turned on its side):

It's quite well-camouflaged sitting on top of an old blue suitcase. The shoebox still provides the best results, and you can see those photos on the product pages.
Pallada: https://www.wargaming3d.com/product/pallada-class-cruiser/
Borodino: https://www.wargaming3d.com/product/borodino-class-battleship/
Right, these are done, into storage they go!

Next up are the tanks. I didn't use the shoebox for these as I usually do, because I wanted to experiment with different backgrounds. In any event, I won't get serious about miniature photography until I have painted samples that I can share on my website.

The SU-100Y gave me some problems, namely that the fenders lost some chunks when I removed the supports, a problem which I can probably solve by making the touch points smaller. For my next test, I will use 0,4mm touch points, the smallest size I can use before getting a warning message.
You can see the chunks missing from the left fender, but at least the engine deck has all its details this time (they are subtle, and unless you can zoom in, you may not be able to make them out, but they are there - hopefully paint doesn't obliterate them). The only other problems were that the tracks were extra thick on the bottom, for some reason, and the front towing shackles broke - after I removed the supports, which was weird, but that's not the weirdest thing that I've seen. It's not even a close second, it's a distant third, after this.

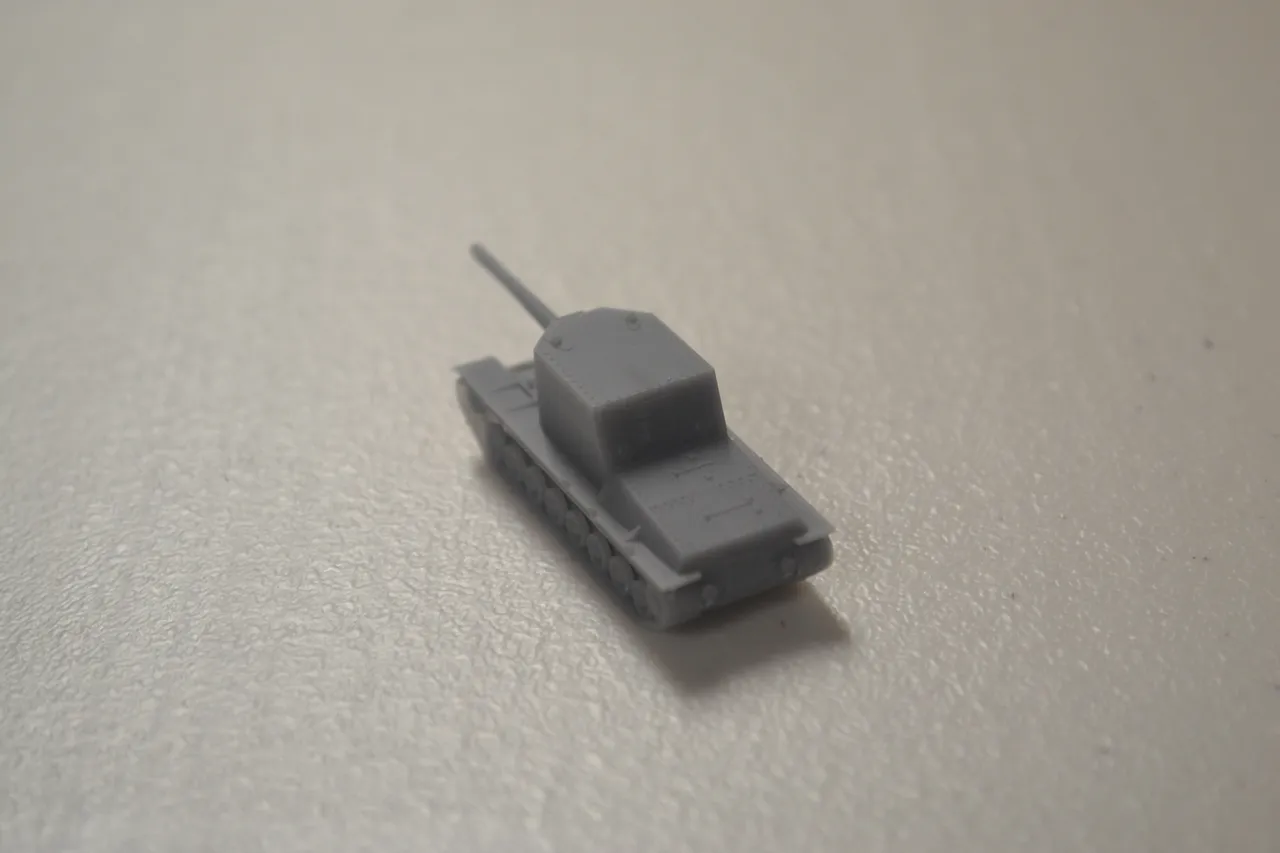
The VK-30.02 D (Panther prototype) was another valuable experiment, owing to the long, slender gun. I'd never be able to print this model in coloured resin, but in grey, the gun barrel is like a wet noodle before curing. On that note, Formlabs says that grey resin, like white resin, does not require curing, which is technically correct, but I prefer to do it anyway to make certain thin features reasonably stiff. 10 minutes at 40 degrees Centigrade is all that my models need. Any longer is unnecessary, and any hotter will cause warping. As it is, gun barrels still have a tendency to curl upward, but that's nothing a quick blast from a heat gun won't fix (just be sure to hold them straight as they cool, since this resin has shape memory).

I completed the experiment with the King Tiger's tracks that I mentioned in the article linked to above. As I expected, removing the staggered supports was much easier, as they simply popped off one by one as I pulled the raft away from the model. Therefore, I changed the support configuration in the King Tiger's print job file from this:

...to this:

From now on, I will save each individual tank as its own print job, this way I can import the support size and location every time I print a new batch, rather than generating supports for an entire tank batch and having to reconfigure it every single time. Certain tanks have unique considerations when it comes to the supports, particularly those whose hulls aren't flat on the bottom, so I'd like to save those experiments as I finish them, such as the IS-3:

...something that still needs work, but came out better than last time, or even worse, Object 279:

The barrel curl isn't as pronounced on this one as on the VK-30.02 D, but the real reason I didn't bother to fix it is simply because I forgot to add a support at the very end, where it really needs one. I need to print another one of these anyway, along with yet another T-10M, because there were some strange "oofs" on the bottom that you can't see in these pictures, but that still trigger my OCD.

That, however, will be a project for another day. I have other things which take priority at the moment. I received my bench-mounted model fixture, which I'll use for painting, as well as some decent primer and other supplies, but no paint yet. If my vacuum forming machine arrives before my model paint, I'll be playing with that instead.
Hopefully the next article that I make like this will be the last, as I am so close to figuring out all of the necessary procedures and parameters for producing superb wargaming miniatures with 3d printing. This way, I'll not only have all my own notes in one place, but also a convenient set of instructions for anyone who wants to break into this hobby for themselves, and would rather not go through the trouble of performing these experiments.