I am still having fun with my Bambu Lab A1 3D printer. It is on special offer at the moment if you want one. I am tempted to get the AMS 2 Pro filament system so I could do multiple colours. It can also dry the filament to prevent printing issues.
So far all my prints have turned out well. I was really impressed by this book/tablet stand. It all printed in one piece apart from the prongs that would hold a book open. Those just clipped in. This is about as big as I can print and it works really well.

A work in progress are these drum triggers. They clip onto drums and will send signals to my Yamaha EAD10 to play samples when I hit things. If you buy ready made ones they cost from £50-100, but all they really are is a holder for a piezoelectic sensor that costs pennies. You need a socket and then some foam that goes between the sensor and the drum head. I have the special foam on order, so will report on how it goes with them. I found these models on Thingiverse that has loads of items. I just had to load them into Bambu Studio to prepare for printing. I am learning how to use this software that allows for all sorts of tweaks. I may have to adjust the models slightly as the hold for a nut was a little too small.

I had another little project that I had wanted to sort out from the start. I got a little Samson Mixpad audio mixer from a charity shop ages ago. It works fine, but a couple of the knobs were missing, so I wanted to print those.
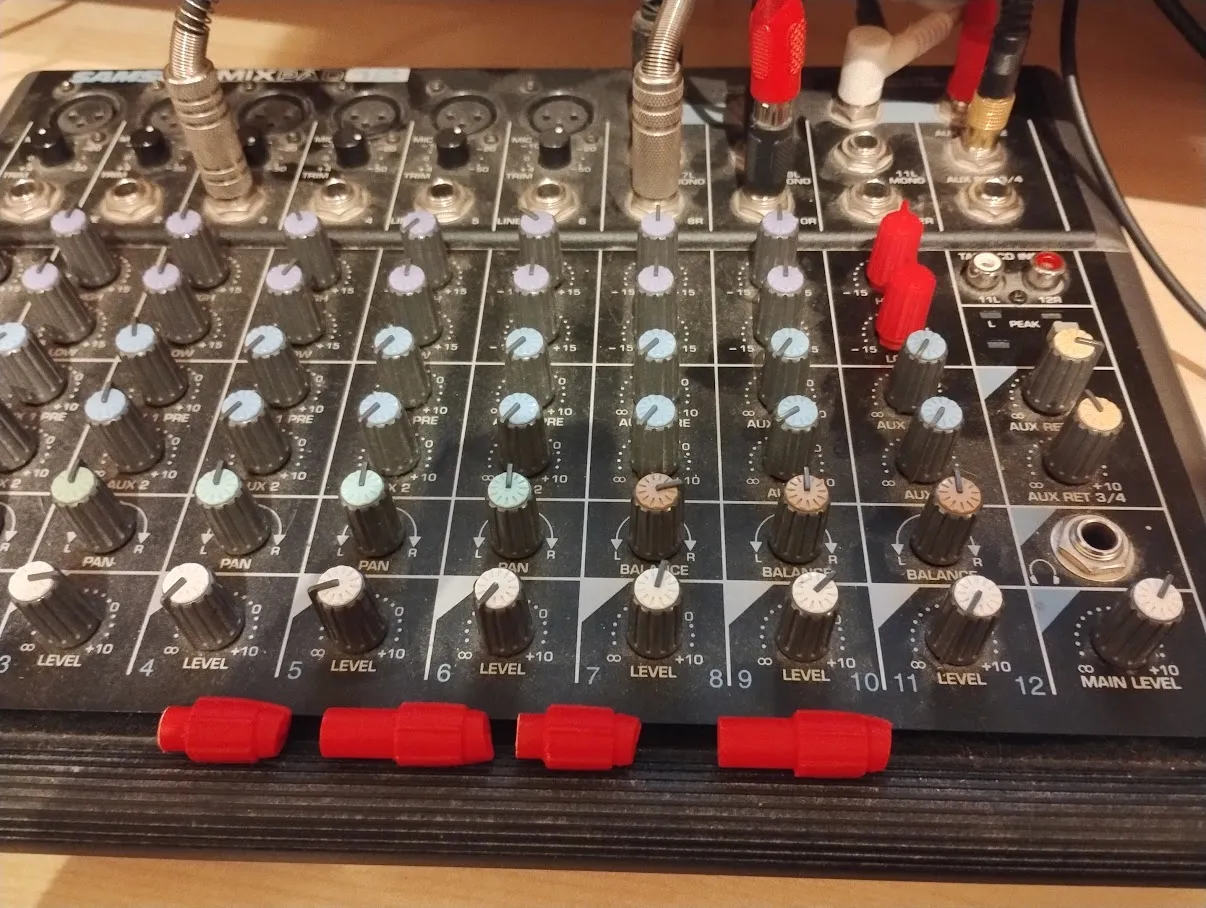
As you can see I have a full set now. The reason everything is red is just because that is the filament I have for now. Those knobs along the bottom were some attempts to get what I needed. I found a model on Makerworld for a knob for a different Samson mixer that was not quite right. That is the ones with the longer base. The orientation of the flat part for the potentiometer shaft was wrong, but I could fix that in Bambu Studio by reflecting it. I tried that, but it was also slightly too large on the outer diameter. I have now learnt how I can make changes. I snipped off part of the length and then reduced the diameter by making another object with a hole of the right size and subtracted the difference. This might be easier in a proper CAD application, but I have not figured that out yet. So I printed off another version and it fitted, but the orientation was wrong. What I had not realised is that not all the knobs are the same! The Level ones on the bottom row that I checked are different to the others.

At this point I returned to a knob I found on Thingiverse that I thought was wrong and realised it was what I wanted after all. I got there in the end. I did have to do a few prints, but each one cost pennies. I may upload things to Makerworld to that others can benefit from what I found out. It would be so much easier if companies could make their parts more standard, but it provides opportunities for the 3D printing world.
I do need to find time to learn more about the available tools. Someone suggested Tinkercad for basic CAD work as it is free to use and is on the web. There are various other options, but it takes time to explore these things.
Happy printing!
 |
The man behind: |  : Helping good Hivers level up : Helping good Hivers level up
#BritList: A monthly list of Hivers in the UK |
