
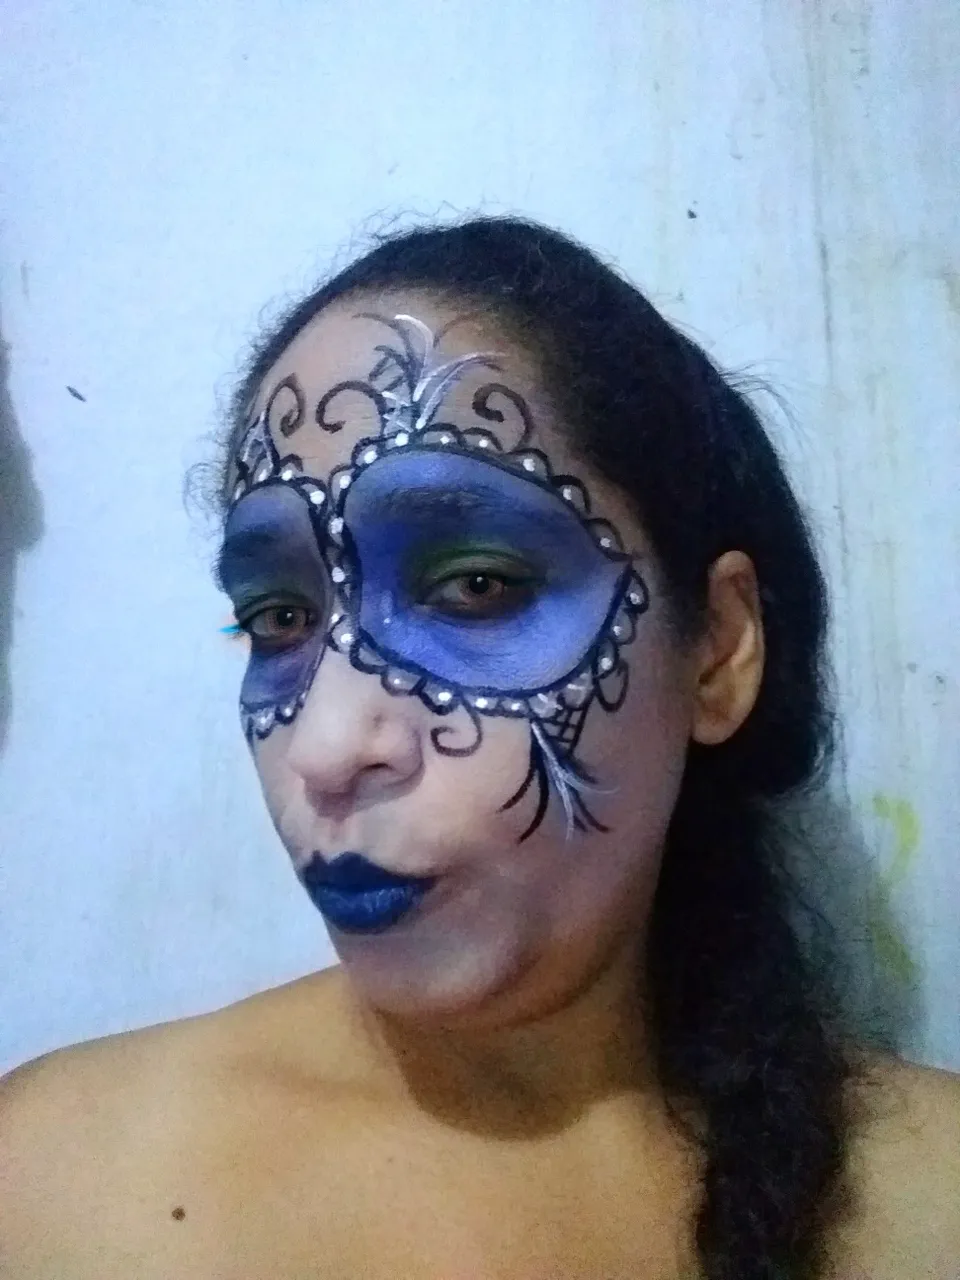
Greetings #hive friends, special greetings to the makeup community today I bring you a makeup inspired by a Venetian mask, I hope you like it.
MATERIALS
- Neutral soap.
- Liquid base.
- ear correcter.
- shadows.
- blue and black eyeliner.
- black and white paint.
- Rimmel.

Steps
-As I always tell you, the main thing to start making our makeup is to wash our face with neutral soap and then dry it very well.
- Then we apply the concealer for dark circles, followed by the liquid base, we apply it to the face with the help of a sponge.

- Then with the black pencil I make the divisions.
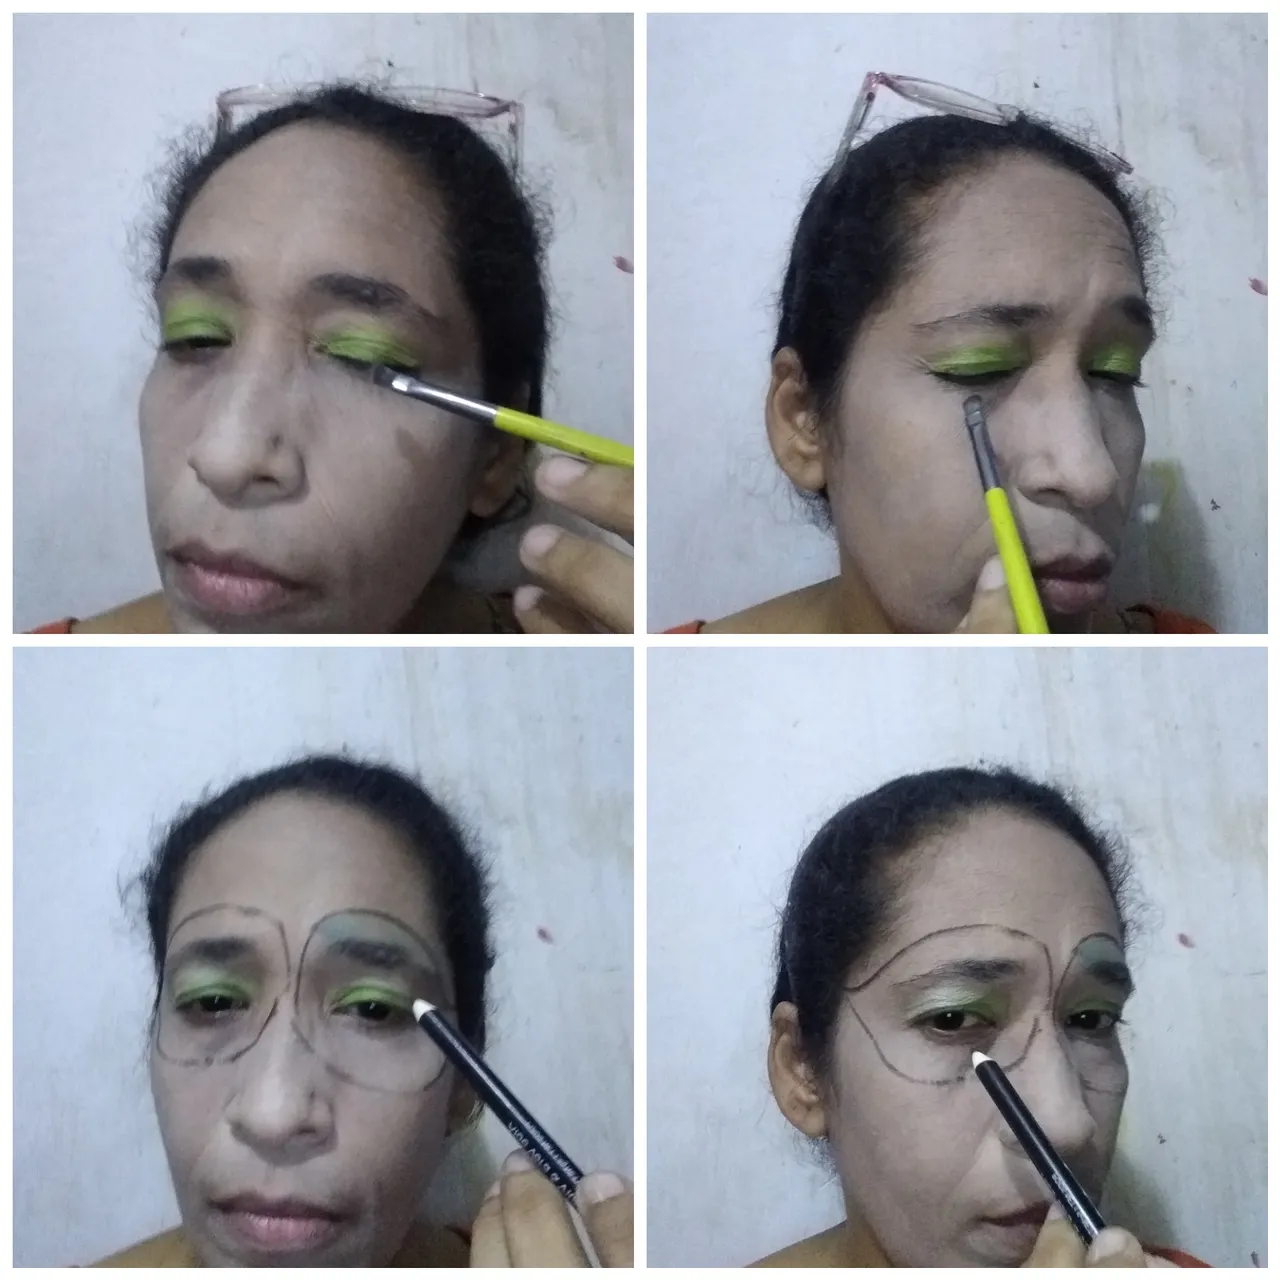
- With the help of a brush we apply the shadows, first on the green eyelids and then on the rest of the drawing but with the blue color.

- Then we delineate the drawing and give some technical touches or embellishing touches as I say, which is nothing more than placing all those little details that make the makeup stand out.

- To finish we apply the blue eyeliner on the lips, and the black one on the eyes and we culminate with the application of Rimmel, and voila we are done.

FINAL SCORE

how in all my posts I want to remind you that life is beautiful and colors and that it is better if we put those colors on our face.
All photos were taken and arranged with my readmi go phone.
Thanks for reading. See you in my next post.

Saludos amigos de #hive, saludos especiales a la comunidad de maquillaje el día de hoy les traigo un maquillaje inspirado en una máscara veneciana, espero que les guste.
MATERIALES
- Jabón neutro.
- Base liquida.
- corrector de ojeras.
- sombras.
- lápiz de ojos azul y negro.
- pintura negra y blanca.
- Rimmel.
Pasos
-Cómo siempre les digo lo principal para comenzar a elaborar nuestro maquillaje es lavarnos la cara con el jabón neutro y luego secarlo muy bien.
- luego nos aplicamos el corrector de ojeras, seguido de la base liquida, la aplicamos por el rostro con ayuda de una esponja.
- Después con el lápiz negro hago las divisiones.
- con ayuda de un pincel nos aplicamos las sombras, primero en los párpados de color verde y luego en el resto del dibujo pero con el color azul.
- Después nos delineamos el dibujo y damos unos toques técnicos o toques embellecedores como yo le digo, que no es otra cosa más que colocar todos esos pequeños detallitos que hacen que el maquillaje destaque.
- Para finalizar nos aplicamos el lápiz de ojos azul en los labios, y el negro en los ojos y culminamos con la aplicación de Rimmel, y listo hemos terminado.
RESULTADO FINAL
cómo en todos mis post quiero recordárles que la vida es bella y colores y que es mejor si esos colores los colocamos en nuestro rostro.
Todas las fotos fueron tomados y arregladas con mi teléfono readmi go.
Gracias por leer nos vemos en mi próximo post.