Wonderful Saturday...!
Today I present to you for my daily blog activity, a nice one-piece outfit. I have previously elaborated a few, however I had not published the tutorial. 😅😅
About the piece:
A current set of one piece for girls, ideal piece when you are walking and are at the height of coquetry mixed with sweetness. It is made of Muslin fabric and a beautiful and large flower at the waist. Now, let's get to work! 🙌🙌

Materials:
- Muslin fabric in red tone.
- White felt.
- Scissors, sewing thread, sewing machine.
Step by Step:
A.- The pieces that we need to cut are those observed in figure 1. Keep in mind that the ribbon is 6 CM high.

B.- For the assembly, we start working the upper area. Where we take the ribbon and make a selvedge with Zig-zag stitching. This gives the fabric incredible flight! Then, we face this strip against the top front piece. We will sew and make folds. See figures 2 and 3. After completing this step, we would be as in figure 4.

C.- We will take the ribbon again and making a fold, we will face the shore. See figure 5. Now we are on the right side of the piece and we will make a settlement seam. See figure 6. On the back of the jumpsuit, only basic work is done. See how the pieces would be, in figure 7.

D.- To the remaining ribbon, we will make a basic selvage on each side. See figure 8. And, we will sew this with the front and the back. See figure 9.

E.- First one strap and then the other. See figure 10 and 11. Make sure they both have the same distance. We booked.

F.- Let's build the lower part, which consists of a Short. Its assembly is basic. First, we will take the ribbon and with a fold we will make the selvage. Then we sew the crotch. See figures 12 and 13.

G.- Then, we will join the upper part of the Short. Both pieces will be ready as shown in figure 14.

H.- Then the pieces are joined. Remaining as seen in figure 15.

I.- Right in the joint area of both pieces, we will sew the rubber. This so that in a nice way to the one piece. See figure 16. For the decoration I have used a flower made of felt, the steps to make it are in my previous tutorial. They are very cute and versatile. See figure 17.

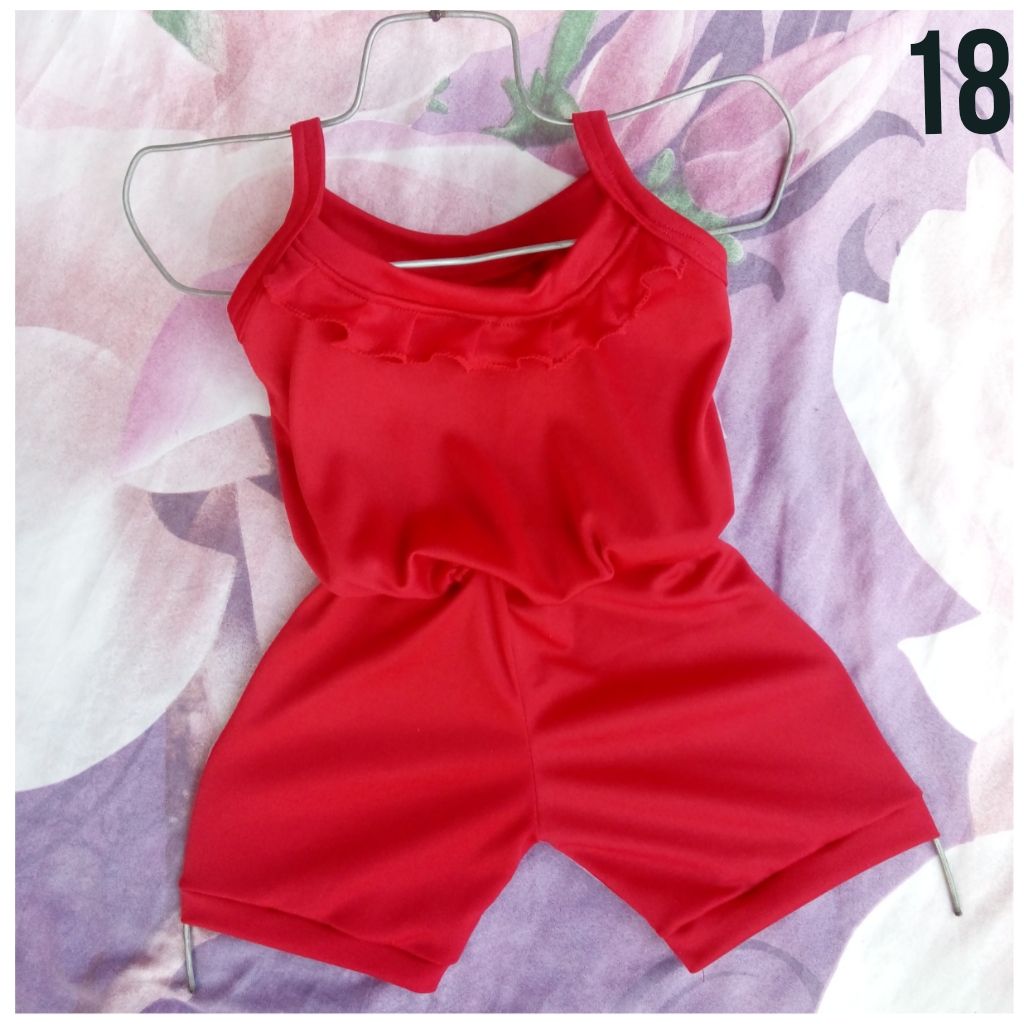
J.- Then, having the jumpsuit ready as in figure 18. We only have to sew the flower at the waist.
💖💖💖💖💖💖💖💖💖💖💖💖
Our piece is ready, take a look: ✨✨💖💖

Versión en Español:
Maravilloso sábado...!
Hoy les presento para mi actividad diaria del blog, un simpático conjunto enterizo. He elaborado anteriormente unos cuantos, sin embargo no había publicado el tutorial. 😅😅
Sobre la pieza:
Un actual conjunto de enterizo para niña, idónea pieza cuando estás caminan y se encuentran en el auge de la coquetería mezclada con dulzura. Se encuentra elaborado en tela de Muselina y una linda y gran flor en la cintura. Ahora, manos a la obra.! 🙌🙌
Materiales:
- Tela de Muselina en tono rojo.
- Fieltro blanco.
- Tijeras, hilo de coser, máquina de coser.
Paso a paso:
A.- Las piezas que necesitamos cortar son las observadas en la figura 1. Ten en cuenta que el listón mide 6 CM de alto.
B.- Para el armado, iniciamos trabajando el área superior. Donde tomamos el listón y hacemos un orillo con costura de Zig-zag. Esto le da un vuelo increíble a la tela.! Después, este listón lo enfrentamos a la pieza del frente superior. Coseremos y haremos pliegues. Ver figuras 2 y 3. Luego de terminar este paso, nos quedaría como en la figura 4.
C.- Tomaremos nuevamente el listón y haciendo un doblez, enfrentamos a la orilla. Ver figura 5. Nos situamos ahora en el derecho de la pieza y haremos una costura de asentamiento. Ver figura 6. En la parte trasera del enterizo, solo se trabaja de manera básica. Ver cómo quedarían las piezas, en la figura 7.
D.- Al restante listón, le haremos un orillo básico de cada costado. Ver figura 8. Y, este lo coseremos con la parte delantera y la trasera. Ver figura 9.
E.- Primero un tirante y luego el otro. Ver figura 10 y 11. Asegúrate de que ambos tengan la misma distancia. Reservamos.
F.- Armemos la parte inferior, que consta de un Short. Su armado es básico. Primero, tomaremos el listón y con un doblez le haremos el orillo. Luego cosemos la entrepierna. Ver figuras 12 y 13.
G.- Luego, uniremos la parte superior del Short. Ambas piezas listas nos quedarán como se observa en la figura 14.
H.- Luego se unen las piezas. Quedando como se observa en la figura 15.
I.- Justo en la zona de unión de ambas piezas, coseremos la goma. Esto para que de una linda forma al enterizo. Ver figura 16. Para el decorado he usado una flor hecha en fieltro, los pasos para hacerla están en mi tutorial anterior. Son muy lindas y versátiles. Ver figura 17.
J.- Luego, de tener el enterizo listo como en la figura 18. Sólo nos queda coser la flor en la cintura.
💖💖💖💖💖💖💖💖💖💖💖💖💖
Nuestra pieza está lista, da un vistazo: ✨✨💖💖
💖💖💖💖💖💖💖💖💖💖💖💖💖