
¡Hola, gente de internet! Espero que estén bien. A veces nos pasa, cuando queremos plantar que no es funcional hacer una siembra directa (en mi caso, mi perrito desentierra las semillas y se las come) entonces es necesario hacer un semillero para que nuestras semillas se conviertan en brotes. Hoy les enseñaré a como hacer este proceso.
Hello, internet people! I hope you're ok. Sometimes it happens to us, when we want to plant that it's not functional to do a direct sowing (in my case, my little dog digs up the seeds and eats them) then it's when it's necessary to make a seedbed so that our seeds become sprouts. Today I will show you how to do this process.

Lo primero que tenemos que saber es las condiciones en la que nuestra plata debe crecer: Cuantas veces necesita riego, si necesita exponerse al sol directo o no y ese tipo de cosas, lo segundo es asegurarnos de que nuestras semillas sean fértiles, para eso simplemente llenamos una taza con agua y ponemos nuestras semillas dentro, las que flotan son infértiles, así que utilizaremos las que estén en el fondo de la taza. Lo tercero es preparar la tierra del semillero, debe ser fértil, puedes comprar tierra abonada en un vivero o hacerla tú mismo mezclando tierra con composta.
The first thing we have to know is the conditions in which our silver should grow: How often it needs watering, if it needs to be exposed to direct sunlight or not and that kind of things, the second thing is to make sure that our seeds are fertile, for that we simply fill a cup with water and put our seeds inside, the ones that float are infertile, so we will use the ones that are at the bottom of the cup. The third thing is to prepare the soil for the seedbed, it must be fertile, you can buy fertilized soil in a nursery or make it yourself by mixing soil with compost.
En cuanto al recipiente, éstedebe ser de pocos centimetros de profundidad, en mi caso utilicé la mitad de un cartón de huevos, es biodegradable y además cumple con el primer requisito. Lo primero que tenemos que hacer es ponerle a cada hendidura dos o tres centímetros de tierra apróximadamente, luego colocar las semillas y posteriormente cubrirlas con la misma cantidad de tierra y finalmente, regar todo con algunas gotas de agua (hasta que se vea húmeda la tierra) pero no queremos hacer lodo, así que ten cuidado con la cantidad de agua.
As for the container, it must be a few centimeters deep, in my case I used half an egg carton, it's biodegradable and also meets the first requirement. The first thing we have to do is to put to each hole two or three centimeters of soil approximately, then to place the seeds and later to cover them with the same amount of soil and finally, to water everything with some drops of water (until the soil looks humid) but we don't want to make mud so be careful with the amount of water.

Yo elegí sembrar calabacín, los brotes van creciendo de 3 a cuatro días y no es solo hasta los 25 días que se puede transplantar. Les mostraré el proceso a continuación:
I chose to sow zucchini, the sprouts are growing from 3 to four days and it's not only until 25 days that you can transplant. I will show you the process below:


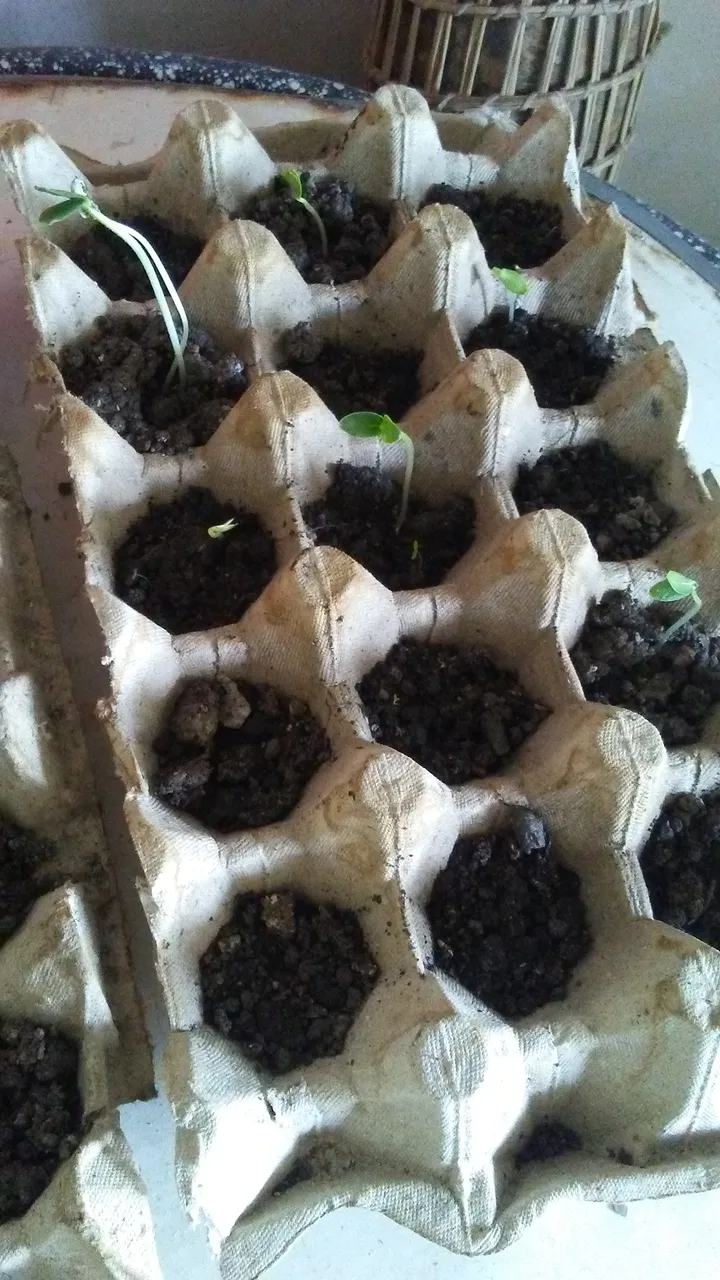

Otra de las cosas que hay que tener en cuenta es que como la cantidad de tierra es muy poca, es importante que las plantas no estén expuestas al sol directo, sino cerca de una ventana para que obtengan luz diurna y no dejar que la tierra se seque por completo.
Another thing to keep in mind is that as the amount of soil is very little, it's important that the plants aren't exposed to direct sunlight but near a window to get daylight and not let the soil dry out completely.
Aún mis brotes no están listos para ser transplantados, pero probablemente cuando lo estén haré un post al respecto y además quizá documente el crecimiento que tengan.
My sprouts are not ready to be transplanted yet, but probably when they are I will do a post about it and also document the growth they have.
Bueno amigos, esto ha sido todo por el post de hoy, espero que les haya resltado instructivo y que hayan aprendido algo nuevo hoy. Muchas gracias como siempre a todos por dedicarme su tiempo, les quiero mucho y ya nos encontraremos en otro post.
Well friends, this has been all for today's post, I hope you found it instructive and that you have learned something new today. Thank you very much as always to all of you for dedicating your time to me, I love you very much and we will meet again in another post.


Las imágenes de portada y despedida las realicé en Canva, el resto de las imágenes son de mi autoría, hechas con un teléfono celular LG K4 Lite. El logo lo realicé en la siguiente página:
The cover and farewell images were made in Canva, the rest of the images are my own, made with a LG K4 Lite cell phone. The logo was made in the following page: