This is part of a weekly (or fortnightly if I'm lacking content) series about owning an allotment. Click here for the Introduction Post. I am NOT a keen gardener, so this series will be telling tales of stuff I learn as the season’s progress. Hopefully you find it interesting, you might find some of it useful, and if you have any comments, questions or even better, some useful tips to share, then please add them below
This is an entry to the Amazing Nature Competition run by 

As part of managing our allotment we are still trying to clear the ground ready for use (it was out of use for 4 years before we acquired it... there are A LOT of weeds). In this post we mostly spent time digging the ground to get rid of Brambles which had spread all over the place.
It has been awhile since I checked in, in fact the last entry was over 2 months ago. That is purely as there hasn't been a great deal to report apart from mud, lots and lots of mud.
It is such a large plot of land (approx. 120 square metres) so we have decided to split it 50/50: half will be used to grow tasty vegetables, and the other half will be set aside for the benefit of the local wildlife

Here is a quick overview of our Allotment Plot, which has been split into 2 sections
In the middle you can see a black shape, this is a wildlife pond we have put in last week. On the left hand side is bare soil with some raspberry bushes on the edge... this is the going to be the Wildlife section and will feature a small wildflower meadow and some native plants and shrubs to encourage the wildlife. On the right hand side you can see where my partner is stood, this will be the Vegetable section where we will attempt to grow our own veg.
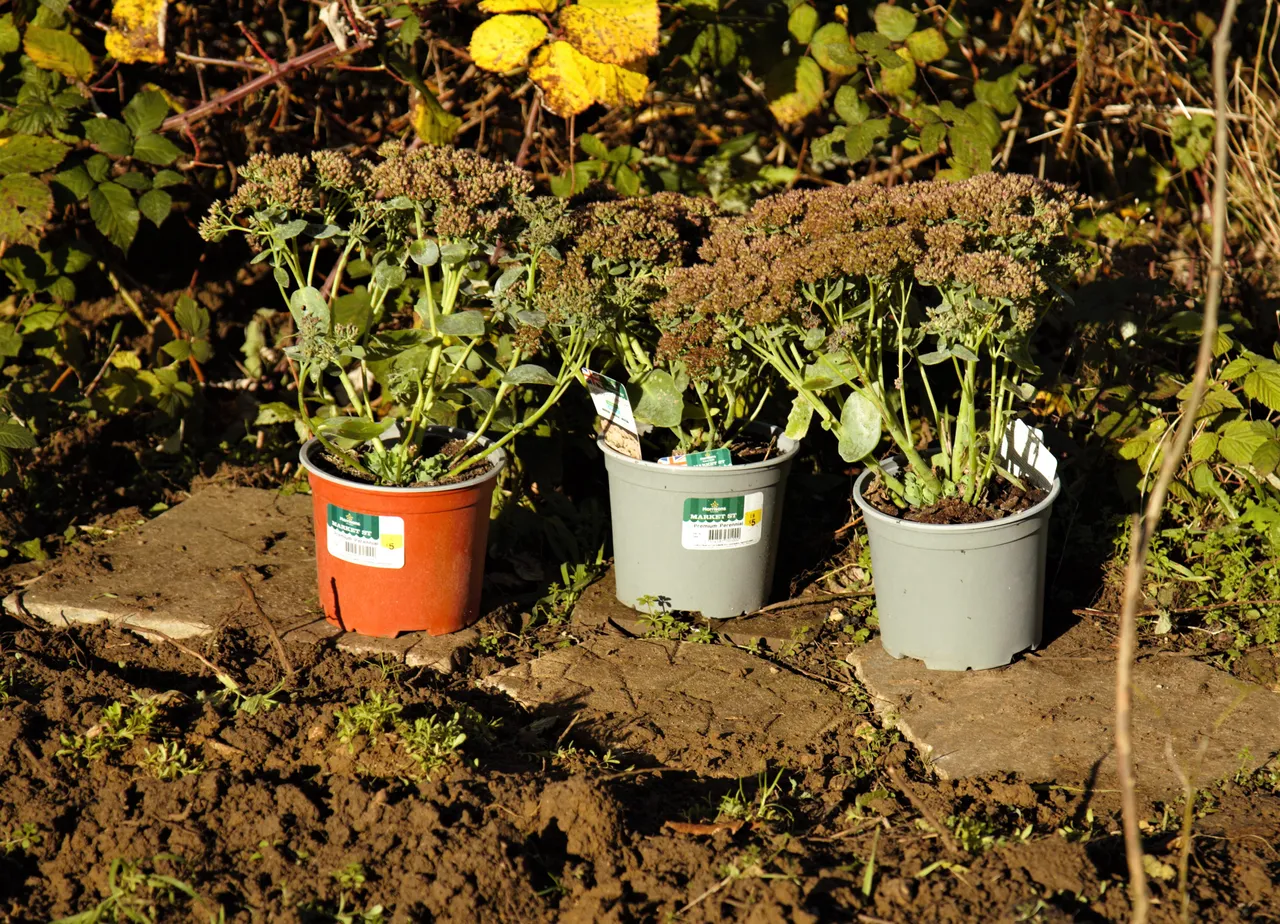
Here are some of the native plants my green-fingered partner has picked (I have no idea whats going on, I'm just here for the manual labour lol!) They are Sedum telephium, we have similar plants in the garden and they are covered by Bees, Flies, Wasps and Butterflies.

My partner 
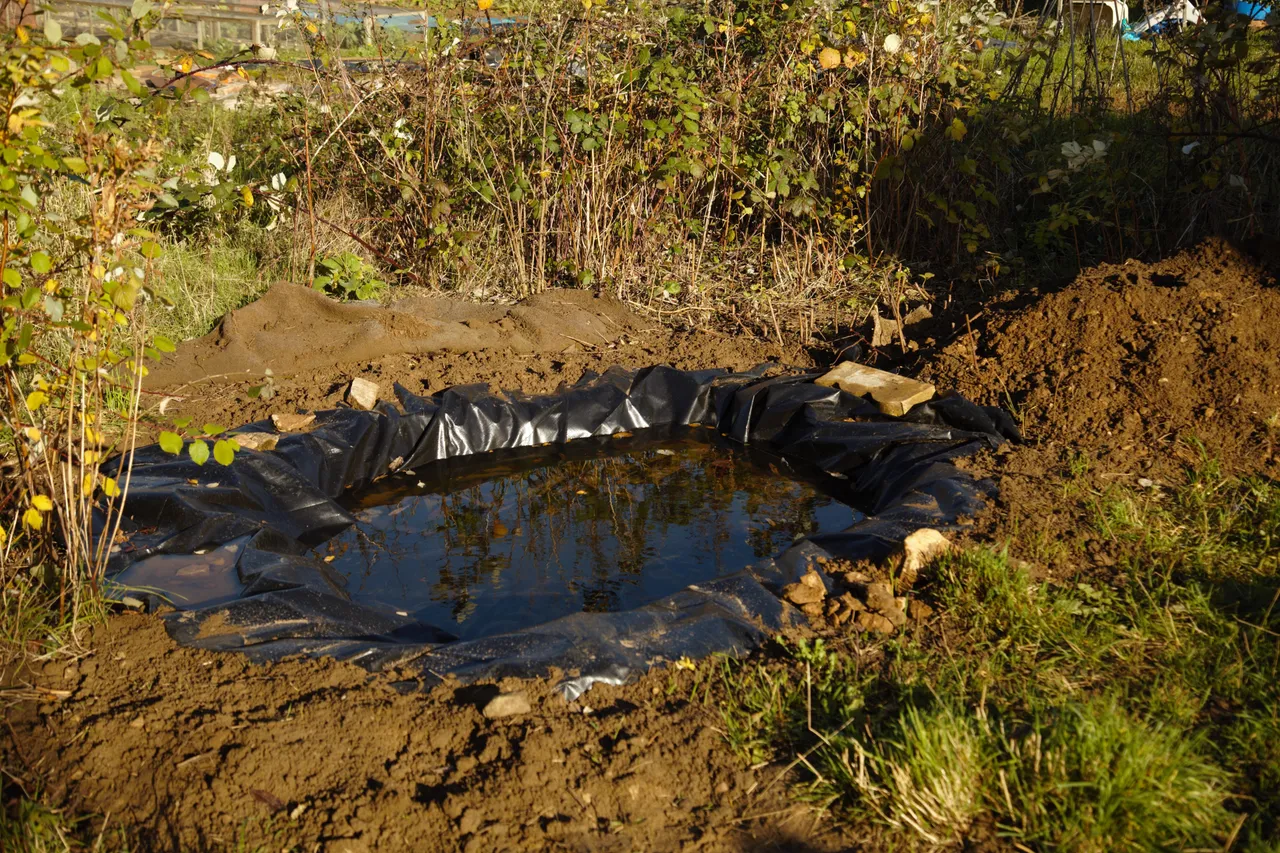
Here is a closer look at the pond. It isn't finished yet as it needs a proper edge around it, and of course some native water plants to put in it. The plants aren't availble to buy untill the Spring, but we have dug it now so its ready whenever the plants arrive.
You can't see it very well in this image but the left hand side is actually a slope so anything that falls in can climb out and not get stuck.

And now we move onto the Vegetable plot. There is a line of raspberry plants from the previous plot owner that we have decided to leave there and use to divide the Allotment in half. While my partner sets about planting, my task today is to dig this over so we can keep it clear over Winter. Hopefully this will mean that when we start again in the Spring we will have less work today.
In previous years we have let the plot run wild over Winter and it takes ages to reclaim control of it in the Spring.

Tools for the job, A Fork, a Rake, some Gloves (I don't like get my hands dirty haha) and a wheelbarrow to put any weeds, rocks or other rubbish in.

Lets get to work, here is a picture of me making an easy job look very difficult...

Not a complicated job... dig a trench, turn over the soil


and rake it back into place, sifting out any weeds and other crap as I go

Thats part of it done. Its back-breaking work, but it's good exercise at any rate, even if I know I won't be able to move tomorrow!
In this image I still need to dig over the square of grass on the left hand side, and then finish the patch on the right hand side next to the path. I will have to come back and do this another day, as I decided to help my partner finish the Bog Garden.

If you aren't aware, a Bog Garden is simply a patch of really wet soil set aside for the various plants who love waterlogged conditions. To build one you first need to dig a big hole (thus my expertise was required)
Once the whole is big enough, we put in a pond liner, and then poked some holes in it with a fork to allow some water to drain. We don't want it to fill up with water completely otherwise we will just end up with a muddy slurry of a pond. Using a pond liner with holes in helps to keep the soil wetter than the surrounding area

The pipe will be used to keep the water levels topped up in the Summer, and will be conected to the Water Butt somehow (don't ask me how, Dawn has the masterplan, I just do what I'm told). We then put stones to help the water drain so the Bog Garden doesn't become overly saturated.

And then the final task was to fill it back in again. You can see the edge of the pond linner showing where the bog garden will be. Again this is all about preparing the area and conditions ready for planting next Spring

You can see the wildlife section starting to take shape now, the patch of soil on the left will have native plants put in it, and the grassy patch next to the bog garden will have wildflower seeds.
The ultimate aim of all this not just to grow a bit of veg, but to create a place where we can sit and relax in the Summer months and watch the butterflies fluttering about, and listen to the birds tweeting away.
Tasks for next time
We have a few more plants to put in, mostly Spring bulbs (crocuses and tulips) which need planting before Winter kicks in. I also need to finish digging over the Vegetable section.
Thank you for reading, I hope you found it interesting.
If you have any thoughts or opinions on this article then I'd love to see your comments.
And if you really like the content then maybe you would like to upvote or re-hive it.

All Photos taken by 
Check out my website for more of my work.