
Gracias de antemano por estar aquí disfrutando de un tutorial más conmigo de costura,espero estén pasando una bonita tarde a pocos días de finalizar este bonito año lleno de desafíos y pruebas me comprometo una vez más a mostrarles los últimos trabajos de estos días que he hecho de fin de año ,he trabajo duro para que mis bellas clientas tanto grandes como pequeñas luzcan hermosas con sus prendas,y aunque no ha sido fácil cada reto que tona para mí y que hago con éxito es una meta cumplida de aprendizaje en este gran mundo de la costura.
Thank you in advance for being here and enjoying another sewing tutorial with me. I hope you're having a lovely afternoon. With just a few days left in this wonderful year full of challenges and trials, I'm committed once again to showing you the latest projects I've made for the end of the year. I've worked hard so that my beautiful clients, both young and old, look beautiful in their garments, and although it hasn't been easy, every challenge I face and successfully overcome is a learning milestone in this great world of sewing.


Hacer palazzos es algo que me ha costado pero gracias aa la práctica de vez en cuando he mejorado un poco,si te gustaría ver el paso a paso de este bello palazzo sencillo para niñas te invito que te quedes a apreciar este tutorial y los resultados finales 😍👖.
Making palazzo pants has been challenging for me, but thanks to occasional practice, I've improved a bit. If you'd like to see the step-by-step process for this beautiful and simple palazzo pants for girls, I invite you to stay and appreciate this tutorial and the final results 😍👖.
Materiales: | Materials:
- Tela de 1.40 cm
- Máquina
- Hilo de coser
- Medida como referencia para cortar la tela o patrones
- Elastico de 3 cm de ancho x 40 cm de largo
- 1.40 cm wide fabric
- Sewing machine
- Sewing thread
- Reference measurement for cutting fabric or patterns
- 3 cm wide x 40 cm long elastic
Pasos a seguir: | Steps to follow:


Paso 01
Step 01
We start by cutting the palazzo pieces, a double back piece and double front pieces with a 1 cm drop, we cut the width of our waistband and a piece to sew the loops and also the ribbon for the bow.


Paso 02
Step 02
We start sewing our palazzo by joining each piece in place, joining the side pieces and then the crotch. We will leave the palazzo assembled to assemble our waistband.


Paso 03
Step 03
We sew the loops and cut them to 6 cm long each or less, then we are going to sew or join the waistband on both sides by folding the waistband, and we are going to sew the waistband with a straight stitch from top to bottom the fold leaving 2 cm because at the top we should have gathered, we leave an opening to insert the elastic.


Paso 04
Step 04
Finally, we'll insert the elastic into the waistband and adjust it well. We'll seal the opening and place the waistband on our pants and sew around the perimeter with an overlock and straight stitch. Don't forget to sew the hem of our pants, making a 2 cm wide hem (you can make it less as you like). And that's it!
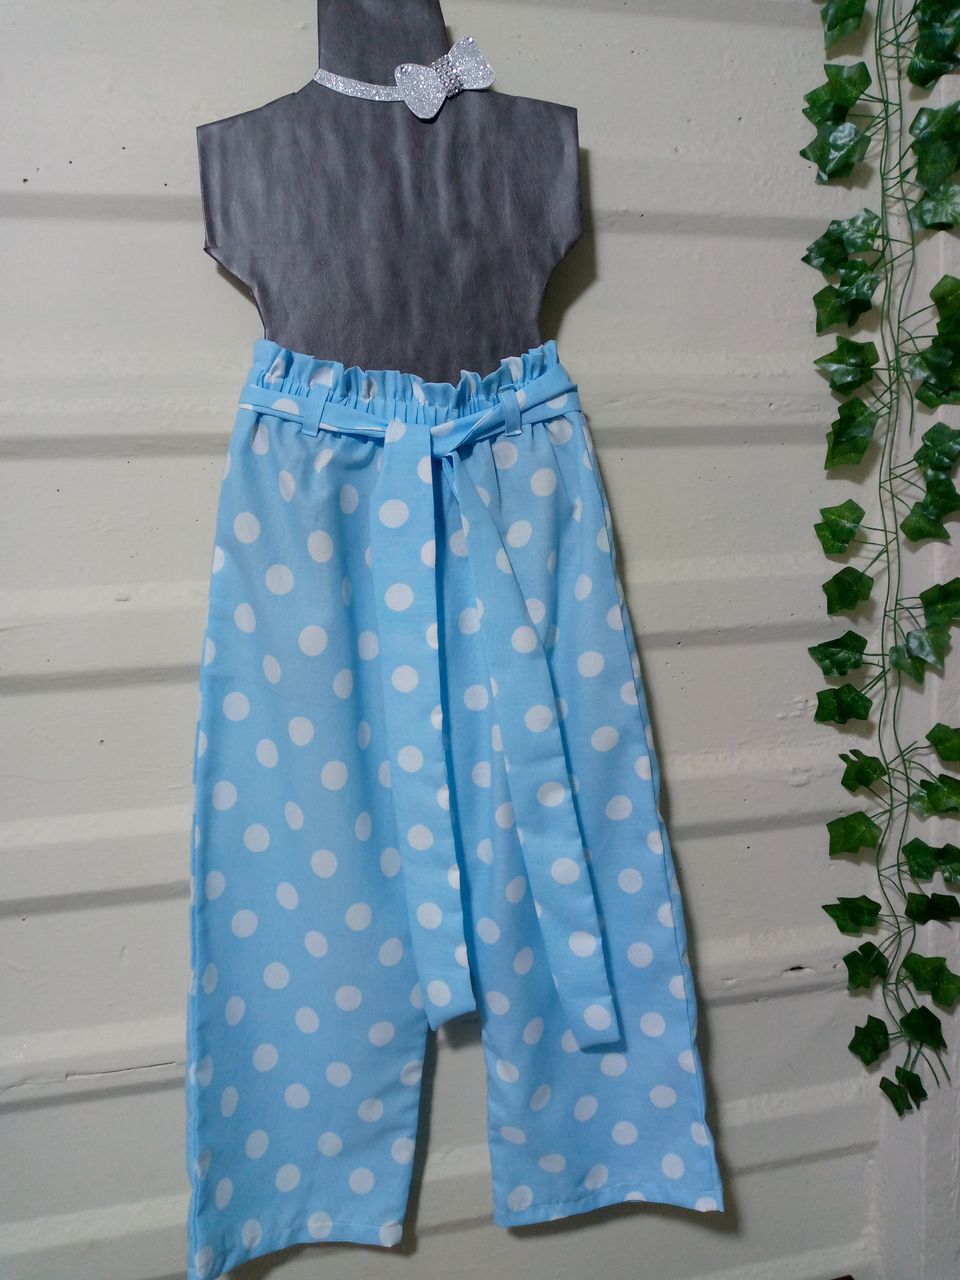
Resultado: | Result:
Así nos ha quedado este lindo palazzo a la niña para quién se lo iba a hacer y le he cosido una cinta para colocarlo en la pretina entre las trabillitas,espero les haya gustado como quedó este lindo palazzo nos vemos en otro tutorial queridos y apreciados amantes de las agujas ♥️🥰.
This is how this cute palazzo pants turned out for the little girl I was making them for, and I sewed a ribbon to attach to the waistband between the belt loops. I hope you liked how this cute palazzo pants turned out. See you in another tutorial, dear and appreciated needle lovers ♥️🥰.


¡Hola!...Soy Annie
Una chica que le apasiona el diseño,la costura las manualidades y crear cualquier cosa de mucho uso con mis manos,tengo como hobbie la música ,el maquillarme,la pintura y el dibujo,expresar mis ideas y sentimientos en un dibujo es algo que me gusta hacer,amo la naturaleza,un atardecer ,la playa y disfrutar con mis familiares de los buenos momentos de la vida.❤️
Creando las cosas con amor🌷♥️ | Creating things with love🌷♥️
Images:my own work | Edited by:Canva® and PicsArt © | Translator:Google Translate |Device:TecnoSpark 8C .
