Bienvenidos a mi tutorial de costura ✂️🧵./Welcome to my sewing tutorial ✂️🧵.
Buenos dias mis amores amantes de las agujas,sean bienvenidos y espero estén pasando un jueves increíble ,en esta mañana vamos a estar realizando para ustedes una falda tipo corte "A" pegada muy bonita y elegante para reuniones eventos y más, estaré usando tela de gabardina en estampado de cuadros que me gustó muchísimo cuando la compré.
Good morning my needle lovers, welcome and I hope you are having an amazing Thursday. This morning we will be making for you a very pretty and elegant A-line skirt, perfect for meetings, events and more. I will be using gabardine fabric in a plaid print that I loved when I bought it.


Sientanse cómodos y espero puedan aprender a hacer esta falda con mi tutorial sencillo, acá les dejo los materiales y el proceso de la falda ,que lo disfruten.
Make yourselves comfortable and I hope you can learn how to make this skirt with my simple tutorial. Here are the materials and the process for making the skirt. Enjoy!

Materiales: | Materials:
- Tijeras
- 1 metro de tela gabardina
- Cierre de 20 cm de largo
- Perlas medianas
- Hilo y aguja
- Máquina de coser
- Patrones o medida para cortar la tela
- Alfileres
- Tiza de costura
- Metro
- 1 botón
- Scissors
- 1 meter of gabardine fabric
- 20 cm zipper
- Medium-sized pearls
- Needle and thread
- Sewing machine
- Patterns or measurements for cutting the fabric
- Pins
- Tailor's chalk
- Measuring tape
- 1 button
Pasos a seguir: | Steps to follow:


Paso 01
Step 01
To begin, I used my existing skirt patterns as a guide to cut my fabric. I laid the fabric flat on a surface, spread it out, and first cut the double front piece with a 1 cm drop at the top, leaving centimeters for the dart. I cut two back pieces, also leaving a 3 cm space for the zipper. I cut the waistband to the same width as my waist, leaving 3 cm extra so that part of the fabric would stick out and the button could be placed at the end.


Paso 02
Step 02
Before sealing the side of the skirt, we will mark 10 cm of dart on the front. We will place two darts on each side, measure with the tape measure, make a vertical line and sew our dart 3 cm wide, then sew the edges with overlock or zigzag stitch of our skirt, once sewn, sew the pieces on each side leaving 1 cm of seam allowance.


Paso 03
Step 03
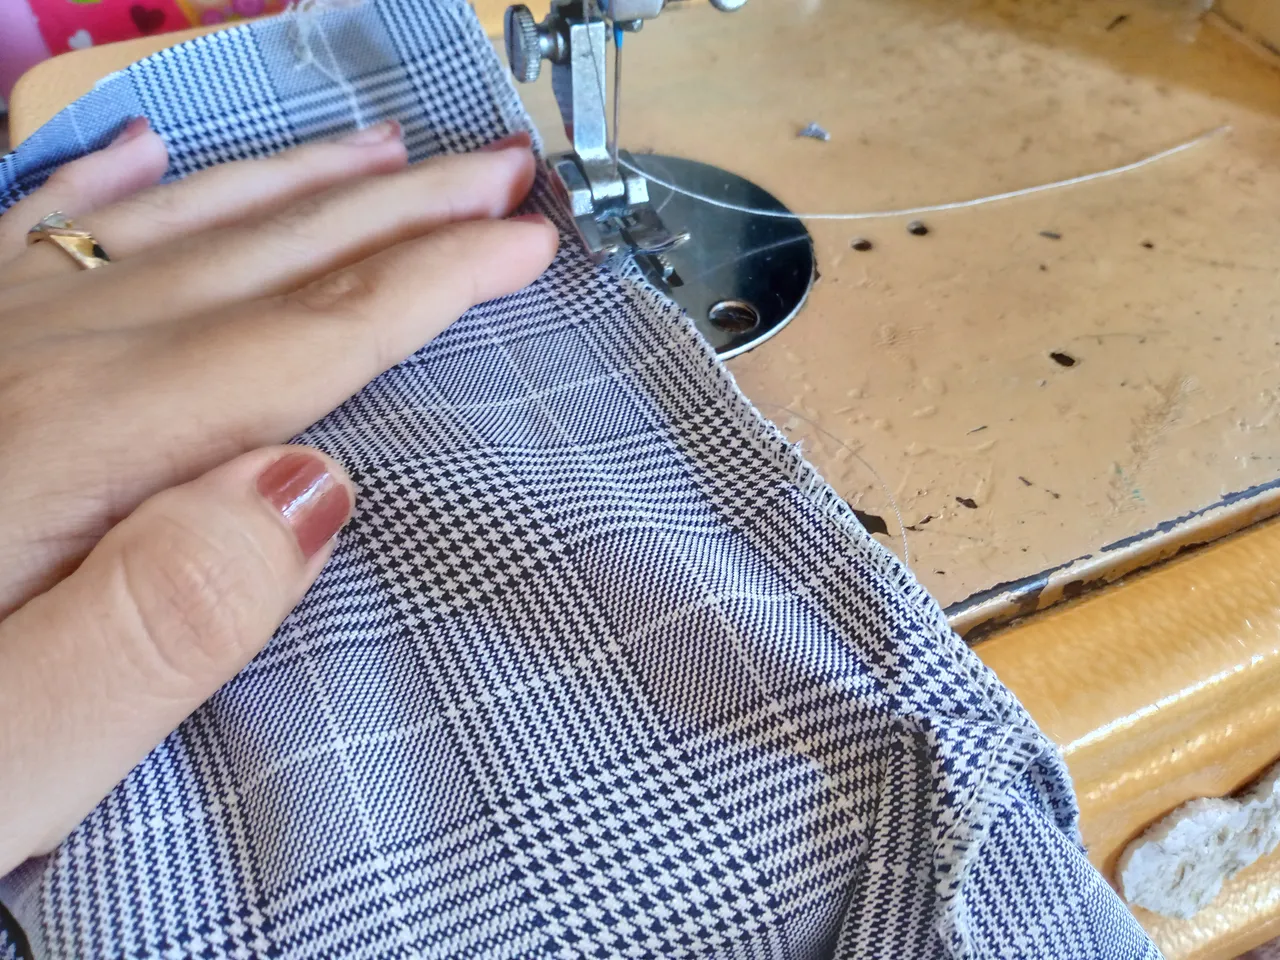
It's time to sew our zipper and we're going to mark 20 cm or less at the top and 15 cm upwards at the bottom for the skirt opening. We're going to sew from the point where I marked to where the zipper will reach, up to the height of the opening. We sew with a straight stitch, leaving the zipper and opening open. We sew the zipper on the left side, then on the right side, going over the top while leaving the facing.


Paso 04
Step 04
I proceed to sew the 2 cm wide opening on the fold, then we sew the waistband at the ends and I place it from the inside out on the waist part above, that is, the upper part. We make a small hem to the waistband and we will sew a straight stitch over it. I finish by making a buttonhole on the right side and on the left side I place the button. I have decorated the bottom of the skirt with scattered pearls to give it a more elegant touch. With this final detail I have finished making it.
Resultado: | Result:
Termino dándole un acabado final a la falda con la plancha de ropa para evitar arrugas en la tela,espero les haya gustado el proceso a mi me gustó en definitiva como se me ve ,es una falda bonita elegante y lo más importante sencilla de hacer ,viste mucho y la puedes usar para ocasiones formales e informales, cuéntame que tal te ha parecido,me despido de ustedes por hoy y nos vemos en otro blog de costura ,saludos ✨❤️🧵y bendiciones 🙏🏻.
I finished by ironing the skirt to remove any wrinkles. I hope you enjoyed the process; I definitely loved how it turned out. It's a beautiful, elegant skirt, and most importantly, easy to make. It looks great and you can wear it for both formal and informal occasions. Let me know what you think! I'll say goodbye for today, and I'll see you in another sewing blog post. Hugs and blessings!


¡Hola!...Soy Annie
Una chica que le apasiona el diseño,la costura las manualidades y crear cualquier cosa de mucho uso con mis manos,tengo como hobbie la música ,el maquillarme,la pintura y el dibujo,expresar mis ideas y sentimientos en un dibujo es algo que me gusta hacer,amo la naturaleza,un atardecer ,la playa y disfrutar con mis familiares de los buenos momentos de la vida.❤️
Creando las cosas con amor🌷♥️ | Creating things with love🌷♥️
Images:my own work | Edited by:Canva® and PicsArt © | Translator:Google Translate |Device:TecnoSpark 8C .
