

Un placer saludarles gracias por visitar mi blog de costura ✨🧵./It's a pleasure to greet you, thank you for visiting my sewing blog ✨🧵.
Feliz noches amigos de 
Good evening friends of
He hecho uso de mi libreta para anotar las medidas correspondientes de esta falda y así evitarme errores innecesarios y ganar mas tiempo a la hora de cortar las piezas.Si deseas ver cómo se hace te dejo los Materiales acá.
I used my notebook to write down the measurements for this skirt to avoid unnecessary mistakes and save time when cutting the pieces. If you'd like to see how it's done, I've included the Materials here.

Materiales: | Materials:
- Elastico de 4 cm de largo x 50 de ancho
- Máquinas e coser
- Tijera
- Hilo y alfileres
- 4 cm long x 50 cm wide elastic
- Sewing machine
- Scissors
- Thread and pins
Pasos a seguir: | Steps to follow:


Paso 01
Step 01
As I mentioned at the beginning, I marked the measurements of my skirt based on my client's measurements, of course, because they are her measurements. I cut two pieces of the skirt, and I will lower the seam allowance of one of the pieces by 1 cm in the front. I also cut the waistband.


Paso 02
Step 02
The second step we will take is to seal the skirt on one side, then the other. We will simply sew each piece together, then join them in the middle, leaving a 15 cm long opening and sewing it underneath our opening, making small hems on the sides.


Paso 03
Step 03
We're going to sew the hem of our skirt now, and then we're going to place the waistband that I've sewn and sealed on both sides and pin it to each side of our skirt. We'll sew it around the perimeter, leaving a small opening where we're going to insert our elastic.


Paso 04
Step 04
As a final step, I have inserted our elastic and we will sew it together. Once sealed, we will finish sewing the opening with a straight stitch and an overlock stitch all around the waistband. That's how we finished it.
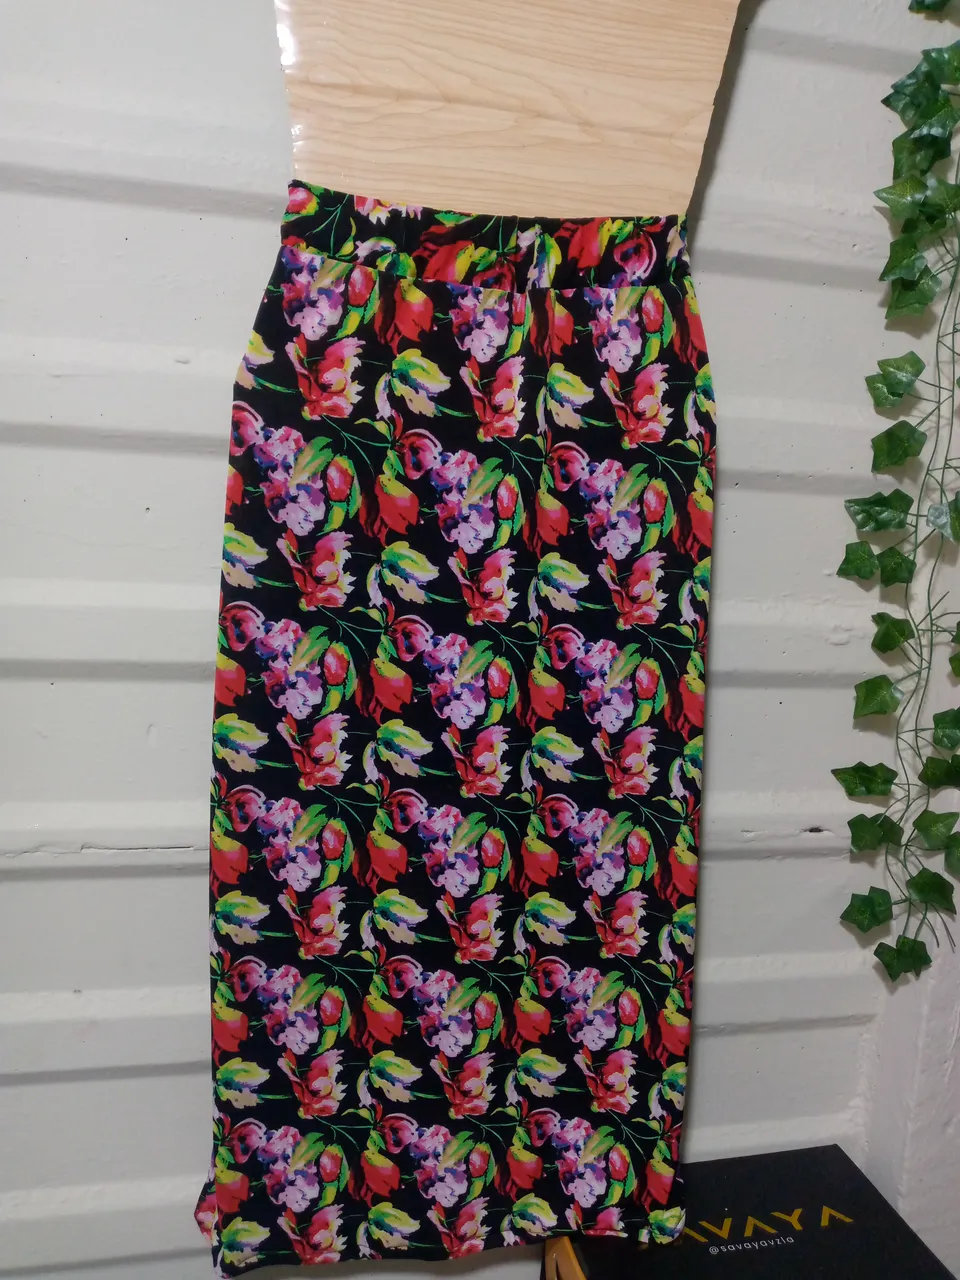
Resultado: | Result:
Miren como nos ha quedado ya terminada está bonita falda con estampado señorial muy facil y sencilla de hacer para principiantes,espero te haya gustado este modelo y nos vemos en otra felíz y alegre confección ,saludos feliz noche amigos costuriles disfruten el día de mañana.🥰
Look how this pretty skirt with a stately print turned out! It's very easy and simple to make, even for beginners. I hope you liked this pattern, and I'll see you in another happy and joyful sewing project. Goodnight, fellow sewers! Enjoy tomorrow! 🥰


¡Hola!...Soy Annie
Una chica que le apasiona el diseño,la costura las manualidades y crear cualquier cosa de mucho uso con mis manos,tengo como hobbie la música ,el maquillarme,la pintura y el dibujo,expresar mis ideas y sentimientos en un dibujo es algo que me gusta hacer,amo la naturaleza,un atardecer ,la playa y disfrutar con mis familiares de los buenos momentos de la vida.❤️
Creando las cosas con amor🌷♥️ | Creating things with love🌷♥️
Images:my own work | Edited by:Canva® and PicsArt © | Translator:Google Translate |Device:TecnoSpark 8C .
