
Welcome once again to my blog, where creating is my life, cutting and sewing, showing once again a new way to sew your garments with a personal touch.
Hello, good evening everyone. Today I want to share with you a different way to make a crop top. It's a custom design that includes a cherry print, a fruit that's been very trendy lately. I imagined a crop top made with olive-green microdurano fabric, with an open back and a string to tie a bow in the back. This style is a little daring, but very pretty. I invite you to join me in this project, and please let me know in the comments if you like it or if you have any recommendations.

(Materiales:)||(Materials:)
- Tela microdurasno verde oliva y fucsia
- Tijeras
- Alfileres
- Patrón de top crop
- Regla y lápiz
- Hilos de color verde y fucsia
- Pelon
- Olive green and fuchsia microdurano fabric
- Scissors
- Pins
- Crop top pattern
- Ruler and pencil
- Green and fuchsia threads
- Hairpin
(Procedimiento:)||(Procedure:)


Paso nro 1
Paso nro 1
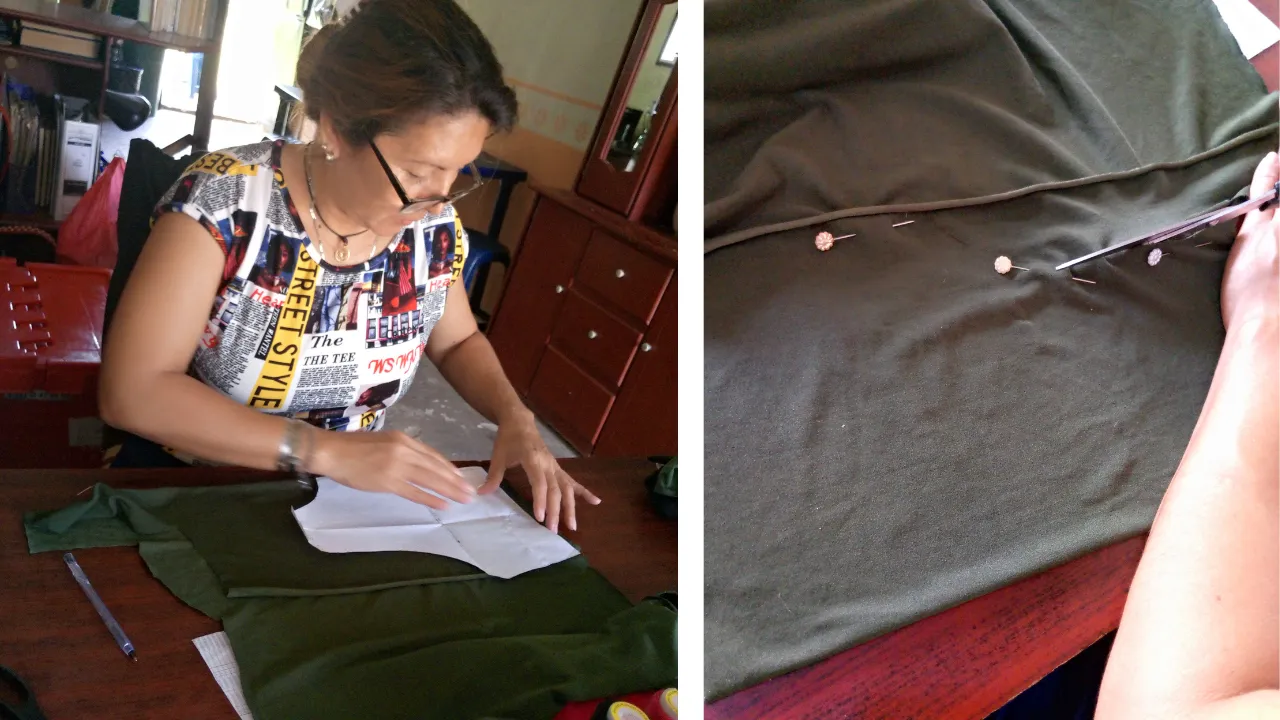
In the first step, I marked the pattern for the backless top on the green fabric. I designed this pattern myself, using a regular shirt as a reference. I marked where I wanted the backless area to be and saved the pattern. I also marked the green bias bindings for the shoulders and back, which I'll also use to make the bow string. I cut a bias binding from fuchsia fabric for the neckline. Finally, I cut the front and back of the top.


Paso nro 2
Paso nro 2
In the second step, I sketched a cherry and then cut it into sections: one for the cherry and another for the stem and leaf. Once I finished the sketch, I marked it on the fabric. Next, I sewed the cherry section first, securing it to one side of the front of the top I chose. I pinned the cherry to keep it in place. Next, I sewed the stem and leaf together. For this, I used a piece of felt and used a zigzag stitch.


Paso nro 3
Paso nro 3
In the third step, I'll proceed to sew the front of the crop top to the back. To ensure everything is properly aligned, I first place both pieces on top of each other, checking that the edges match, and sew the bias bindings on the neck and shoulders. I chose a bias binding that complements the design, ensuring the seams are clean and well-finished. I sew the bias binding that goes on the back. This step is crucial, as the back of the top also needs a polished finish that matches the rest of the design. I used pins to secure the bias bindings in place before sewing, which helped prevent them from shifting during the process. Finally, I joined the hem with a straight stitch. This final detail is important to give the crop top a professional finish. I made sure the stitching was even and straight, checking each section for any unwanted wrinkles or folds.


(Resultado final:)||(Bottom line:)
This crop top is not only a reflection of my personal style, but also a reminder of the satisfaction that comes from creating something unique and handmade. I thank everyone for joining me on this journey. I hope this tutorial inspires you to try your own creations and experiment with different designs. Feel free to share your experiences and results! Thanks for being here, and see you next time!

The photos presented in this blog are my responsibility. The images have been edited using Canva. The photographs were taken with my Infinix hot 10 cell phone. The content has been translated with Google translator.