

Un saludo mi querida comunidad @NeedleWorkMonday feliz inicio de semana y lunes de aguja 💖 y uno muy especial para los amantes de este hermoso arte, para hoy les traigo un lindo proyecto tejido a crochet, con el que elabore un accesorio para el cabello bien tierno, como es un scrunchie de conejita, es un detalle bien hermoso para nuestras niñas tanto para obsequiar como también para comenzar un emprendimiento, se pueden elaborar varias al dia al igual que la cantidad de material a utilizar son muy poco, casi retazo de hilos. Así que materiales en manos y comencemos con este paso a paso
Greetings my dear community @NeedleWorkMonday happy start of the week and needle Monday 💖 and a very special one for lovers of this beautiful art, for today I bring you a nice crochet knitted project, with which I elaborated a very tender hair accessory, as is a bunny scrunchie, it is a very beautiful detail for our girls both to give as a gift and also to start an enterprise, you can make several a day as well as the amount of material to use are very little, almost scrap of yarn. So, materials in hands and let's start with this step by step.

- Hilo pabilo blanco
- Hilo pabilo fucsia
- Hilo pabilo negro
- Hilo perl amarillo
- Balin
- Cola blanca
- Silicona liquida
- Tijera
- Aguja para crochet
- Aguja lanera
- coleta
- White wick thread
- Fuchsia wick yarn
- Black wick yarn
- Yellow pearl thread
- Balin
- White glue
- Liquid silicone
- Crochet needle
- Wool needle
- Scissors
- pigtail


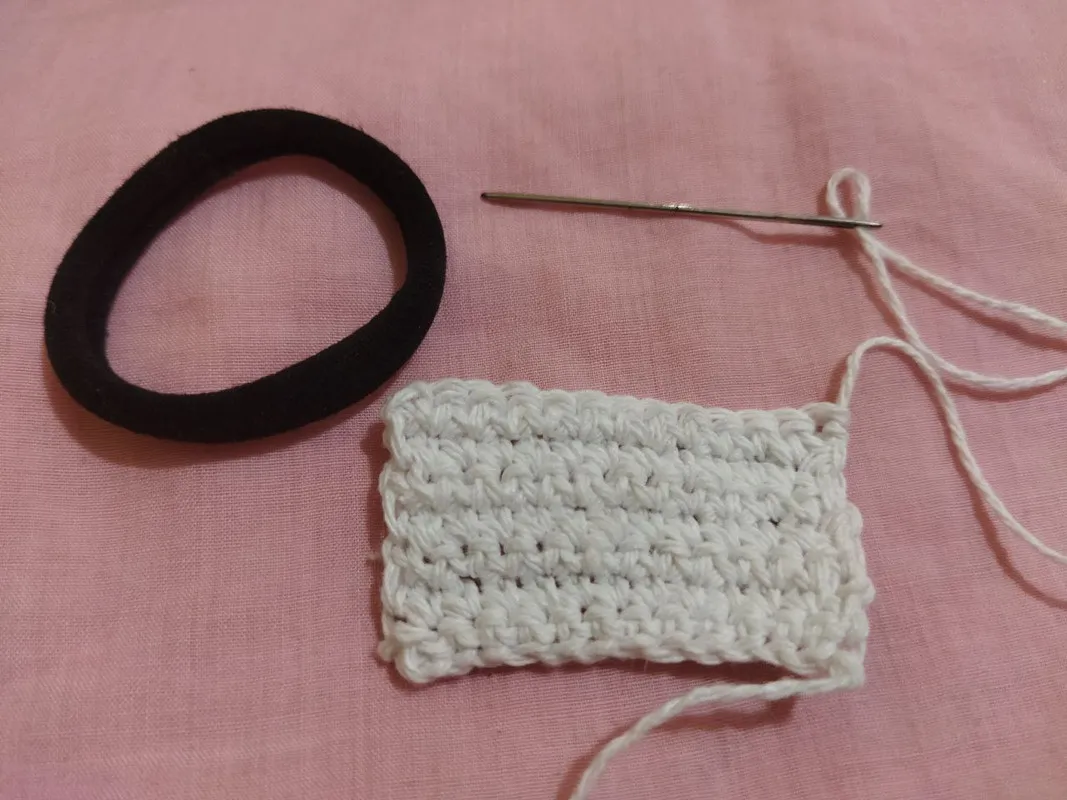
Comenzamos este lindo proyecto que les comparto hoy con mucho cariño y con el cual damos inicio a esta nueva semana y con el que les enseñare como hacer un accesorio para el cabello en especial para nuestras niñas se trata de un scrunchie de conejita tejido a crochet. iniciamos elaborando una cadena en hilo pabilo color blanco de 14 punto y realizamos un total de 8 vueltas de puntos bajos manteniendo la cantidad de puntos de la cadena. Aunque la cantidad de vueltas va depender del grosor de la coleta. Cuando terminemos dejamos una hebra de hilo sobrante para coser con una aguja lanera y forrar la coleta
We begin this beautiful project that I share with much affection today and with which we start this new week and with which I will teach you how to make a hair accessory especially for our girls, it is a crochet bunny scrunchie. We start by making a chain in white thread of 14 stitches and we make a total of 8 rounds of low stitches maintaining the number of stitches in the chain. Although the number of rows will depend on the thickness of the pigtail. When we finish we leave a strand of leftover thread to sew with a wool needle and cover the ponytail.


Ahora vamos a realizar las orejas largas características de los conejitos, comenzamos con una cadena de 6 puntos en color fucsia y vamos a realizar puntos bajos por los dos extremos solo que en la parte superior de la cadena haremos un punto alto doble. Al finalizar la vuelta cambiamos el color hilo y pasamos a blanco y de igual manera hacemos puntos bajos y en la parte superior hacemos un punto alto para darle la forma de la oreja. repetimos estos mismos pasos o secuencia de puntos para hacer la otra oreja
Now we are going to make the characteristic long ears of the bunnies, we start with a chain of 6 stitches in fuchsia color and we are going to knit low stitches on both ends, only that in the upper part of the chain we will make a double crochet. At the end of the round we change the color of the yarn to white and in the same way we make single crochet and in the upper part we make a double crochet to give the shape of the ear. We repeat these same steps or sequence of stitches to make the other ear.


Teniendo todas las piezas lista procedemos armar la conejita, vamos a coser las 2 orejas en la parte central, después que estén cosidas con cola blanca le aplicamos y damos la forma deseada y dejamos secar para que se endurezcan y no se doblen al usar el scrunchie. Para hacerla bien coqueta elaboramos una pequeña flor del color de su preferencia. hacemos un anillo magico y una cadena de 3 puntos, dos puntos altos y una cadena de 3 puntos para bajar, repetimos hasta hacer los 5 pétalos de la flor, después se la pegamos en el centro con silicona liquida y en el centro un balin dorado. Por ultimo con hilo color negro elaboramos unas v en la parte del frente que serán los ojos
Having all the pieces ready we proceed to assemble the bunny, we are going to sew the 2 ears in the central part, after they are sewn with white glue we apply and give the desired shape and let them dry so that they harden and do not bend when using the scrunchie. To make it very flirty we make a small flower of the color of your choice. We make a magic ring and a chain of 3 stitches, two high stitches and a chain of 3 stitches to go down, we repeat until we make the 5 petals of the flower, then we glue it in the center with liquid silicone and in the center a golden ball. Finally with black thread we elaborate some v's in the front part that will be the eyes.


Ahora si Listo!!! ya culminamos con este hermoso proyecto que elabore tejido a crochet como fue una hermosa scrunchie de conejita, ideal para las niñas de la casa como tambien una excelente idea para emprender con su venta. Con esmero y dedicación podemos lograr muchas cosas que nos proponemos
!! Un saludo y nos vemos en una próxima oportunidad!!
Now if Ready!!! we have finished with this beautiful project that I made crochet as it was a beautiful bunny scrunchie, ideal for the girls of the house as well as an excellent idea to undertake with its sale. With care and dedication we can achieve many things that we propose.
!! Best regards and see you in the next opportunity!


| Pueden seguirme en 💙: | You can follow me on 💙: |
|---|---|
| eveyese1312 | |
| Discord | eveyese1312#6211 |
Las fotos y el contenido son de mi autoria tomadas con mi teléfono POCO M3
Imágenes editadas en PowerPoint Canva
Para la traducción usé el traductor: DeepL
The photos and content are my own.
Images edited in PowerPoint Canva
For the translation, I used the translator: DeepL
