Hi, today I bring you a double mold, on the one hand the neckline for a dress and on the other the mold for a skirt. Both molds range from size 36 to 56, with their colors to differentiate them.
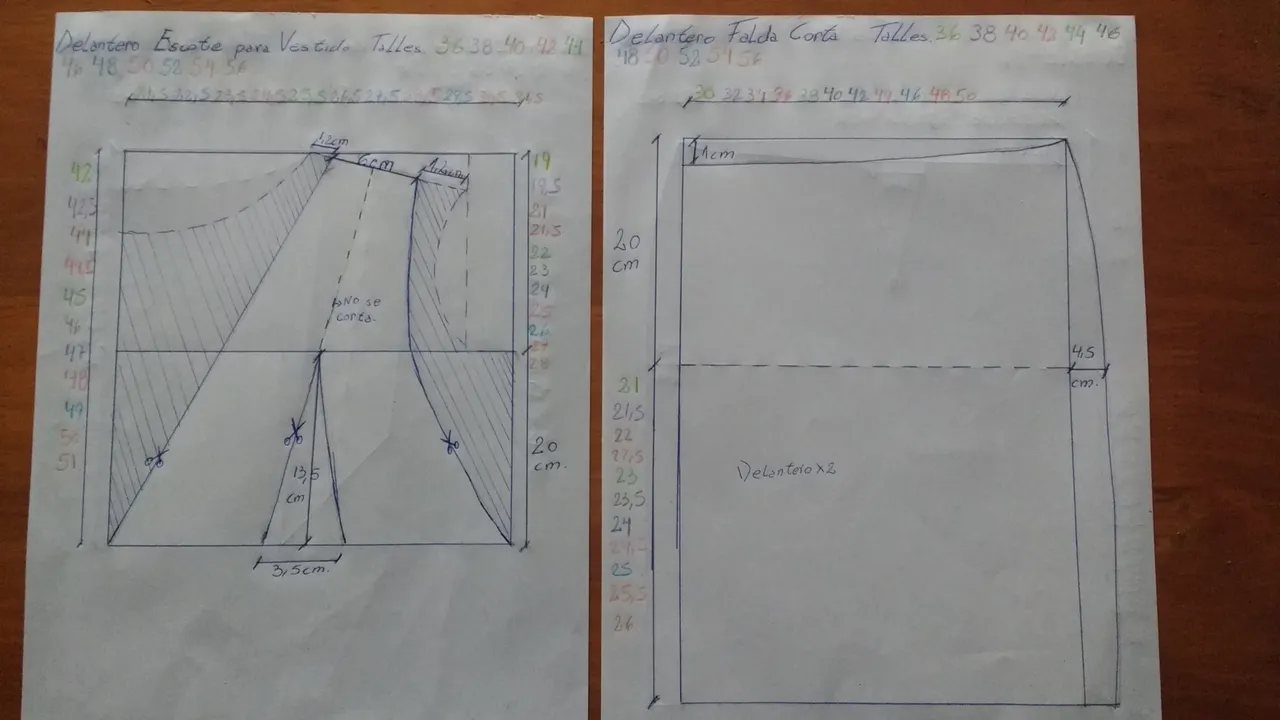
This image corresponds to the front of the neckline and the skirt. I would like to clarify that the dotted line that is above the clamp cannot be cut.
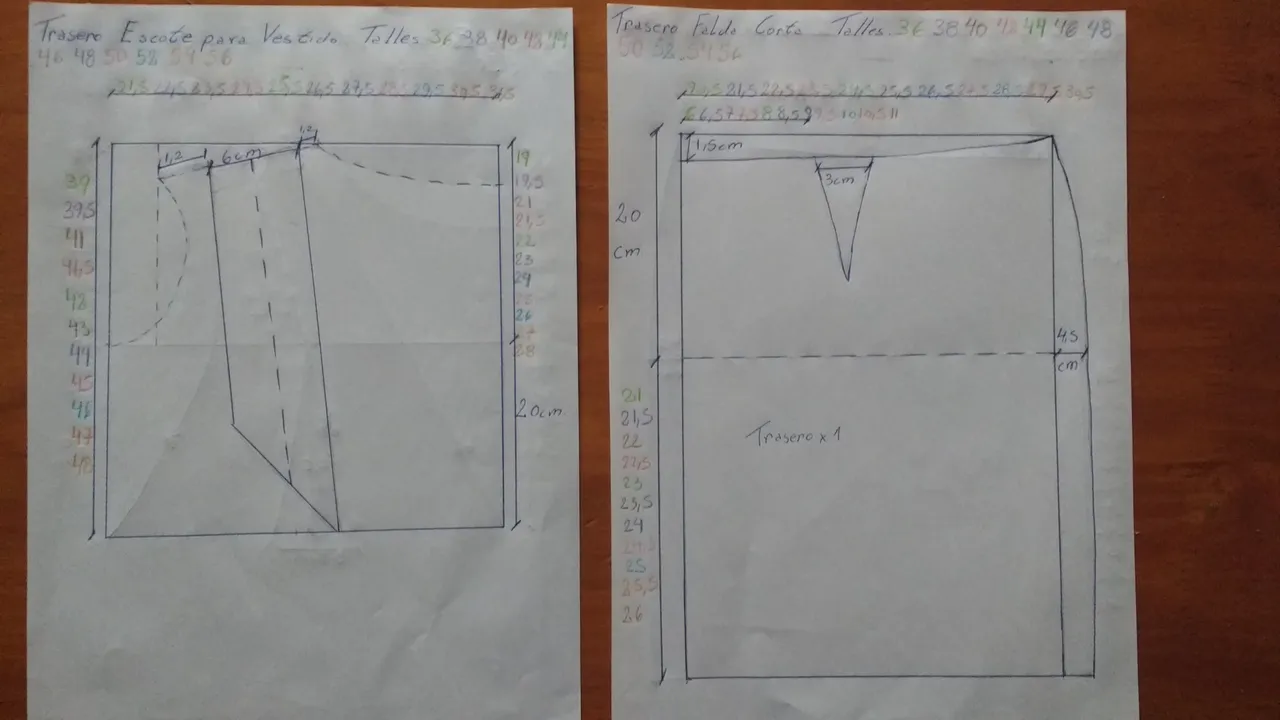
Image of the back of both molds. All the measurements that are in the pen, do not vary according to the size, that means, that it does not matter if they make size 36 or 56, those measurements will always be the same.

Front and back mold of the neckline, already cut. This is a size 36.

Skirt mold, I want to tell you that in this case I made a modification and joined both molds (rear and front), that is why it looks different than the mold transferred on paper with the measurements. You do it as you like best.
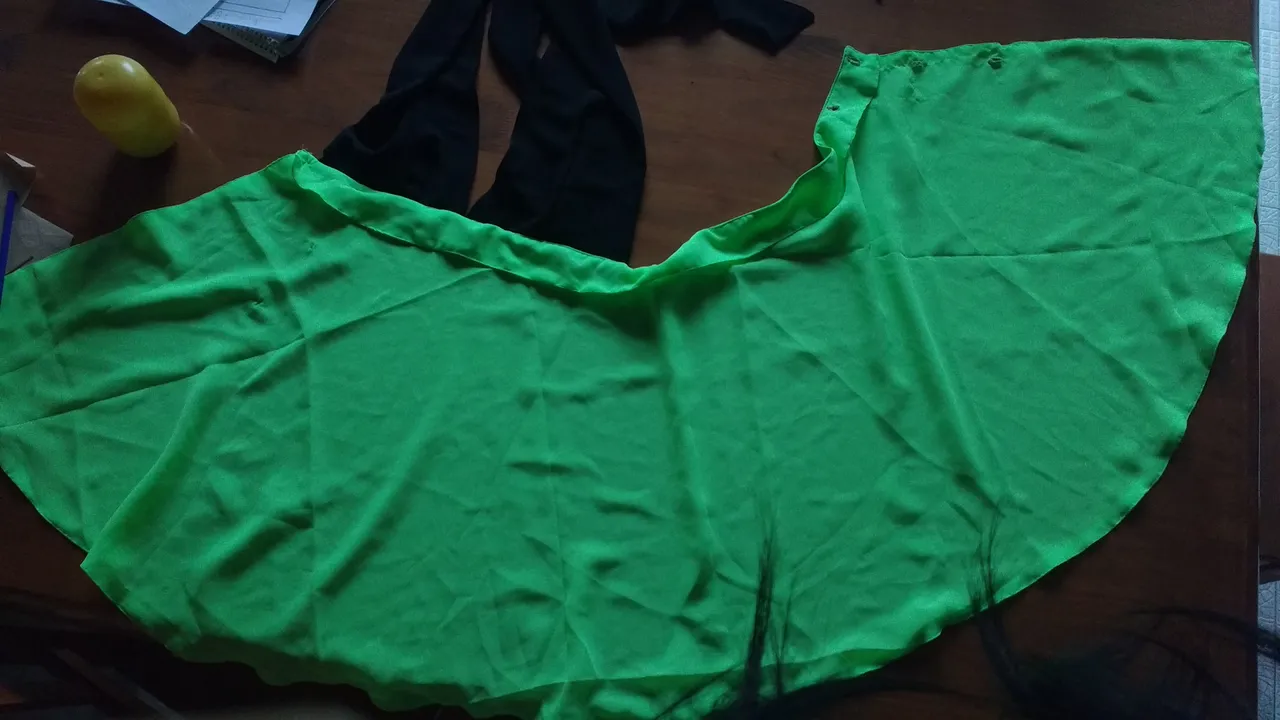
As this dress is already made, I did not place the molds on a fabric, but I will show you how I was making it. Remember to leave 1.0 cm for the seam allowance.

When we have everything cut, we will start sewing. The first thing we have to do is join the clips, I cut two parts of each front, that way the clips would be on the inside of the garment, and it would not be seen. As you can see in the picture.

Then I joined the back parts to the front parts, sewed them together and closed the sides. This is how we finish the neckline.

Let's start with the skirt, in this case I also cut two parts and sewed them together, then I turned the fabric over, so the seams would be internal. Also in this way we already carry out the ring of it. This skirt does not close like others, it is made so that it can be tied, for that, what I did was from one side, I measured 1.0 cm and placed the first button, then I measured another 5.0 cm and placed the second button, then I went down about 7.0 cm and place the third, the same for the fourth button.
Remember that these measurements will depend on your physique, they are not exact measurements.
On the other side, make the same measurements and sew the buttonholes.
Now we are going to place the neckline over the skirt. For that, on the same measurement of the first button, that is to say 1.0 cm from the edge, we secure the first side of the neckline, glued, we secure the other side and on top we place the internal view.
Data: the internal view is the same as the one I did for the "Skirt with Buttons". If after reading this you want me to upload it, just tell me and I will.

Image taken from my Instagram 

Image taken from my Instagram

If you do not want to do the internal view, you can fold the entire edge of the skirt and place an elastic, before placing the neckline and closing the skirt. As you can see in this image. Remember that the measurements to place the neckline are the same, 1.0 cm from the edge.
Image taken from my Instagram