
Hello friends, I hope you are very well on this day, and have had a good weekend, always wishing you a new week full of blessings.
Today I am very happy to be able to publish again in my needle Mondays, where I come to share a fan art of the video game Minecraft, this is a favorite video game of my daughter, and me, she always shows me figures of some characters that she wants me to make, this time she wants me to make the bee.
I found it cute, she asked me to please make it for her, I hesitated a lot to make it because I didn't have all the right material for the result to be the one I expected; however, I decided to venture in making it with crochet thread and simple sewing thread, for the details.
I felt motivated because it seemed easy to make and since I had the plastic mesh, which is the main material, I started to make the bee for a keychain.
Everything that is for my daughter, motivates me because I know she will love it, but this was not the case, because once I finished the bee, I passed her the picture, and she did not react with a I love it, with that red heart, that she always puts me when I send her something that she likes, she just told me, mommy, doesn't it look like a bee, and I was like, 😲 what is it seriously. She told me if because you had to count the squares when knitting you had to follow the pattern, I told her I did everything I could 😌and it came out like this, but it doesn't matter I see that you know how to make it better, now I challenge you to make one 😁, I accept it, now I will wait to see how it goes for her, on the other hand, my husband saw me a little sad,😞 and told me that he loved it, and to give it to him, he told me that it was very pretty and that he would use it with a lot of affection. 😊
I loved it for being my first fan art of this video game, I thought this bee was cute and what do you think?
I hope you like it a lot and let me know and don't say it looks like spongebob 😆 let's see.
The pictures you will see below, were taken with my phone model TECNO SPARK GO 2024.
Hola amigos, espero que se encuentren muy bien en este día, y hayan tenido un buen fin de semana, deseándoles siempre una nueva semana llena de bendiciones.
Hoy me siento muy feliz de poder volver a publicar en mis lunes de agujas, donde les vengo a compartir un fan art del video juego Minecraft, este es un video juego de los favoritos de mi hija,y yo, ella siempre me muestra figuras de algunos personajes, que desea que le haga, en esta oportunidad desea que le haga la abeja.
Me pareció tierna, me pidió que por favor se la hiciera, dude mucho para hacerla porque no tenía todo el material adecuado para que el resultado fuera el que yo esperaba; sin embargo, decidí aventurarme en hacerla con hilo de crochet e hilo simple de coser, para los detalles.
Me sentí motivada porque me pareció fácil de hacer y como tenía la malla de plástico, que es el material principal, comencé a elaborar la abeja para un llavero.
Todo lo que sea para mi hija, me motiva porque sé que le va a encantar, pero este no fue el caso, porque una vez que termine la abeja, le pase la foto, y no reacciono con un me encanta, con ese corazón rojo, que siempre me coloca cuando le envió algo que a ella le gusta, solo me dijo, mami, ¿no se parece a una abeja, y yo me quede, 😲qué es en serio?. Me dijo si porque tenías que contar los cuadros al tejer tenías que seguir el patrón, le dije hice todo lo que pude 😌y me salió así, pero no importa ya veo que tú sabes hacerla mejor, ahora te reto a que hagas una 😁, lo acepto, ahora esperaré a ver que tal le va a ella, por otra parte, mi esposo me vio un poco triste,😞 y me dijo que a él le encanto, y que se la regalara, me dijo que me había quedado muy bonita y que él si la iba a utilizar con mucho cariño.😊
A mí me encanto para ser mi primer fan art de este video juego, me pareció linda esta abejita ¿y ustedes que les parece?
Espero que les guste mucho y me lo hagan saber y no digan que se parece a bob esponja 😆 veamos.
Las fotografías que verán a continuación, fueron tomadas con mi teléfono modelo TECNO SPARK GO 2024.

 |  |
|---|---|
 |  |
It all started with a mesh ribbon from which I cut 8 pieces of 8 columns and 9 rows, for the body I used 6 pieces, and for the wings I used 2 pieces.
I threaded a wool needle with yellow crochet thread and began to knit each square, making a back stitch, as when we embroider with back stitch, this back stitch is on the purl side.
This type of stitch is very well worked with worsted wool yarn, so for the next one I will do it with the right yarn to make it look much tighter and fluffier.
Todo empezó con un listón de malla de donde corte 8 piezas de 8 columnas y 9 filas, para el cuerpo utilice 6 piezas, y para las alas 2 piezas.
Enhebre una aguja lanera con el hilo de crochet amarillo y empecé a tejer por cada cuadro, haciendo un punto atrás, como cuando bordamos con punto atrás, este punto atrás queda del lado del revés.
Este tipo de malla, queda muy bien trabajado con hilo de lana de estambre, así que para el próximo lo haré con el hilo adecuado para que se vea mucho más cerrado y esponjoso el tejido.
 |  |
|---|---|
 |  |
Finishing covering with yellow thread all the pieces, I made the stripes with brown thread, following the vertical lines, on the yellow thread.
Then I bordered the eyes and mouth, black color with blue dots that later I noticed that it gave him a sad face aspect, I was not completely convinced, I could not do much here, just remove the two blue dots on the cheeks replacing them with pink dots.
Terminando de cubrir con hilo amarillo todas las piezas, le hice las rayas con hilo de color marrón, siguiendo las líneas verticales, sobre el hilo amarillo.
Luego borde los ojos y boca, color negro con puntos azules que luego note que le dio aspecto de carita triste, no me convenció del todo, no pude hacer mucho aquí, solo retire los dos puntos azules de las mejillas sustituyéndolo por puntos de color rosado.
 |  |
|---|
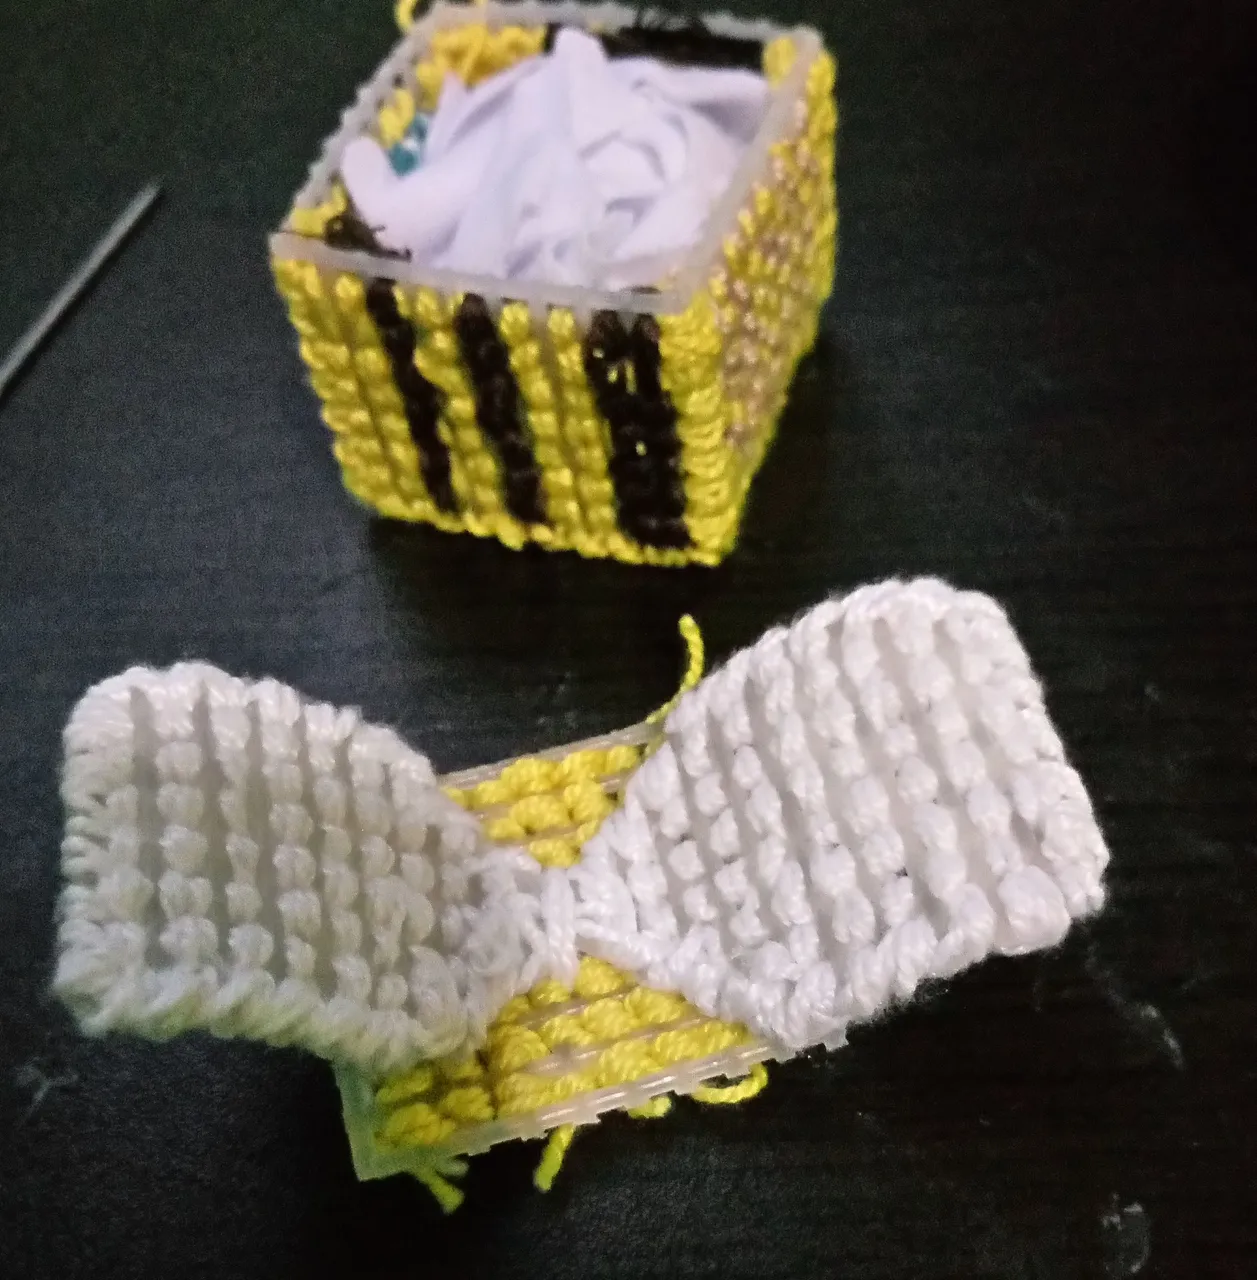
I began to shape it into a square, sewing the side pieces and the base, leaving the top piece that closes for the last, because the wings will be sewn there.
Comencé a darle forma de cuadro, cosiendo las piezas laterales, y base, dejando para último la pieza de arriba que cierra, porque allí van a ir cosidas las alas.
 |  |
|---|---|
 |  |
I made the wings starting with 2 stitches and increasing each row by 1 stitch on each side, then I just cut off the excess stitches and sewed the whole edge.
Hice las alas comenzando con 2 puntos y aumentando por cada línea 1 punto de cada lado, después solo corte los excedentes de malla y cosí toda la orilla.
 |  |
|---|---|
 |  |
I sewed on the top piece, and ready I just put the chain with the key ring.
Then I saw that I could do something more for the eyes and I sewed some white stitches to make light, and give more life to this character, even so she was still sad my little bee, was that she felt that my daughter didn't like me.😬
Beloveds, I hope you like this bee so that the next one will have a happy face.🙂😘
Cosí sobre la pieza superior, y listo solo le coloqué la cadena con el aro para llavero.
Luego vi que podía hacer algo más por los ojos y le cosí unos puntos blancos para hacer luz, y darle más vida a este personaje, aun así siguió triste mi abejita, fue que sintió que a mi hija no le gusto.😬
Amados, espero que a ustedes si les guste esta abejita para que la próxima tenga una carita feliz.🙂😘
 |  |
|---|

social networks / redes sociales

Traductor Deepl
Translated Deepl
Ediciones Canva
Editions Canva

