Hola hola amigos espero que se encuentren sanos y llenos de muchas creatividades. Mi trabajo creativo de hoy se trata de un tutorial sobre como hacer una decorativa mariquita con material reciclado (Bombillo y alambre).
Hello hello friends I hope you are healthy and full of many creatives. My creative work today is a tutorial on how to make a decorative ladybug with recycled material (Bulb and wire).


Materiales:
Bombillo.
Alambre.
Pinza.
Pintura acrílica negra, blanca, y roja.
Pincel.
Retazo de hoja blanca y foami negro.
Silicón en barra
Materials:
Light bulb.
Wire.
Gripper.
Black, white, and red acrylic paint.
Brush.
Piece of white sheet and black foami.
Stick silicone

Como lo realice.
How to do it.
Paso1: Pinte el bombillo de negro y roja dándole forma a la mariquita y deje secar por 20 minutos.
Step1: Paint the bulb black and red shaping the ladybug and let it dry for 20 minutes.

Paso2: Luego con un pincel delgado hice unas líneas con blanco para darle forma en las alas y deje secar por 15 minutos.
Step2: Then with a thin brush I made some lines with white to shape the wings and let it dry for 15 minutes.

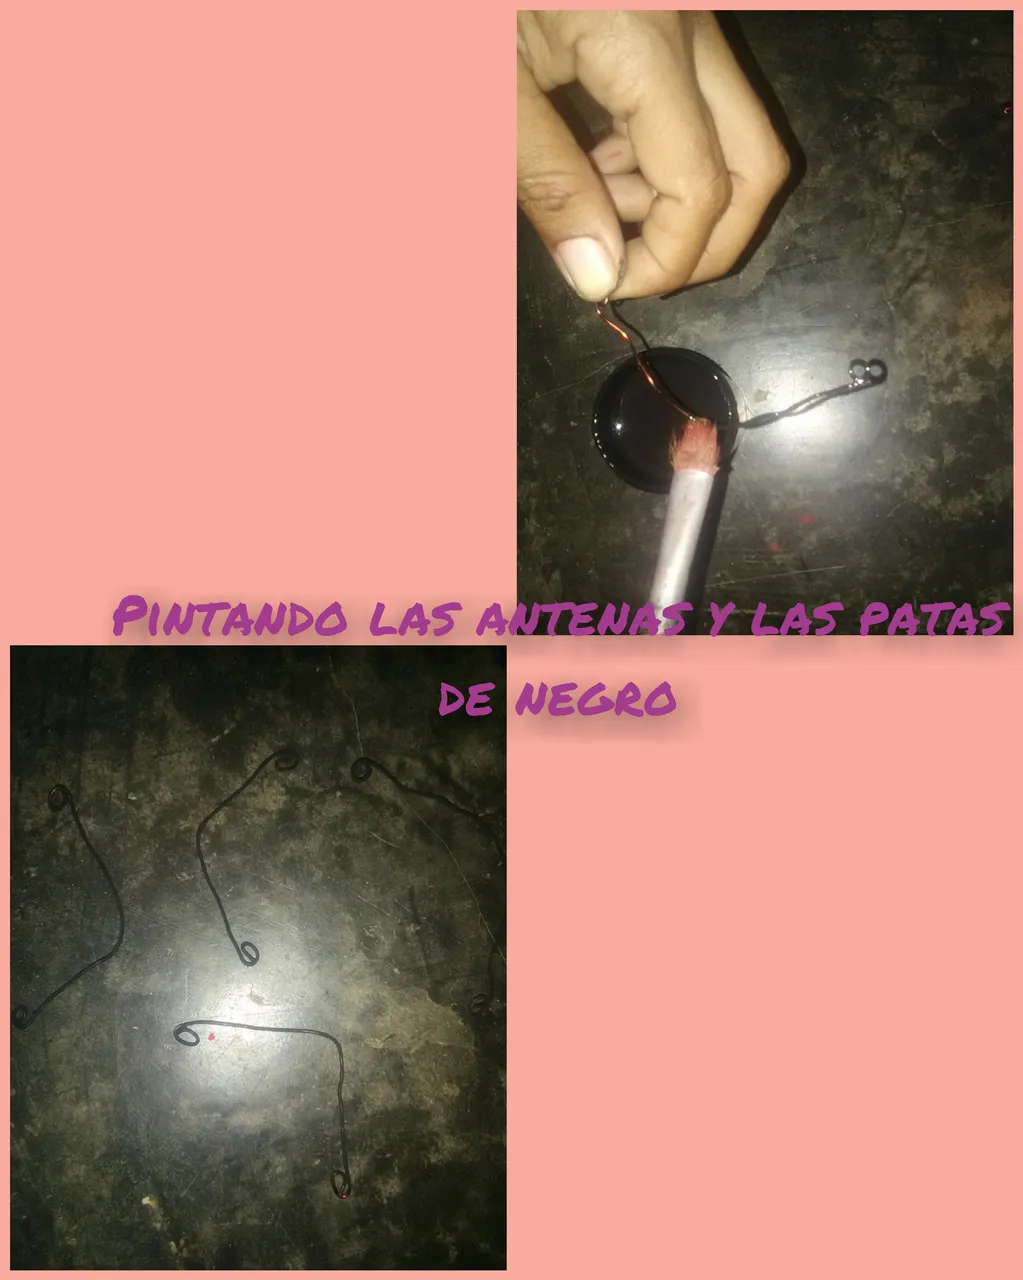
Paso3: Con el alambre realice las antenas y las patas, luego las pinte con negro.
Step3: With the wire make the antennas and legs, then paint them with black.

Paso4:con el retazo de hoja blanca y de foami negro le hice los ojos.
Step 4: I made the eyes with the piece of white sheet and black foam.

Paso5: Ya todo listo procedo a pegar las partes.
Step5: Everything is ready and I proceed to glue the parts.

✓Pegando los ojos.
✓Glueing the eyes.

✓ Las antenas y las patas.
✓ The antennas and legs.

Aquí les muestro esta decorativa mariquita.
Here I show you this decorative ladybug.

Gracias amigos por visitar mi blog.
Thanks friends for visiting my blog.