
¡Reciban un muy feliz saludo compañeros de Hive!
En esta oportunidad compartiré con ustedes mi participación en el concurso organizado por La Taguara ( 
El reciclaje se ha vuelto parte importante en nuestra coexistencia con el planeta ya que es de suma importancia reducir los desechos que contaminan e inutilizan nuestro hábitat. Esto nos ha llevado a la innovación, ya que nos hemos visto obligados a ser creativos para darle uso nuevamente a los residuos. Particularmente pienso que es importante que al realizar manualidades con materiales de reciclaje, estos deben ser para algo que si tenga un propósito de utilidad, por ejemplo, no considero correcto realizar una manualidad para que luego termine nuevamente como basura, cada objeto debe tener alguna utilidad o aprecio sentimental para que este no tenga que llegar a ese punto. Sin más que agregar a esto, les presento mi manualidad con materiales de reciclaje.
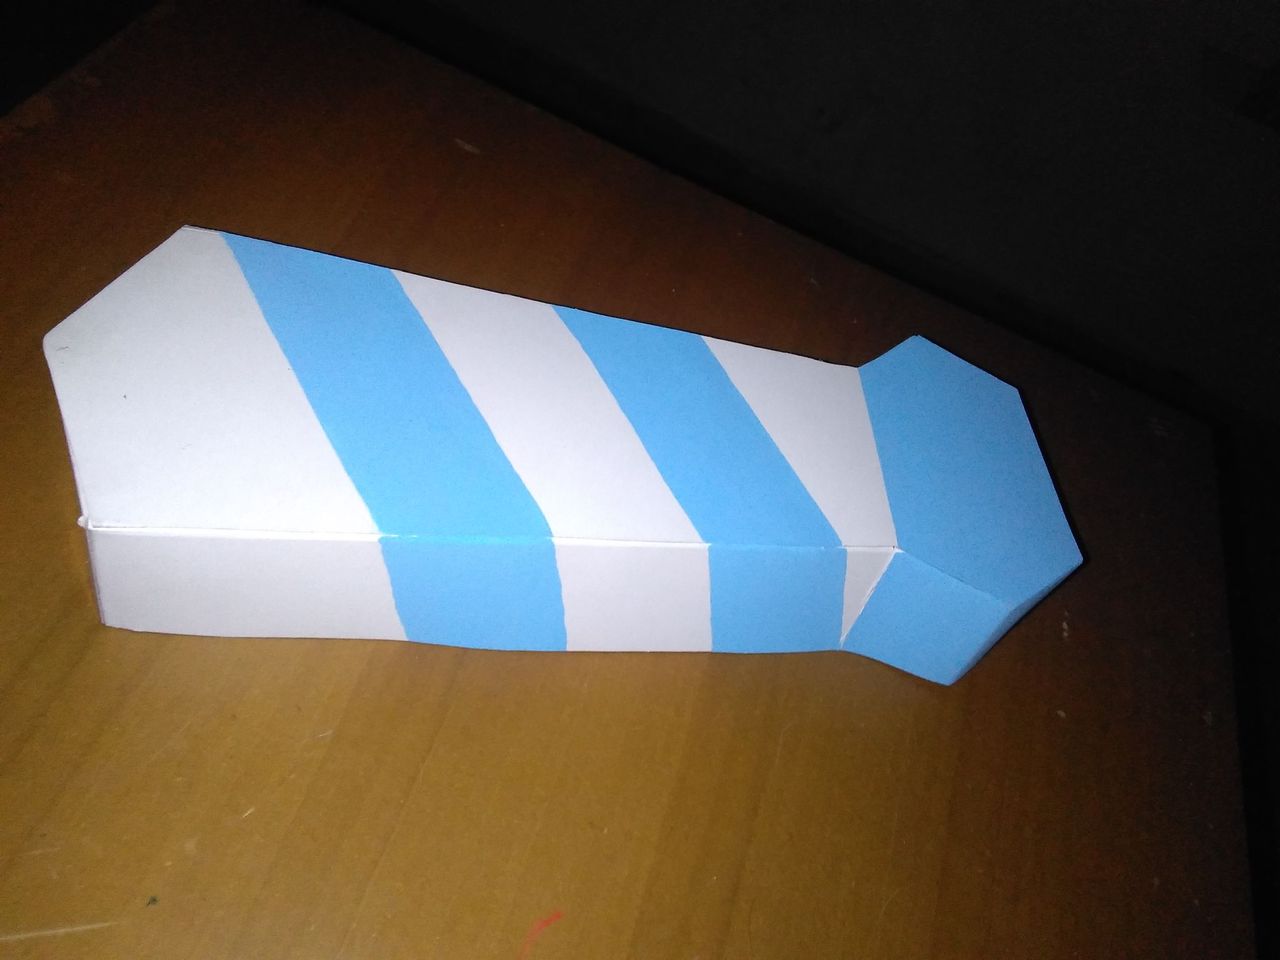
Desde hace un mes mas o menos he estado guardando unas cajitas en las que vienen unas galletas que venden en el supermercado de mi localidad, sabía que en algún momento las utilizaría, entonces vino la oportunidad de darles uso ya que hace poco fue el día del padre y decidí hacer una cajita de regalo en forma de corbata para regalárselo a mi papá, a pesar de que el modelo lo vi en Pinterest (referencia), el cómo armar la caja surgió de mi ingenio y experiencia, acá les muestro el paso a paso.
Materiales
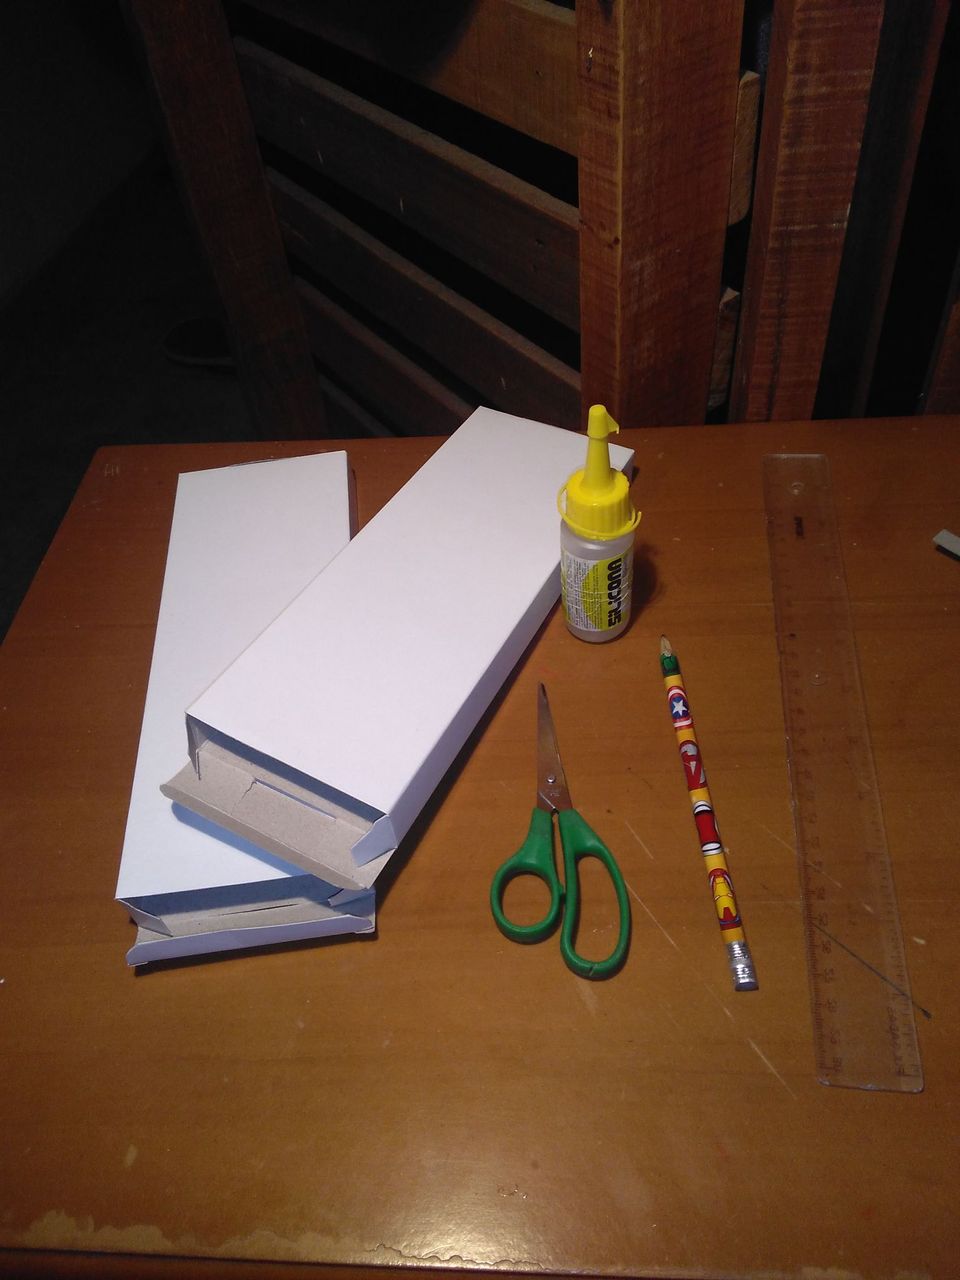
- Silicona líquida
- Tijeras
- Lápiz
- Regla
- Cajitas de cartón de galletas
- Papel de regalo dorado
- Pincel
- Pintura al frío azul
- Pincel
- Cuchilla o exacto
- Galletas, chocolates y dulces
Tutorial
- Tomar las cajitas de cartón de los empaques de galleta y abrirlos por un costado con la ayuda de la cuchilla.


- Dibujar dos corbatas del lado de adentro de la caja, con la ayuda de una regla medir y marcar las distancias de las puntas, de esta forma se evita que quede disparejo.


- Cortar las formas de corbatas con la ayuda de una tijera o un exacto, luego con los retazos del cartón realizar unas tiras de alrededor 5 cm de ancho y adicional al costado de la tira, agregar 1 cm y doblar hacia adentro.


- Una vez tengamos las tiras lo que vamos a hacer es ponerles un poco de pegamento y pegarlas por el borde de nuestras corbata, dejando un pequeño espacio para que puedan encajar


- Y casi terminamos!! por ultimo tenemos que pintarlo..
Esperamos que se seque la pintura y metemos los dulces los chocolates o cualquier cosa que le tengamos a nuestro papa!


Muchísimas gracias por pasarte por mi post! recuerda que puedes participar en el concurso haciendo click en el enlace al principio de la publicación! Saludos!
English
Receive a very happy greeting fellow Hive members!
This time I will share with you my participation in the contest organized by La Taguara (
Recycling has become an important part of our coexistence with the planet since it is of utmost importance to reduce the waste that contaminates and renders our habitat useless. This has led us to innovation, as we have been forced to be creative in order to make new uses for waste. I particularly think it is important that when making crafts with recycled materials, these should be for something that has a useful purpose, for example, I do not consider it right to make a craft to then end up again as garbage, each object must have some utility or sentimental appreciation so that it does not have to reach that point. Without further ado, I present to you my craft with recycled materials.
For a month or so I have been saving some boxes that come with cookies sold in my local supermarket, I knew that at some point I would use them, then came the opportunity to use them because it was recently father's day and I decided to make a gift box in the shape of a tie to give it to my dad, although I saw the model on Pinterest (reference), how to assemble the box came from my ingenuity and experience, here I show you the step by step.
Materials
- Liquid silicone
- Scissors
- Pencil
- Ruler
- Cardboard cookie boxes
- Gold wrapping paper
- Paintbrush
- Blue cold paint
- Paintbrush
- Knife or exacto
- Cookies, chocolates and candies
Tutorial
- Take the cardboard boxes from the cookie packaging and open them on one side with the help of the knife.
- Draw two ties on the inside side of the box, with the help of a ruler measure and mark the distances of the ends, this way you avoid unevenness.
- Cut the tie shapes with the help of a scissors or an exacto, then with the cardboard scraps make strips of about 5 cm wide and additional to the side of the strip, add 1 cm and fold inwards.
- Once we have the strips what we are going to do is to put some glue on them and glue them along the edge of our tie, leaving a little space so that they can fit
- And we're almost done!!! finally we have to paint it....
We wait for the paint to dry and we put in the candies the chocolates or whatever we have for our dad!