

Hello there, my fellow artisans and handcrafts enthusiasts!
It's time to finish this instrument. Let's get right to it!
Tuning Machines


Swipe to see the photos
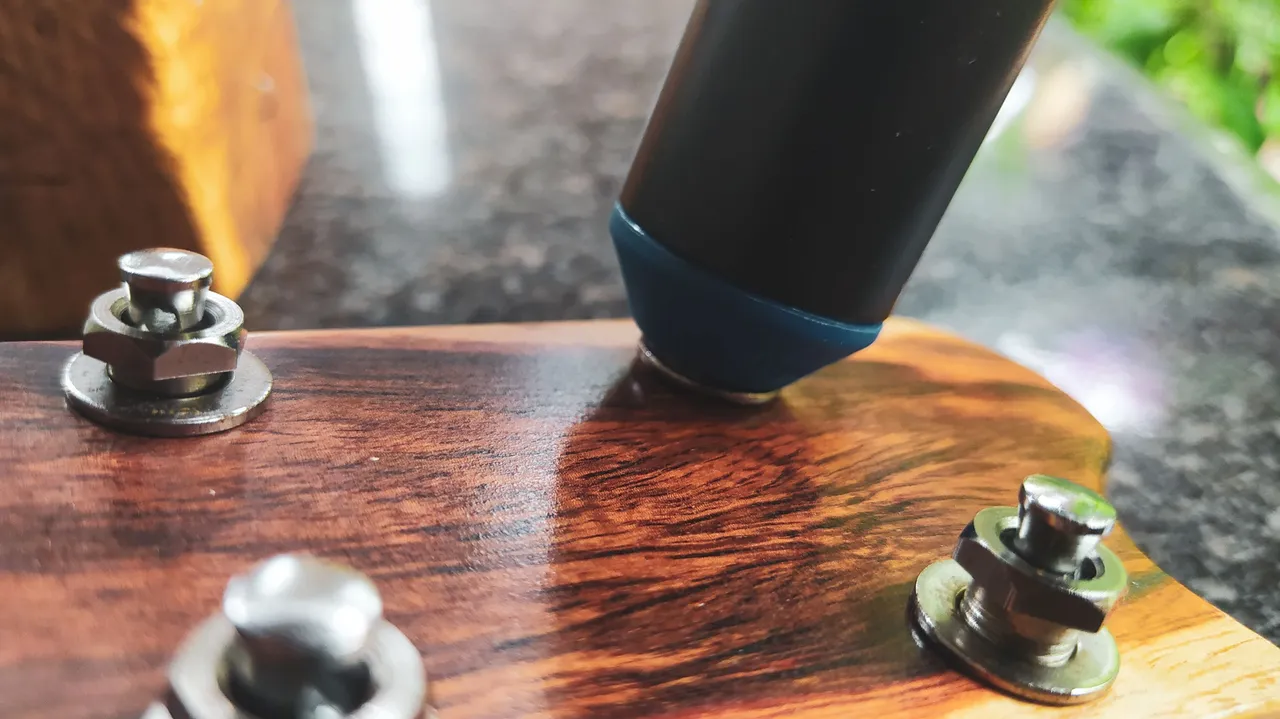
We need fine tuners for a fine instrument. I bought these over a year ago and still hadn't made a project to install them until now. The installation is simple, we get the tuners in place and then have to hold them with some nuts and washers to cover the holes. There's an extra screw to keep the whole contraption tightly in place.
One important thing I learned from using these tuners, it's that my winder has a key that fits perfectly with the nuts. It is amazing how one tool can do multiple specializes jobs.
Also, these silver tuners match perfectly with the colours of the build. Can't help but wonder about the use of bronze frets and golden tuners for a build like this. However, I think the contrast plays well in the composition.
Strings


Swipe to see the photos
With the tuners in place, we move ahead to the strings. These one with their colour coding make life easier. Don't keep the tags. I think they are just made for getting them on and then removing. Once the strings are placed, you don't need to know which one is which.
It is a simple process of making a knot at the bridge and then pulling the strings through the holes in the tuners. Of course, we can't miss to get each one in their slot at the nut. They get wobbly and annoying when they have no tension, but the winder makes quick work of this. And with tension and strings, this one is already making sounds.
Look at what I made


Swipe to see the photos
This is the result of some hard work and patience. A project that took a year for certain reason but now it is complete and makes me proud. Once you see the whole instrument together and working, it's just something else. There are some things that need to get better, but each new project is a new opportunity to learn about the craft.
For example, for instruments of this quality having a sound port on one of the sides is a lot of help for the musician as they can listen to everything they are doing at the moment they play.
This one is the Aesthetic Cuatro.
Do you want to listen to it? Here's a cover of a simple song. I'll come back with a different one in no time to make it give its full potential.
Thanks for following up this process.
El Cuatro Estético
¡Buen día, mis colegas artesanos y amantes de las manualidades!
¡LLegó la hora de termianr este instrument!
Clavijas
Desliza para ver las fotos
Un instrumento así de fino necesita unas clavijas que vayan con el estilo. Compré estas hace más de un año y no había hecho un instrumento adecuado para colocarlas hast ahora. Instalarlas es muy simple. Colocamos las clavijas en ls agujeros que ya tenemos en el clavijero. Las fijamos con las tuercas que traen en la parte frontal del clavijero. Luego, terminamos de asegurarlas con los tornillos que traen en la parte trasera.
Algo importante que aprendí durante este proyecto es que mi herramienta para ajustar la tensión de las cuerdas trae una llave hexagonal que sirve para hacer el trabajo de las tuercas en la parte frontal. Es genial cuando las herramientas pueden hacer más
de un trabajo específico.
Además, creo que estas clavijas cromadas van perfectamente con los colores del proyecto. No puedo evitar pensar en cómo se vería con trastes de bronce y clavijas doradas. Sin embargo, el contraste de colores juega bien con la presentación.
Cuerdas
Desliza para ver las fotos
Con las clavijas en su lugar, vamos con las cuerdas. Estas traen una etiquetas para diferenciar la posición de cada una. Esto nos hace más fácil el trabajo. Aunque no se quedan sobre las cuerdas. En mi opinión, se retiran luego de montarlas. Después de todo, una vez las cuerdas están colocadas, no cambia su posición.
El proceso es tan simple como hacer un nudo en el puente y después llevar las cuerdas a las clavijas. Por supuesto, no podemos olvidar hacer que cada una pase por su ranura respectiva en la cejuela. Al principio, es un poco incómodo mantenerlas en su lugar ya que no hay tensión, pero eso se ajusta rápido. Con las cuerdas afinadas, ya tenemos un instrumento funcional.
Mira lo que hice
Desliza para ver las fotos
Este es el resultado de trabajo duro y paciencia. Un proyecto que tomo un año por razones ajenas a mi voluntad. Ahora que está listo no puedo evitar sentirme orgulloso. Una vez que tenemos todo listo, la sensación es indescriptible. Hay detalles por mejorar, pero cada proyecto nuevo es su propia escuela y una oportunidad para mejorar en el oficio.
Por ejemplo, es muy provechoso hacerle un monitor en uno de lo aros a este tipo de instrumentos. Así el músico siempre puede escuchar bien todo lo que toca en el momento que ejecuta el instrumento.
Este es el Cuatro Estético.
¿Quiere escucharlo? Por aquí te dejo un cover que grabé hace poco. Es una canción muy sencilla. Ya luego vendré con algo más complejo para mostrar todo el potencial de este instrumento.
Gracias por seguir este proceso.
Fotos/Photos 📷: taken by me (Redmi Note 8)
Portada/Thumbnail 🖼️: by me, created with Canva.
Edición/Editing 🎬: by me, made with Adobe Photoshop Lightroom.

Follow me on Instagram for enquires and commission.
If you'd like to help the workshop grow, you can make a donation here.
You can find me at discord as bertrayo#1763