Greetings dear Hive community, today I present a tutorial on How to make a Robot with a Hard Drive
computer as a participation in the Mundo Electrónico contest in the HiveDiy community. For this practice it will be used in some parts of my computers that are not working.

Cómo realizar un Robot con un Disco Duro de Computadora/How to make a Robot with a Computer Hard Drive::
Materiales/Materials::
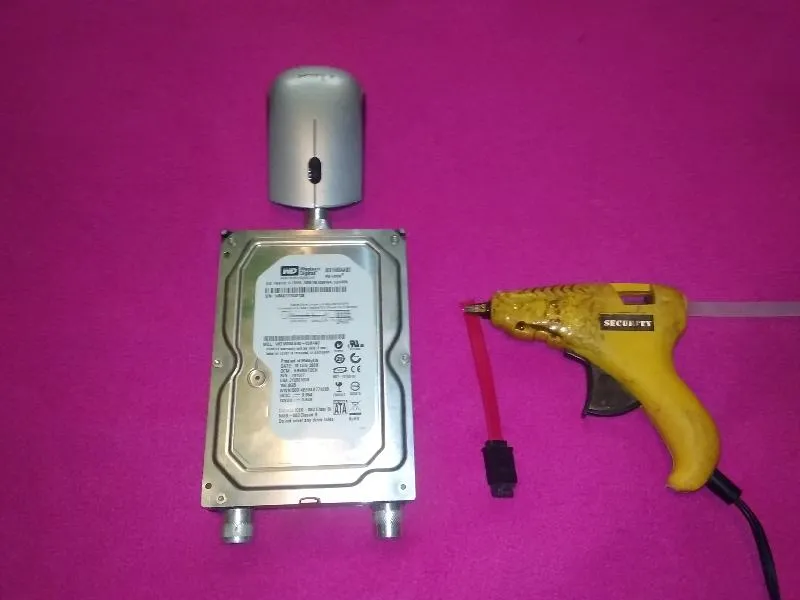
- 1 Disco duro
- 1 Ratón inalámbrico
- 1 Cable de disco duro tipo conexión sata
- 1 Filtro de regulador de voltaje
- 2 Pilas de reloj
- 3 Aros de cortinas
- 1 Tijera
- Silicón
1 hard drive
- 1 Wireless Mouse
- 1 sata connection type hard disk cable
- 1 Voltage regulator filter
- 2 watch batteries
- 3 curtain rings
- 1 Scissors
- Silicone

Paso 1/Step 1 :
Se pega el aro de cortina con el silicón en la parte de arriba y en el centro del disco duro.
The curtain ring is glued with the silicone on the top and in the center of the hard disk.

Quedando así, esta parte va ser el cuello de nuestro robot.
Staying like this, this part will be the neck of our robot.


Paso 2/Step 2:
Se coloca silicón sobre el aro de la cortina para pegar el ratón inalámbrico, que será la cabeza del robot.
Silicone is placed on the curtain ring to glue the wireless mouse, which will be the robot's head.

Paso 3/Step 3:
Se pegan con silicón uno de lo aros de cortina en la parte de abajo del disco duro.
One of the curtain rings are glued with silicone to the bottom of the hard disk.

Paso 4/Step 4:
Se pegan el tercer aro, hasta completar los dos, esto serán las patas del robot.
The third ring is glued, until completing the two, this will be the legs of the robot.

Paso 5:
Se corta con la tijera en dos parte el cable de disco duro sata, de 5cm.
The 5cm sata hard disk cable is cut into two parts with the scissors.

Quedando así, esto serán los brazos del robot.
Staying like this, this will be the robot's arms.

Paso 6/Step 6:
Se coloca silicón al primer brazo del robot, y lo pegamos en el lado izquierdo.
Silicone is placed on the first arm of the robot, and we glue it on the left side.
Quedando así.
Being that way.

Paso 7/Step 7:
Se pega el segundo brazo del robot.
The second robot arm is glued.

De esta forma completamos los dos brazos del robot.
In this way we complete the two arms of the robot.

Paso 8/Step 8:
Se pega una de las pilas de reloj encima del ratón inalámbrico.
Stick one of the clock batteries on top of the wireless mouse.

Aquí tenemos uno de los ojos del robot.
Here we have one of the robot's eyes.

Paso 9/Step 9:
Se pega con el silicón el segundo ojo de robot.
The second robot eye is glued with the silicone.

Ya tenemos nuestro robot con los dos ojos.
We already have our robot with both eyes.

Paso 10/Step 10:
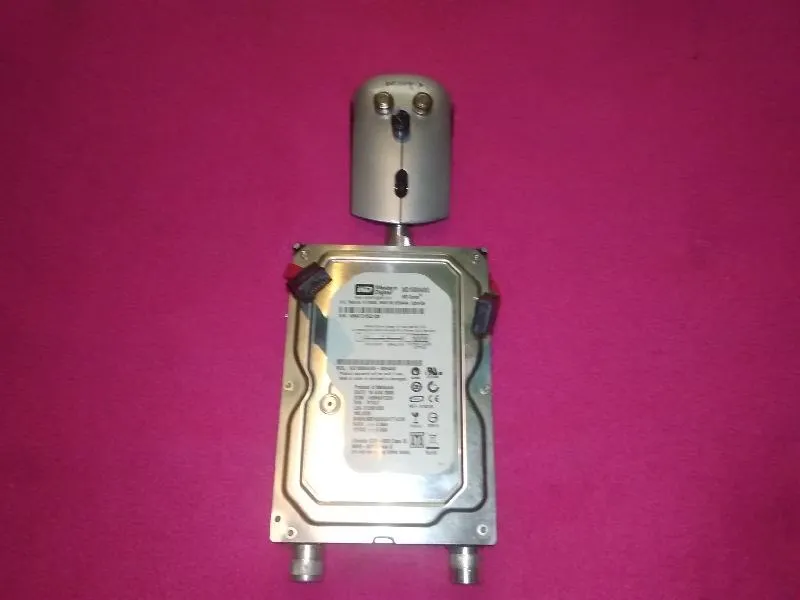
Se pega el filtro encima del ratón inalámbrico, esta será la nariz del robot.
The filter is glued on top of the wireless mouse, this will be the robot's nose

Este es el resultado final.
This is the final result.


Espero que les haya gustado mi tutorial, nos vemos en el próximo. Invito a 
I hope you liked my tutorial, see you in the next one. I invite
