

Todo el contenido en inglés y español.
All content in English and Spanish.
Buenas noches a todos los integrantes de esta hermosa comunidad, casualmente hoy termine unos adornos que hacía días tenía preparados y por falta de tiempo no los había terminado . Pueden verlos si decaen en DBUZZ , no tomé las fotos para mostrarles el paso a paso ,pero les traigo algo diferente ,les mostraré un lindo corazón ♥️ que me hice para ponerlo en mi mocita de noche les enseñaré los materiales que utilice y cómo lo hice , ojalá les guste tanto como ami.
Good evening to all the members of this beautiful community, coincidentally today I finished some ornaments that I had prepared a few days ago and due to lack of time I had not finished them. You can see them if they decay in DBUZZ, I didn't take the photos to show you the step by step, but I bring you something different, I will show you a nice heart ♥ that I did to put it in my little night I will show you the materials I use and how I did it, I hope you like it as much as me.
Materiales
Pistola de silicon
Papeles de colores
Regla de medir
Piedras pequeñas
Un pedacito de soga fina
Un asorbente
Cartón
Tijera
Materials
Silicone gun
Color papers
Ruler
Small rocks
A little piece of fine rope
a sorbent
Paperboard
Scissors
  Paso a paso
   Step by Step


Paso #1- Comenzaré marcando en los papeles de color pequeños cuadrados , la medida que voy a utilizar es el ancho y el largo de la misma regla así quedan todos parejos .
Step #1- I will start by marking on the small square colored papers, the measure I am going to use is the width and length of the same ruler so that they are all even.


Paso #2-Ya todos los cuadritos marcados, los recorto para tenerlos ya preparados y pasar al próximo paso.
Step #2-Already all the squares marked, I cut them to have them ready and move on to the next step.


Paso #3- Seguidamente marco en cartón dos plantillas en forma de corazón ♥️ y las recorto
Step #3- Then I frame two heart-shaped templates in cardboard ♥ and I cut them

Paso #4- Ya recortados los corazones ♥️ le echo por una superficie pegolin que cubra todo el corazón ♥️ .
Step #4- The hearts have already been cut ♥ I throw it down a sticky surface that covers the whole heart ♥.


Paso#5- Cubierto de pegolin una de las caras del corazón ♥️ con la parte de arriba del lápiz ✏️lo coloco encima de un cuadradito de papel 📄 y suavemente le doy un giro y con la otra mano 🤚 aprieto un poquito el papel 📄 para que quede como una flor 🌷 y rápidamente sin sacar la flor 🌷 del lápiz ✏️ lo voy pegando en la base del corazón ♥️.
Step #5- Covered with pegolin one of the faces of the heart ♥ with the top of the pencil ✏ I place it on top of a little square of paper 📄 and gently I give it a twist and with the other hand 🤚 I squeeze the paper a little 📄 so that it looks like a flower


Y así van quedando.
And that's how they are.


Paso #5-Voy preparando la base del corazón ♥️ donde voy a pegar a la tapa de la botella el absorbente , le pegaré una tapa echa de cartón le abriré un pequeño hueco en el medio donde le voy a introducir el absorbente para poderlo pegar al fondo y así se ve.
Step #5-I'm preparing the base of the heart ♥ where I'm going to stick the absorbent to the lid of the bottle, I'll stick a cardboard lid I'll open a small hole in the middle where I'm going to insert the absorber to be able to stick it to the bottom and that's how it looks.


Paso#6- Cuando introduzco el pitillo al cartón lo pego en el fondo de la tapa y para hacerlo más pesado y no se caiga le voy pegando piedras pequeñas dentro de la tapa y junto al absorbente , ya llena la tapa , entonces la sello pegándole la tapa hecha de cartón,seguidamente como paso #7- le pego alrededor de la tapa el pedacito de sofá fina y le hago un pequeño lazo para que luzca más bonita 🤩.
Step #6- When I insert the cigarette to the cardboard I stick it on the bottom of the lid and to make it heavier and it doesn't fall I'm sticking small stones inside the lid and next to the absorbent, it already fills the lid, then the seal sticking the lid made of cardboard, then as I step #7- I stick the small piece of thin sofa around the


Paso #8-Le corto un pedacito al absorbente para que no quede tan alto y en la parte de arriba lo aplastó un poquito con silicon caliente y pego las dos tapas de los corazones con mucho cuidado no romper las flores 🌷 .
Step #8- I cut a little piece of the absorbent so that it doesn't get so high and at the top he crushed it a little with hot silicone and glued the two lids of the hearts very carefully not to break the flowers 🌷.


om/DQmQaDN69QB3pw1tq3zKenaR5zSpz6roMAX9pAQVA6SPDk4/img_2659.heic)

Paso#9- Pegados las dos caras de corazones ♥️ en los bordes les voy pegando flores 🌷 para que no se vea el empate t quede completamente cubierto de flores
Step #9- Glued the two sides of hearts ♥ on the edges I'm sticking flowers 🌷 so that you don't see the tie you are completely covered with flowers 🌷.


Paso#10- Y final en la parte de abajo de la base para que no se vea el cartón también le pego florecitas.
Step #10- And at the end of the bottom of the base so that you don't see the cardboard, I also stick small flowers.
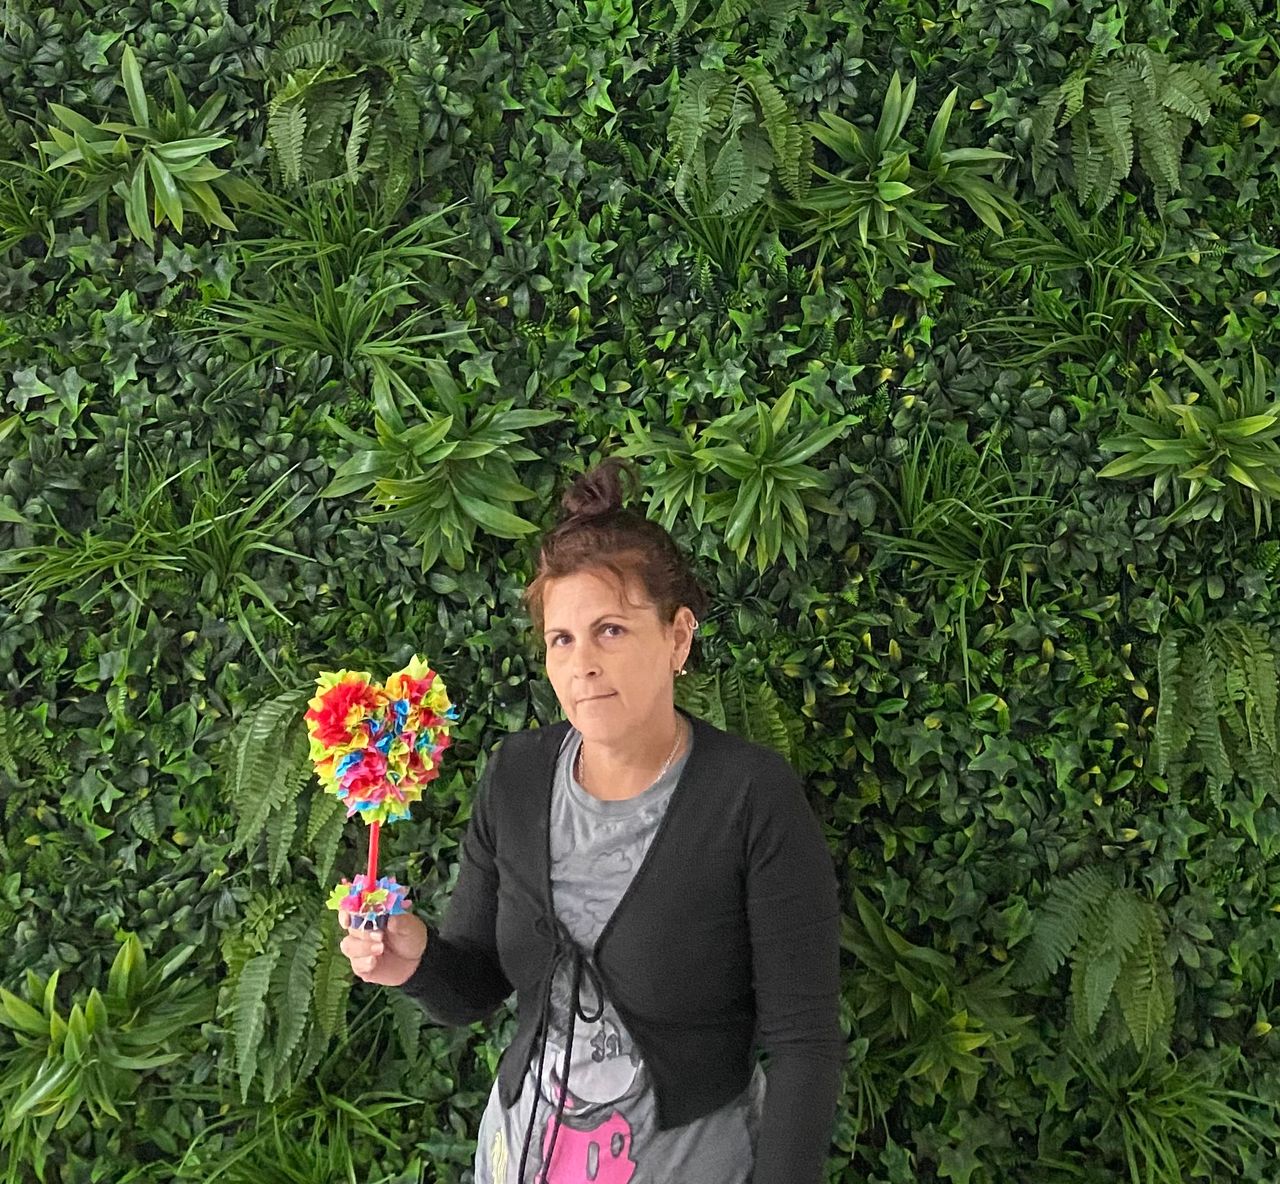
Y así me quedó ,bien bonito , espero les guste , hasta otra publicación,👋
And that's how it was, very nice, I hope you like it, even another post, 👋
     Gracias 🙏 por leer y comentar mi post.
      Thank you 🙏 for reading and commenting on my post.
Todas las fotos son de mi auditoria especialmente las tomé para esta publicación con mi teléfono 📱 IPHONE.11 y el texto fue traducido al inglés por el traductor Deepl.link.
All the photos are from my audit, especially I took them for this publication with my phone 📱 IPHONE.11 and the text was translated into English by the translator Deepl.link.