
Feliz domingo bella familia, espero se encuentren bien, hoy voy a compartir con ustedes en mi hermosa comunidad de Hive diy, un lindo posa taza con motivo de navidad, es muy sencillo de hacer y con muy poco material, con retazo de tela y fieltro. Me gusta estas fechas de sembrinas, ya que son momentos para compartir en familia, para decorar el hogar con motivos navideños, y es muy propicio para aprovechar de realizar nuestros detalles de navidad y compartirlo con todos ustedes, entre otros. Comencemos.
Happy Sunday beautiful family, I hope you are well, today I will share with you in my beautiful community of Hive diy, a nice cup holder with Christmas motif, it is very simple to make and with very little material, with scraps of fabric and felt. I like these dates of Christmas, as they are times to share with family, to decorate the home with Christmas motifs, and is very conducive to take advantage of making our Christmas details and share it with all of you, among others. Let's start.

Español:
Materiales:
- Retazo de tela, uno color rojo y el otro beige.
- fieltro verde.
- 1 cinta blanca tela raso de 3 cm de ancho.
- Piedritas decorativas.
- 1 barra de silicon.
- Hilo.
Aguja. - Tijera.
- Lápiz.
- Regla.
English:
Materials:
- Piece of cloth, one red and the other beige.
- green felt.
- 1 white satin ribbon 3 cm wide.
- Decorative stones.
- 1 silicon stick.
- Thread.
Needle. - Scissors.
- Pencil.
- Ruler.


Español:
Paso 1:
- Tomamos la tela beige, dibujamos y recortamos un círculo de 15 cm de diámetro, y otro en la tela roja, pero más pequeño de 14 cm de diámetro, luego colocamos el círculo rojo encima del beige dejando 1 cm fuera del borde, y procedemos a coser.
English:
Step 1:
- We take the beige fabric, draw and cut out a circle of 15 cm in diameter, and another one in the red fabric, but smaller of 14 cm in diameter, then we place the red circle on top of the beige one leaving 1 cm outside the edge, and proceed to sew.

Español:
Paso 2:
- Ahora cortamos una tira de fieltro en forma circular con 3 cm de ancho, luego lo colocamos encima del círculo de nuestra base del posa taza tomando en cuenta el tamaño de la base, después unimos las dos puntas y cosemos, la colocamos encima para coser por todo el alrededor, ahora cosemos todo el borde circular del fieltro junto con la tela roja.
English:
Step 2:
- Now we cut a strip of felt in a circular shape with 3 cm wide, then we place it on top of the circle of our cup holder base taking into account the size of the base, then we join the two ends and sew, we place it on top to sew all around, now we sew all the circular edge of the felt together with the red fabric.


Español:
Paso 3:
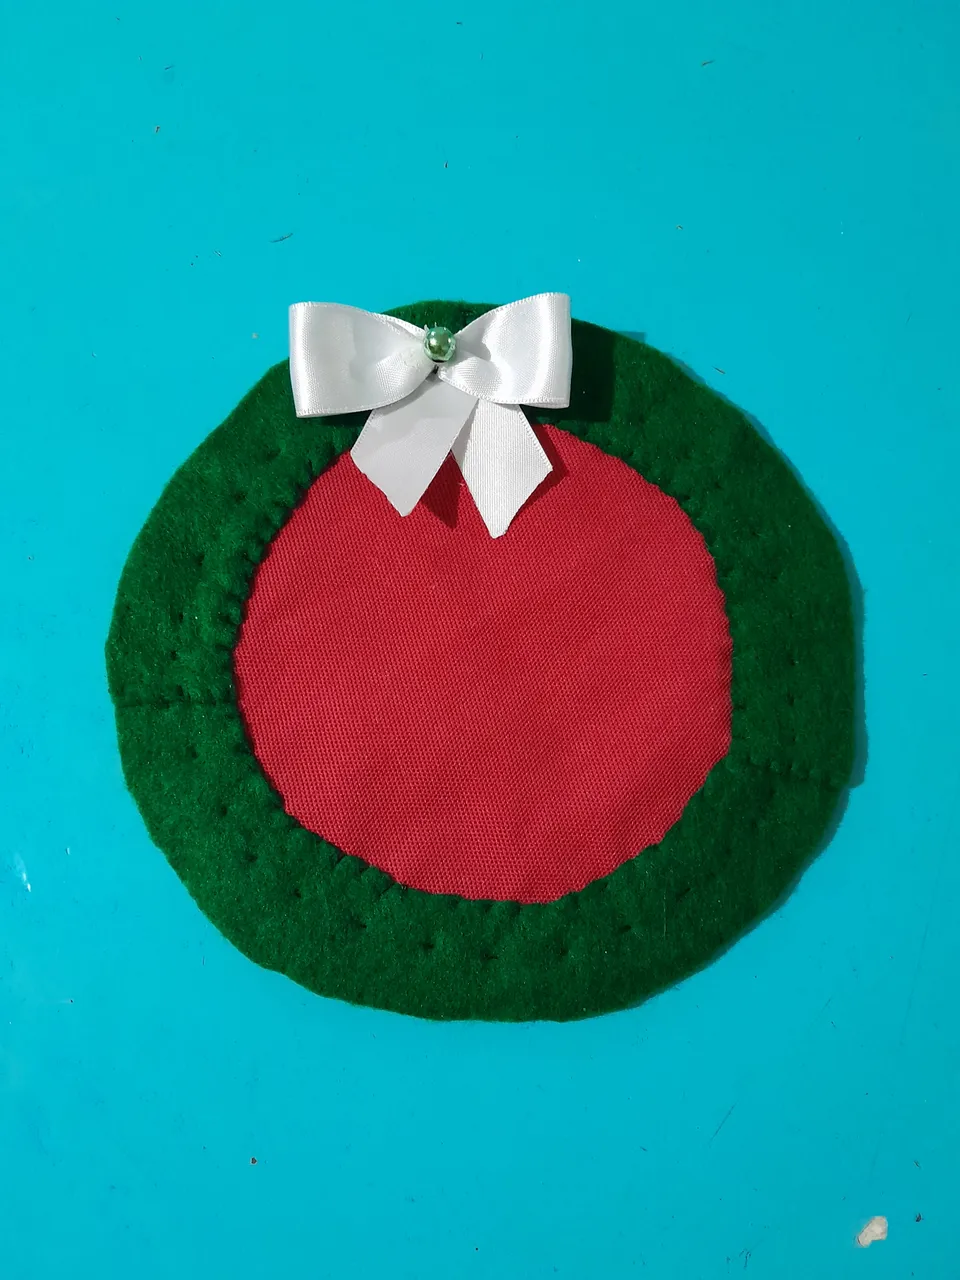
- Ahora tomamos 14 cm de cinta blanca, doblamos las 2 puntas hacia el centro, luego cosemos con 3 puntadas, álamos el hilo y le damos 3 vueltas para sellar la costura, pegamos con silicon caliente la perlita decorativa, cortamos y pegamos 2 trocitos de cinta debajo del lazo, recortando las puntas en forma rectangular, así se le da un mejor acabado al lazo, terminamos pegando el lazo en un borde de nuestro paso taza o posa vasos como ustedes lo prefieran utilizar.
English:
Step 3:
- Now we take 14 cm of white ribbon, we fold the 2 ends towards the center, then we sew with 3 stitches, we pull the thread and we give 3 turns to seal the seam, we glue with hot silicon the decorative pearlite, we cut and glue 2 pieces of ribbon under the ribbon, cutting the ends in a rectangular shape, so it gives a better finish to the ribbon, we finish by gluing the ribbon on the edge of our cup step or cup holder as you prefer to use it.
Este es mi resultado final, nos vemos en la próxima publicación, muchos saludos.
This is my final result, see you in the next publication, best regards.


Todas las fotos son de mi autoria y editadas con Canva. Traductor: DeepL Translate.
All photos are my own and edited with Canva. Translator: DeepL Translate.
