Hola mi bella gente, sean todos bienvenidos a mi blog, encantada de estar aquí con todos ustedes y mostrarle mi nueva creatividad, un soporte para pistola de silicon. Lo vi en casa de una amiga que se lo habían regalado, cuando lo vi me pareció genial y muy útil y decidí hacer uno para mi, parecido pero no igual si no a mi estilo, algo diferente y quise mostrárselo a ustedes. Espero les guste.
Hello my beautiful people, welcome to my blog, I'm glad to be here with you all and show you my new creativity, a silicone gun holder. I saw it at a friend's house who had been given it as a gift, when I saw it I thought it was great and very useful and I decided to make one for me, similar but not the same but in my style, something different and I wanted to show it to you. I hope you like it.

Español:
Materiales:
- 1 trozo de cartón de 26 x 15 cm.
- 1 cartulina verde de 20 x 30 cm.
- Foami amarillo con y sin escarcha.
- Cartulina doble faz metalizada.
- 1 tubo de cartón, la altura de tu preferencia, la mía es de 11 cm.
- Pistola de silicon.
- Lápiz.
- Tijera.
- Regla.
English:
Materials:
- 1 piece of cardboard of 26 x 15 cm.
- 1 green cardboard of 20 x 30 cm.
- Yellow foami with and without frosting.
- Double-sided metallized cardboard.
- 1 cardboard tube, the height of your preference, mine is 11 cm.
- Silicone gun.
- Pencil.
- Scissors.
- Ruler.


Español:
Paso 1:
- Comenzamos, pegando con silicon el cartón de la cartulina verde, luego con la tijera hacemos un corte en cada punta de la cartulina, para cuando doblemos la cartulina hacia atrás se nos haga mas fácil al momento de pegarlas. Ahora procedemos a pegar las pestañas de la la cartulina detrás del cartón.
English:
Step 1:
- We begin by gluing the cardboard to the green cardboard with silicone, then with the scissors we make a cut on each end of the cardboard, so that when we fold the cardboard backwards it will be easier to glue them. Now we proceed to glue the tabs of the cardboard behind the cardboard.

Español:
Paso 2:
- Luego, cortamos 1 trocito de foami amarillo de 12 x 12 cm, y 1 de cartón de 10 x 12, tomamos el cartón y con la ayuda de una navaja o cuchillo cortamos por la mitad, con mucho cuidado de no cortarlo completamente, para así doblarlo y dejarlo como en forma de pirámide, y pegarlo con silicon en la mitad de nuestra base, luego forramos pegando con el foami amarillo.
English:
Step 2:
- Then, we cut 1 piece of yellow foami of 12 x 12 cm, and 1 of cardboard of 10 x 12, we take the cardboard and with the help of a razor or knife we cut it in half, being very careful not to cut it completely, in order to fold it and leave it as a pyramid shape, and glue it with silicone in the middle of our base, then we cover it by gluing it with the yellow foami.

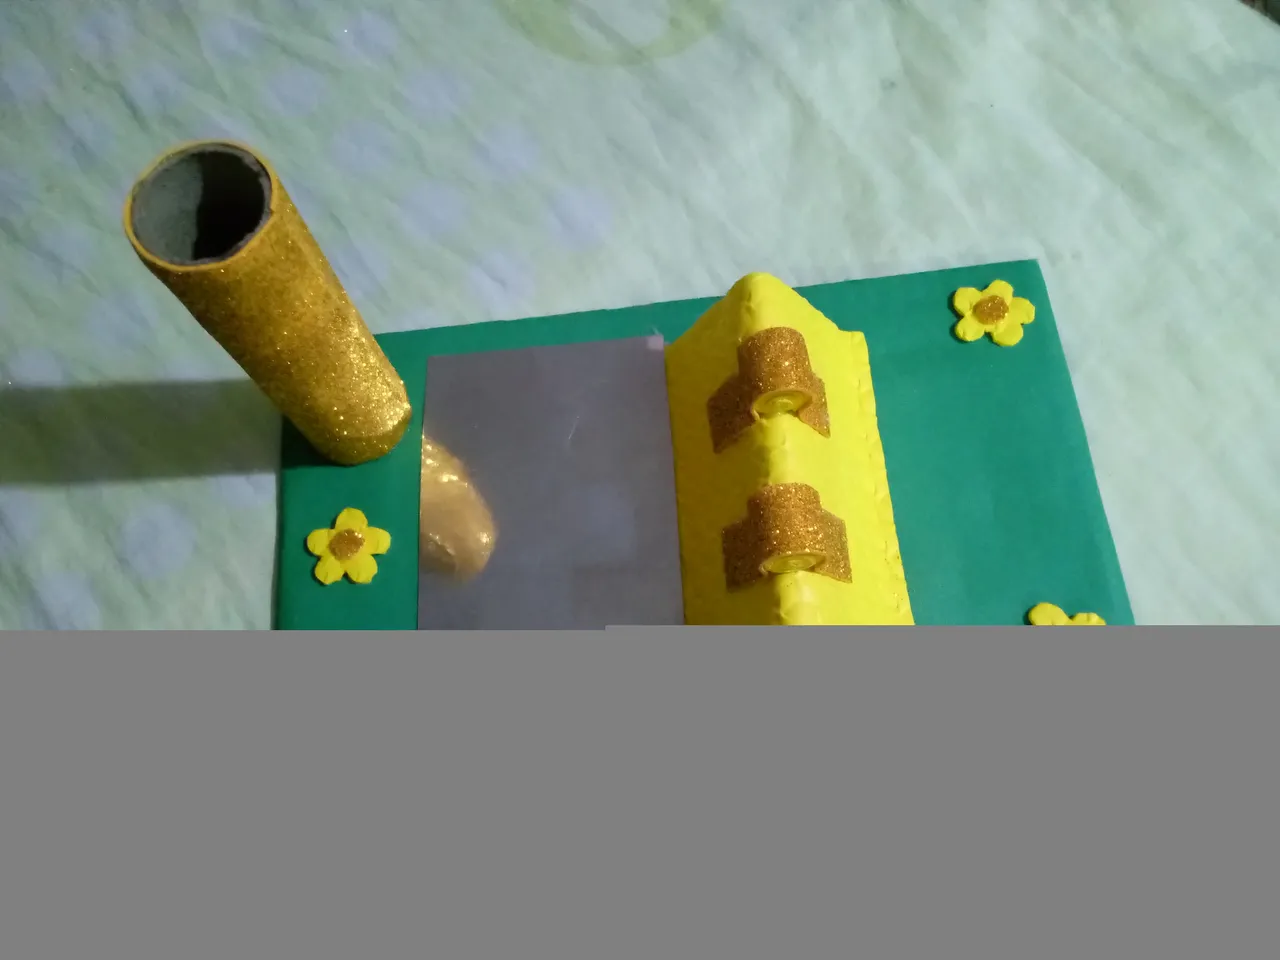
Español:
Paso 3:
- Después, recortamos 4 tiritas de foami amarillo y escarchado, con las tiritas amarillas las enrollamos y pegamos mientras enrollamos, ahora tomamos la medida de la pistola de silicon marcamos con el lápiz, y pegamos los 2 rollitos uno en cada marca. Esto vendría siendo el soporte dela pistola para que no se voltea hacia los lados.
English:
Step 3:
- Next, we cut out 4 strips of yellow and frosted foami, with the yellow strips we roll them up and glue them while rolling, now we take the measure of the silicone gun, we mark with the pencil, and we glue the 2 rolls one in each mark. This would be the support of the gun so that it does not turn sideways.

Español:
Paso 4:
- Seguidamente, pegamos la tirita de foami escarchado cubriendo el rollito de foami para que quede mas estable, luego cortamos y pegamos una lamina de la cartulina metalizada a la otra mitad de la base, después forramos el tubo de cartón con el foami escarchado, y lo pegamos en una esquina, seguida de la cartulina metalizada, luego para terminar realizamos 4 flores del mismo foami y la pegamos a la base, como un detalle decorativo para nuestro hermoso soporte de pistola de silicon.
English:
Step 4:
- Next, we glue the strip of frosted foami covering the foami roll to make it more stable, then we cut and glue a sheet of metallic cardboard to the other half of the base, then we line the cardboard tube with the frosted foami, and glue it in a corner, followed by the metallic cardboard, then to finish we make 4 flowers of the same foami and glue it to the base, as a decorative detail for our beautiful silicone gun support.
Este es resultado de mi bello soporte, espero les haya gustado, saludos y bendiciones.
This is the result of my beautiful support, I hope you liked it, greetings and blessings.