Hola, buenas tardes mis amigos creativos, que conformamos esta hermosa y amada comunidad Hivediy, reciban de mi parte un cordial saludo y espero que estén muy bien, Dios los bendiga a todos. Como siempre hoy quiero compartir con ustedes, este divertido tutorial de como hacer su propio porta-lapices, en esta ocasión yo lo hice con la figura de una rana en anime, además de ser muy lindo, es bastante útil, a la hora de organizar nuestro sitio de trabajo, y lo mejor es que está hecho con materiales muy económicos que podemos conseguir fácilmente. Este proyecto lo elaboré especialmente para regalárselo a mi hija. No esperemos más, manos a la obra y empecemos con este divertidísimo paso a paso, seguro les va a gustar.
Hello, good afternoon my creative friends, who make up this beautiful and beloved Hivediy community, receive a cordial greeting from me and I hope you are very well, God bless you all. As always, today I want to share with you this fun tutorial on how to make your own pencil holder, this time I made it with the figure of an anime frog, besides being very cute, it is quite useful when organizing our workstation, And the best thing is that it is made with very cheap materials that we can easily get. I did this project especially to give it to my daughter. Let's not wait any longer, get to work and start with this hilarious step by step, I'm sure you'll like it.

Para elaborar este bonito porta-lapices, con la figura de una rana, vamos a necesitar los siguientes materiales y herramientas.
Materiales y Herramientas.
*1 cilindro de cartón.
*Foamis de diferentes colores y texturas.
*1 bola de anime.
*1 tijera.
*1 lápiz.
*Pinturas al frío de varios colores y pinceles.
*Pistola de silicona.
*Barra de silicona.
*1 palillo de altura.
Materials and Tools.
*1 cardboard cylinder.
*Foams of different colors and textures.
*1 anime ball
*1 scissors.
*1 pencil.
*Cold paints of various colors and brushes.
*Glue gun.
*Silicone bar.
*1 height stick.

Comencemos con el paso a paso.
Let's start with the step by step.

Paso 1. Para comenzar a elaborar este bonito y practico porta-lapices, lo primero que vamos a hacer es, en un foami de color azul, y con ayuda de un lápiz, marcamos la medida del cilindro de cartón, y luego lo recortamos con se muestra en las imágenes.
Step 1. To start making this beautiful and practical pencil holder, the first thing we are going to do is, in a blue foami, and with the help of a pencil, we mark the measurement of the cardboard cylinder, and then we cut it as shown in the images.

Paso 2. En este paso vamos a cubrir el cilindro de cartón, y lo vamos a hacer pegándolo con silicona caliente para que quede bien pegado, como se ve en las imágenes.
Step 2. In this step we are going to cover the cardboard cylinder, and we are going to do it by gluing it with hot silicone so that it is well glued, as seen in the images.

Paso 3. Ahora es este paso, vamos a tomar un foami de textura ondulada y marcamos dos hojas grandes, luego con ayuda de una tijera la recortamos, esta seria para pegarla en la parte de abajo y en la parte de arriba del cilindro de cartón.
Step 3. Now is this step, we are going to take a foami with a wavy texture and mark two large sheets, then with the help of scissors we cut it, this would be to paste it on the bottom and on the top of the cylinder cardboard.

Paso 4. En este paso tomamos unas de las piezas que recortamos anteriormente, marcamos un círculo en el centro y con ayuda de un cutter lo cortamos, esta pieza seria para pegarla en la parte de arriba del cilindro de cartón, para poder introducir los lapices en la parte de adentro de el porta-lapices.
Step 4. In this step we take some of the pieces that we cut out earlier, we mark a circle in the center and with the help of a cutter we cut it, this piece would be to stick it on top of the cardboard cylinder, to be able to insert the pencils inside the pen holder.

Paso 5. Ya en este paso, procedemos a pegar las piezas en la parte de arriba y abajo del cilindro de cartón, dándole forma a el porta-lapices, como se muestra en las imágenes.
Step 5. Already in this step, we proceed to glue the pieces to the top and bottom of the cardboard cylinder, shaping the pencil holder, as shown in the images.

Paso 6. En este paso tomamos la bola de anime, y con una pintura al frío y un pincel la pintamos, esta seria el cuerpo de la rana que vamos a pegar en el porta-lapices.
Step 6. In this step we take the anime ball, and with cold paint and a brush we paint it, this would be the body of the frog that we are going to stick in the pencil holder.

Paso 7. Ahora en este paso, vamos a tomar foamis de varios colores y texturas, y marcamos las piezas en sus respectivos colores, y luego las recortamos, estas piezas son para formar la rana para el porta-lapices.
Step 7. Now in this step, we are going to take foamis of various colors and textures, and mark the pieces in their respective colors, and then cut them out, these pieces are to form the frog for the pencil holder.

Paso 8. En este paso vamos a utilizar la pistola de silicona, para pegar las piezas a la bola de anime, para formar la rana y luego con pintura al frío con los colores negro, rojo y verde y un pincel pintamos los ojos y boca de la rana y así finalizamos con la elaboración de la rana.
Step 8. In this step we are going to use the silicone gun to glue the pieces to the anime ball, to form the frog and then with cold paint with the colors black, red and green and a brush we paint the eyes and mouth of the frog and thus we finish with the elaboration of the frog.
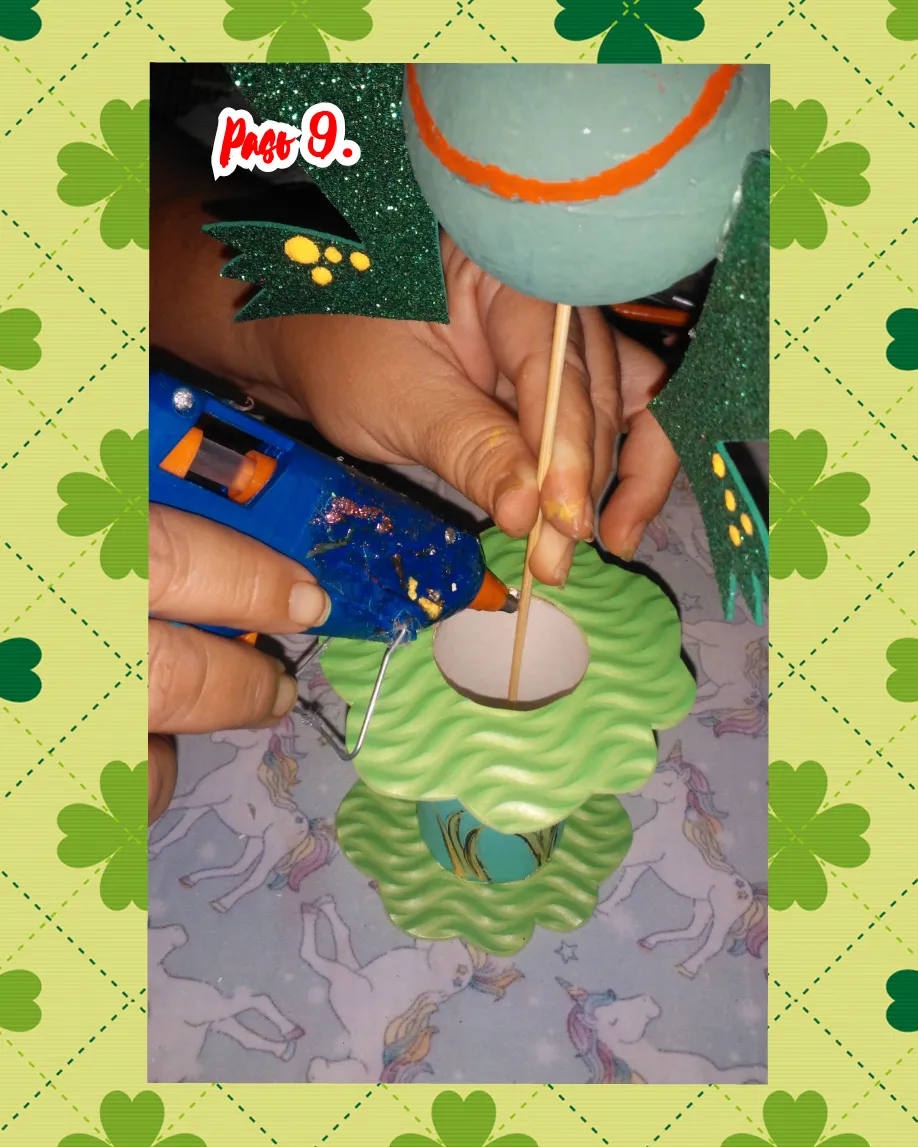
Paso 9. Ya en este paso tomamos un palillo de altura que donde está la rana ya terminada, y con silicona caliente lo pegamos en la parte de adentro del porta-lápices para que se vea como que estuviera saltando.
Step 9. Already in this step we take a tall stick where the frog is already finished, and with hot silicone we stick it inside the pencil holder so that it looks like it jumps.

Ya hemos finalizado todos los pasos, y este es el resultado este bonito porta-lapices con la figura de una rana elaborada en anime, ideal para tener organizado nuestros lapices y mantener nuestro escritorio siempre en orden, y para que los niños también tengan su espacio ordenado. Espero les hayan gustado, gracias por ver hasta el final, nos vemos pronto con otra idea creativa. Dios los bendiga. HASTA LUEGO.
We have already finished all the steps, and this is the result of this beautiful pencil holder with the figure of a frog made in anime, ideal to have our pencils organized and to keep our desk always in order, and for the children also to keep your tidy space. I hope you liked it, thanks for watching until the end, see you soon with another creative idea. God bless you. SEE YOU LATER.
Las fotos son de mi propiedad y editadas con la aplicación Collage Maker.
Photos are owned by me and edited with Collage Maker app.