Hola muy buenas tardes, amigos creativos que formamos esta hermosa comunidad Hivediy, deseo que se encuentren muy bien, que es lo más importante, y que en el día de hoy, tengan muchas bendiciones y lo más importante, mucha paz. El tutorial que les traigo hoy es muy divertido, se trata de decorar una diadema con tela de vinil, es muy fácil y sencillo de hacer, esta diadema la hice especialmente para regalársela a mi niña, y ella tan emocionada que estaba que le encanto como le quedo su diadema puesta en su pelo. Ahora manos a la obra, que vamos a comenzar con el paso a paso, seguro les va a gustar.
Hello, very good afternoon, creative friends who make up this beautiful Hivediy community, I wish you are very well, which is the most important thing, and that today, have many blessings and most importantly, much peace. The tutorial that I bring you today is very fun, it is about decorating a headband with vinyl fabric, it is very easy and simple to do, I made this headband especially to give it to my girl, and she was so excited that she loved how Her headband was left in her hair. Now let's get to work, we are going to start with the step by step, surely you will like it.

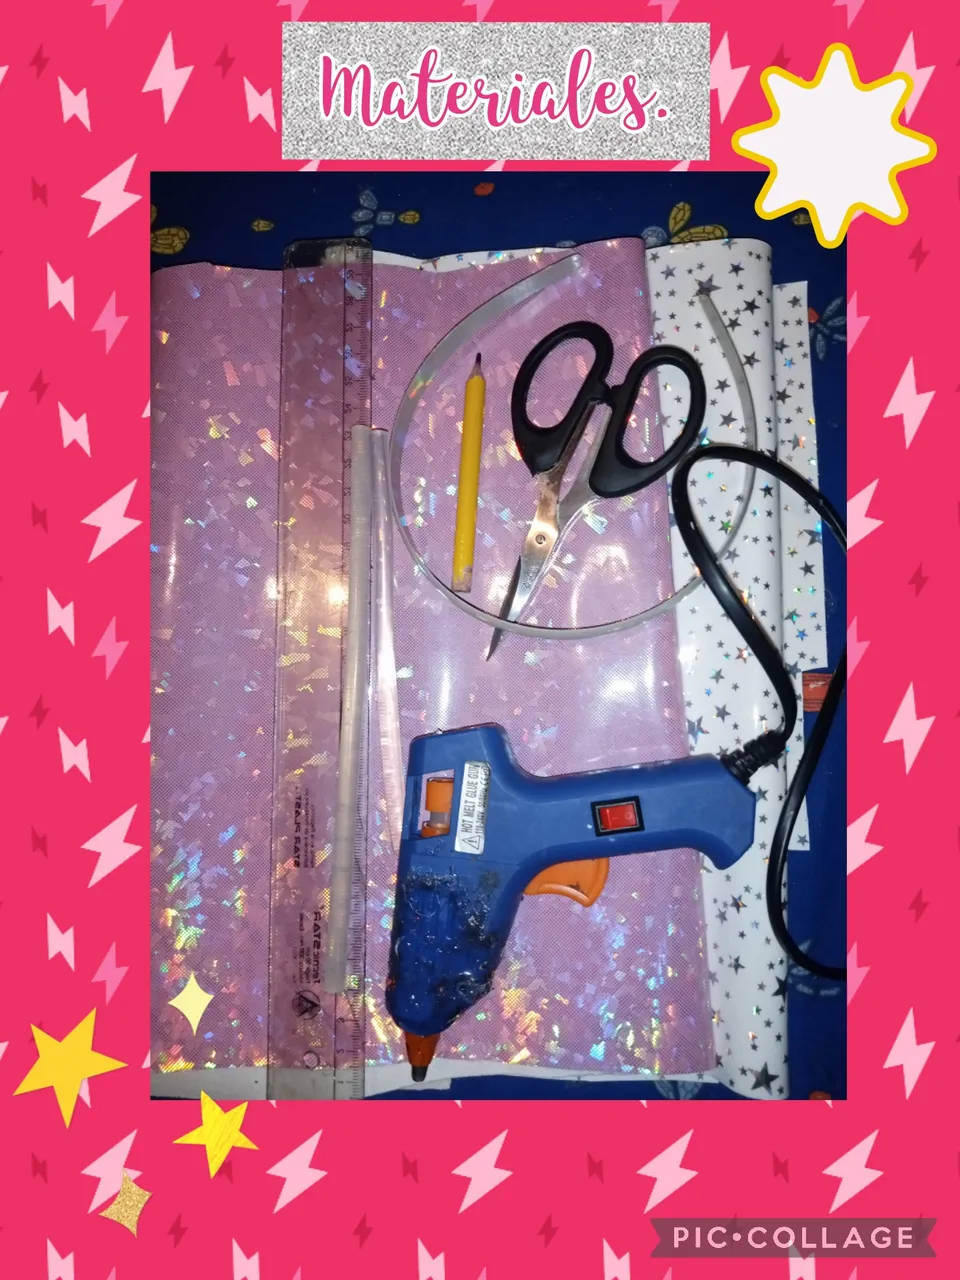
Para decorar esta diadema vamos a utilizar los siguientes materiales y herramientas.
*Tela de vinil estampada y unicolor.
*Cintillo de plástico.
*1 tijera.
*1 lápiz.
*1 regla métrica.
*1 Pistola de silicona caliente.
*Barras de silicona.
To decorate this headband we are going to use the following materials and tools.
*Printed and unicolor vinyl fabric.
*Plastic headband.
*1 scissors.
*1 pencil.
*1 metric ruler.
*1 Hot glue gun.
*Silicone bars.
Vamos a comenzar con el paso a paso para decorar esta bonita diadema con tela de vinil.
Let's start with the step by step to decorate this cute headband with vinyl fabric.

Paso 1. Para comenzar a decorar esta diadema, lo primero que vamos a hacer es tomar la tela de vinil del color que vamos a utilizar y con ayuda de un lápiz, vamos a marcar las medidas de 1,5 centímetros de ancho y vamos a cortar estas tiras con la tijera, luego tomamos el cintillo de plástico y lo comenzamos a cubrir desde la punta, mientras lo vamos pegando con silicona caliente, hasta llegar hasta la otra punta ya cubierta completamente, les muestro las imágenes.
Step 1. To start decorating this headband, the first thing we are going to do is take the vinyl fabric of the color that we are going to use and with the help of a pencil we are going to mark the measurements of 1.5 centimeters wide and we are going to to cut these strips with scissors, then we take the plastic headband and begin to cover it from the end, while we stick it with hot silicone, until we reach the other end, already completely covered, I show you the images.

Paso 2. En este paso vamos a tomar una hoja de papel de uso reciclable y vamos a dibujar los patrones para hacer unos lazos, estos lazos es para decorar la diadema, dibujamos los lazos de diferentes tamaños, y luego con la tijera recortamos los patrones, para después marcarlos en la tela de vinil, que haya seleccionado y finalmente los recortamos, vea las imagenes.
Step 2. In this step we are going to take a sheet of recyclable paper and we are going to draw the patterns to make some bows, these bows are to decorate the headband, we draw the bows of different sizes, and then with the scissors we cut out the patterns, to later mark them on the vinyl fabric, which you have selected and finally we cut them out, see the images.

Paso 3. Ya recortadas todas las piezas, ahora comenzamos a formar los lazos de tela de vinil, de diferentes tamaños y lo vamos a hacer de la siguiente manera, doblamos las puntas hacia el centro y luego lo pegamos con silicona caliente para que quede bien pegado, y así ya formado los tres lazos de tela de vinil, comenzamos a pegarlos en la diadema, en un costado, lo pegamos de la siguiente manera desde el más grande y finalizamos pegando el más pequeño que va a quedar en la parte de arriba, y para finalizar, cortamos una tira muy fina de la misma tela de vinil y la pegamos en el centro de los lazos para unirlos hacia abajo de la diadema y así quedara más fuerte, vea las imágenes.
Step 3. Once all the pieces have been cut, now we begin to form the loops of vinyl fabric, of different sizes and we are going to do it as follows, we fold the ends towards the center and then we glue with hot silicone so that it is well glued, and thus the three vinyl fabric bows are formed, we begin to paste them on the headband, on one side, we paste it as follows from the largest one and we end up gluing the smallest one that will remain on the top , and to finish, we cut a very thin strip of the same vinyl fabric and glue it in the center of the bows to join them to the bottom of the headband and that way it will be stronger, see the images.

Paso 4. Ahora con la misma tela de vinil, vamos a hacer una rosa, y la vamos a hacer de la siguiente manera, marcamos y recortamos un círculo, luego lo vamos a cortar en forma de espiral, para después ir enrollándola de afuera hacia adentro y formar la rosa, esta rosa va a ir pegada en el centro del lazo de tela de vinil, vea las imágenes.
Step 4. Now with the same vinyl fabric, we are going to make a rose, and we are going to do it in the following way, we mark and cut out a circle, then we are going to cut it in a spiral shape, and then We are going to roll it from the outside in and form the rose. We are going to stick this rose in the center of the vinyl fabric bow, see the images.

Hemos llegado al final de todos los pasos, y este es el resultado una bonita diadema decorada con tela de vinil, ideal para hacer un regalo que está muy espectacular para ese momento, gracias por visitar mi blog y leer hasta el final. Muchas bendiciones y que pasen un buen día.
We have reached the end of all the steps, and this is the result, a beautiful headband decorated with vinyl fabric, ideal to make a very spectacular gift for that moment, thanks for visiting my blog and reading until the end. Many blessings and have a nice day.
Las fotos fueron tomadas con mi teléfono androide TECNO SPARK 6GO, y editadas con la aplicación PIC-COLLAGE. Traducido el texto con el traductor español-ingles de Google.
The photos were taken with my TECNO SPARK 6GO android phone, and edited with the PIC-COLLAGE application. He translated the text with Google's Spanish-English translator.