

[Esp]
¡Saludos estimada comunidad!
Llevaba algunos días trabajando en este proyecto, no fue nada fácil, es algo difícil trabajar cortes de alta dificultad sin patrones solo con una idea en la mente y sin ser modista o costurera, yo solo soy aficionada, me encanta coser e inventar mis propias prendas de vestir. Cortar blusas no es algo sencillo, me hubiera ahorrado mucho tener un patrón pero no conseguí revistas si quiera para que me ayudara un poco con las medidas.
Al principio trataba de hacer otro modelo de blusa y llevaba cierre, pero el resultado fue nefasto, afortunadamente días después pude volver a retomar el proyecto, descocerlo y recuperar la tela para hacer la blusa que estoy mostrando hoy.
He realizado varias blusas cuello alto, pero han sido con telas strech, se ajustan al cuerpo sin ningún problema, el problema es que, con telas como la que usé hoy, el corte, la talla y la costura puede ser muy dificultosa.
Iré contando a través del paso a paso cómo me fui ingeniando. Esta es una tela muy fina y algo costosa, es una pena dejarla perder así que lo importante es no darse por vencido y me gustó el resultado obtenido.
Espero les guste, esta idea.
! [English version]
Greetings dear community!
I had been working on this project for a few days, it was not easy at all, it is difficult to work with high difficulty cuts without patterns, just with an idea in mind and without being a dressmaker or seamstress, I'm just an amateur, I love sewing and inventing my own garments. Cutting blouses is not an easy thing, it would have saved me a lot to have a pattern but I didn't get magazines to help me a little with the measurements.
At first I tried to make another model of blouse and it had a zipper, but the result was disastrous, fortunately days later I was able to resume the project, unpick it and recover the fabric to make the blouse I'm showing today.
I have made several turtleneck blouses, but they have been with stretch fabrics, they fit the body without any problem, the problem is that, with fabrics like the one I used today, cutting, sizing and sewing can be very difficult.
I'll be telling you step by step how I went about figuring it out. This is a very fine and somewhat expensive fabric, it is a shame to let it go to waste so the important thing is not to give up and I liked the result obtained.
I hope you like this idea.

Materiales / Materials

| Spanish | English | |
| Tela: Rayón colombiano | Fabric: Colombian rayon | |
| Hilo, tijera | Thread, scissors | |
| Máquina de coser | Sewing machine |
Paso a paso / Step by Step
Step 1️⃣/ Paso 1️⃣
 |  |

[Esp]
Para el corte de la talla usé una de mis blusas. Se necesita un rectángulo de la medida de la abertura del cuello y dos tiras largas para hacer el dobladillo de las mangas y una tira larga para el dobladillo del cuello abierto.
Luego de hacer el corte de la blusa, se toma el centro y se corta una abertura del largo de tu cuello al centro de tu pecho.
! [English version]
For cutting the size I used one of my blouses. You need a rectangle the size of the neck opening and two long strips to make the hem of the sleeves and one long strip for the hem of the open neck.
After making the cut of the blouse, you take the center and cut an opening the length of your neck to the center of your chest.
Step 2️⃣/ paso 2️⃣
 |  | |
 |  |
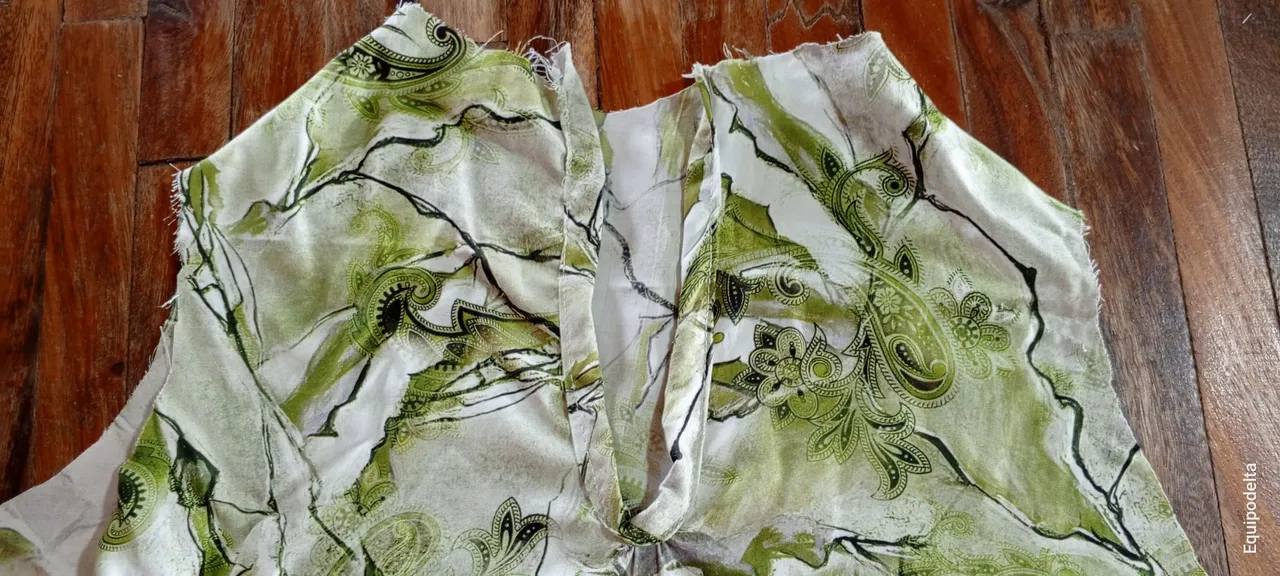
[Esp]
Cerramos la blusa por los laterales con un zig zag y luego con una recta. De la misma forma, cerramos la parte de los hombros.
! [English version]
Close the blouse at the sides with a zig zag and then with a straight stitch. In the same way, we close the shoulder part.
Step 3️⃣/ paso 3️⃣
 |  |
[Esp]
Cosemos un dobladillo en el cuello, es algo muy similar a coser un sesgo de tela.
! [English version]
We sew a hem on the neck, it is very similar to sewing a bias binding.
Step 4️⃣/ paso 4️⃣
 |  | |
 |  | |
 |  |
[Esp]
Tomamos la medida del cuello y cosemos, recomiendo planchar las telas y bastear antes de coser para evitar errores.
Ahora cosemos un dobladillo en cada lado de las mangas.
! [English version]
I recommend ironing the fabrics and baste before sewing to avoid mistakes.
Now we sew a hem on each side of the sleeves.
Step 5️⃣/ paso 5️⃣
 |  |


[Esp]
Abrimos un poco la costura de los laterales a unos 8 centímetros y cosemos una recta fijando cada lado, esta abertura nos servirá para que podamos colocarnos la blusa sin problemas de que nos quede demasiado ajustada, ya que no lleva cierre.
Luego cosemos el ruedo y con ello terminamos nuestra pieza.
Aprovechamos entonces para la presentación, planchar la blusa y como pueden ver en la portada, me quedó muy bien. Espero les guste. La tela es linda, fresca y delicada.
! [English version]
We open a little the seam of the sides to about 8 centimeters and sew a straight seam fixing each side, this opening will serve us so that we can put on the blouse without problems that we are too tight, since it does not have a zipper.
Then we sew the hem and with this we finish our piece.
Then we take the opportunity for the presentation, iron the blouse and as you can see on the cover, I got it very well. I hope you like it. The fabric is nice, fresh and delicate.


Créditos / Credits

💜💜💜

![]() 👉
👉  👉
👉 ![]() 👉
👉 ![]() 👉
👉 
Here / Bríndame un café
