
💠💠💠💠💠💠💠💠💠💠💠💠💠
Hola mis queridos nietecitos de #hive, reciban de parte de esta abuelita una lluvia de bendiciones, espero que tengan un feliz y productivo fin de semana, sobre todo en unión familiar y construyendo en este ecosistema maravilloso llamado hive.
Hoy les traigo un post de un tutorial para mostrarles como realice una linda pinza para el cabello, elaborado en foami escarchado, en esta oportunidad trabaje con los colores azul y amarillo, y como siempre les traigo la lista de materiales, que son muy pocos, las fotos del paso a paso y por supuesto que las fotos del trabajo ya realizado, las fotos que me tomo mi bella flor Lupita, espero que les guste.
💠 Materiales 💠
💠 Foami escarchado azul claro.
💠 Foami escarchado amarillo.
💠 Silicón líquido.
💠 Pinza de cabello.
💠 Tijera.
💠 Lapicero.
💠 Regla.
💠 Cuchilla.
💠Paso a paso 💠
💠Paso 1:

Agarré primero el foami escarchado azul y con la regla y el lapicero y marque unas dos tiras de unos 20 cm de largo y 5 cm de ancho, luego con la tijera lo recorte.
💠 Paso 2:

Agarré una tira y con la cuchilla hice una pequeña marca en el centro, luego lo doblo a la mitad y le pongo un poco de silicón líquido para pegarlo solo por el borde.
💠 Paso 3:

Luego de que ya está pegado, tome la tijera y realice cortes de manera diagonal en toda la tira, esto lo hice en las dos tiras.
💠 Paso 4:


Apliqué un poco de silicón líquido por el borde, y lo fui enrollando poco a poco, luego repetí el procedimiento en la otra tira.
💠 Paso 5:
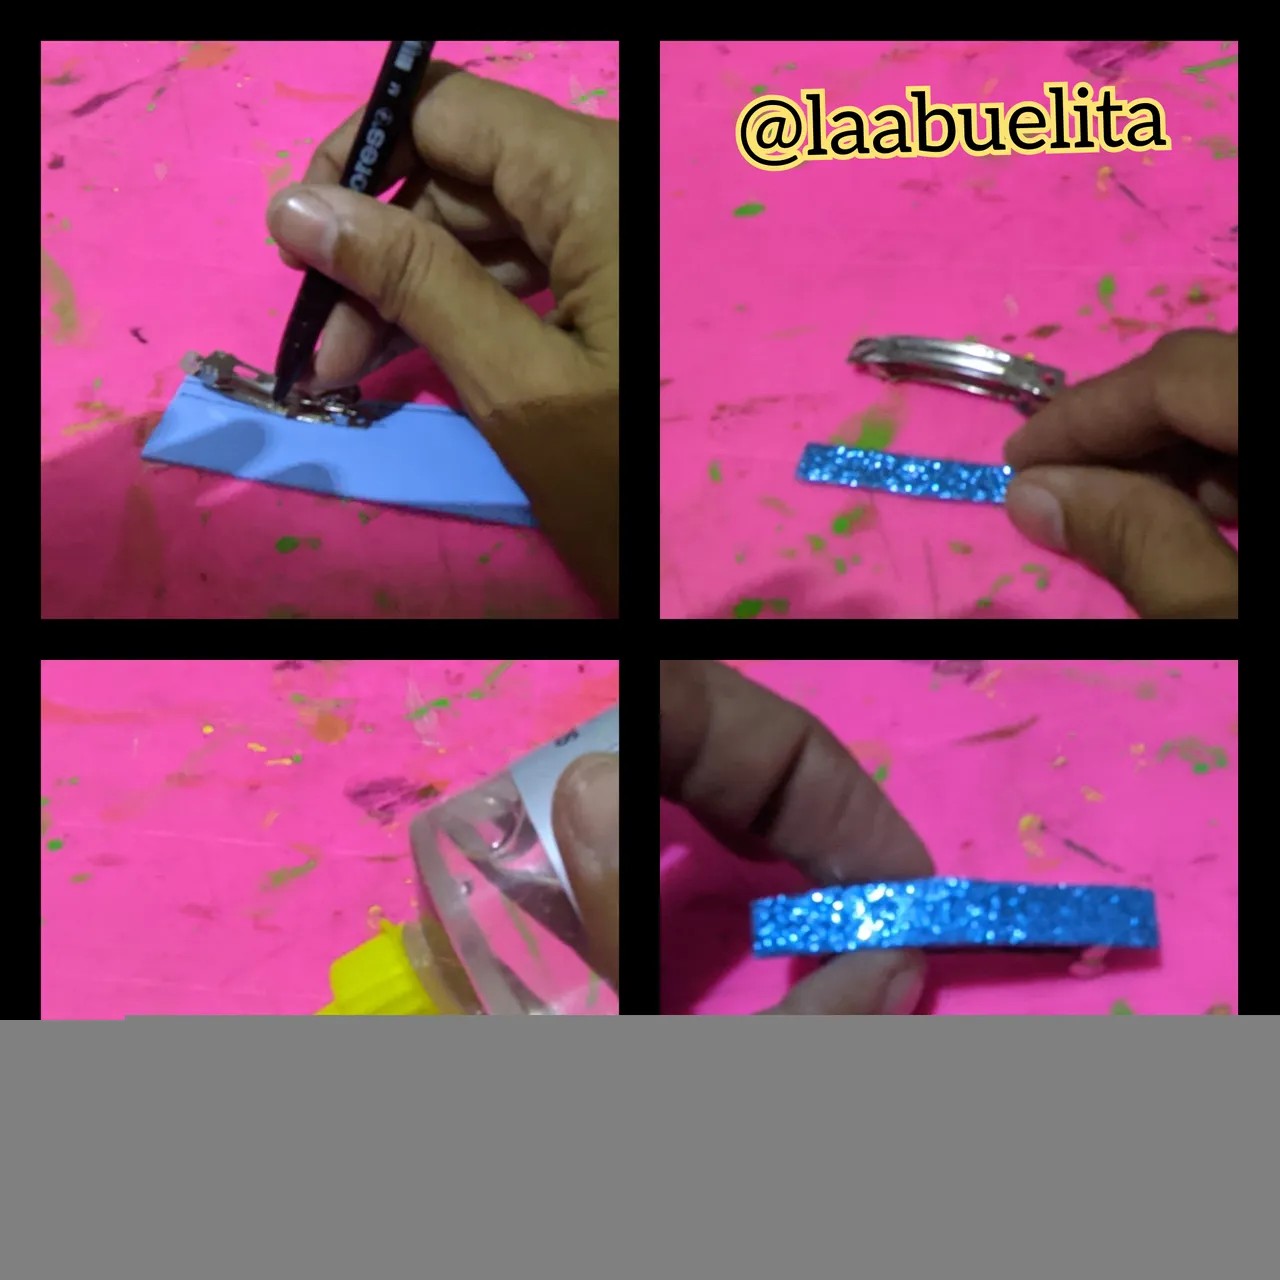
En otro pedacito de foami escarchado azul y marqué un rectángulo el cuál luego recorté y al que le aplicó silicón líquido y pegamos en el gancho.
💠 Paso 6:

Ahora tome las dos flores y le aplicamos un poco de silicón líquido en cada flor, luego lo pegué encima del gancho primero una y luego la otra al lado y dejamos secar.
💠 Paso 7:

En un trocito de foami escarchado amarillo dibuje una especie de detalle, recorte y con un poco de silicón líquido pegamos en ambos lados de las flores, y listo hemos terminado este hermoso gancho.
💠Fotos del resultado Final 💠

💠💠💠💠💠💠💠💠💠💠💠💠💠

💠💠💠💠💠💠💠💠💠💠💠💠💠

💠💠💠💠💠💠💠💠💠💠💠💠💠

💠💠💠💠💠💠💠💠💠💠💠💠💠

💠💠💠💠💠💠💠💠💠💠💠💠💠
¿Qué les pareció el resultado final? Espero que les haya gustado, sepan que lo hice con mucho amor y dedicación como todos los trabajos que hago para que puedan ver qué con poquitos materiales, esos que tenemos guardados por allí en la casa podemos realizar lindos detalles para usar, o para regalar, y al mismo tiempo que usamos el tiempo libre en algo de provecho.
Para este post use el traductor deepl versión gratis, y el programa polish que trae mi teléfono, con el que tomé todas las fotos de este post y son de mi propiedad.
💠Que Dios los bendiga a todos.💠

💠💠💠💠💠💠💠💠💠💠
💠ENGLISH💠
Hello my dear grandchildren of #hive, receive from this grandma a shower of blessings, I hope you have a happy and productive weekend, especially in family unity and building in this wonderful ecosystem called hive.
Today I bring you a post of a tutorial to show you how to make a nice hair clip, made in frosted foami, this time I worked with the colours blue and yellow, and as always I bring you the list of materials, which are very few, the photos of the step by step and of course the photos of the work already done, the photos that my beautiful flower Lupita took me, I hope you like it.
💠 Materials 💠
💠 Light blue frosted Foami.
💠 Yellow frosted foami.
💠 Liquid silicone.
💠 Hair clip.
💠 Scissors.
💠 Pencil.
💠 Ruler.
💠 Blade.
💠Step by step 💠
💠Step 1:
First I grabbed the blue frosted foami and with the ruler and pencil and marked out two strips about 20 cm long and 5 cm wide, then with the scissors I cut it out.
💠 Step 2:
I cut a strip and with the knife I made a small mark in the middle, then I folded it in half and put some liquid silicone on it to stick it only on the edge.
💠 Step 3:
After it is already glued, take the scissors and cut diagonally across the strip, I did this on both strips.
💠 Step 4:
I spread a little liquid silicone around the edge, and rolled it up a little at a time, then repeated the procedure on the other strip.
💠 Step 5:
On another little piece of blue frosted foami I cut out a rectangle which I then cut out and applied liquid silicone to and stuck on the hook.
💠 Step 6:
Now take the two flowers and apply some liquid silicone on each flower, then stick it on top of the hook first one and then the other one next to it and let it dry.
💠 Step 7:
On a small piece of yellow frosted foami draw a kind of detail, cut it out and with a bit of liquid silicone stick it on both sides of the flowers, and that's it, we have finished this beautiful hook.
💠Pictures of the final result 💠
💠💠💠💠💠💠💠💠💠💠💠
💠💠💠💠💠💠💠💠💠
What did you think of the final result? I hope you liked it, I made it with a lot of love and dedication as all the works I do so you can see that with little materials, those that we have stored around the house we can make nice details to use, or to give as gifts, and at the same time we use our free time in something useful.
For this post I used the free version of deepl translator, and the polish program that comes with my phone, with which I took all the photos in this post and they are my property.
💠God bless you all.