
Hola a todos mis nietecitos de #hive les mando un abrazo fuerte y grande cargado de muchas bendiciones a todos los miembros de este ecosistema, hoy regreso con otro trabajo de manualidades, ya que como estoy jubilada tengo bastante tiempo para hacer estás tareas manuales y que de paso me sirven para regalarle un detalle bonito a mi bella flor cuando venga de visita.
Hoy les traje un paso a paso de cómo podemos elaborar un lazo con forma de mariposa para nuestras princesas, que las harán lucir bellas, y lo mejor de todo que es fácil y rápido de hacer, y se puede hacer de cualquier color para que combine con todas las ropas.

🦋MATERIALES QUE USE🦋
🦋 Foami escarchado de color marrón.
🦋 Foami escarchado de color azul.
🦋 Silicón líquido.
🦋 Peineta.
🦋 Mostacillas.
🦋 Tijera.
🦋 Lápiz.
🦋 Gancho de ropa.
🦋 papel de reciclaje.
🦋Paso 1🦋
Primero en una hoja de cuaderno yo dibuje el patrón con el que voy a trabajar, y se ve en la foto, luego lo recorté.
Cuando ya tengo el patrón, lo puse encima del foami marrón y con el lápiz lo marqué y saque dos piezas del mismo tamaño y del mismo color.
🦋 Paso 2🦋
Cuando ya está dibujado agarre la tijera y recorté las dos piezas que había dibujado, es muy fácil.

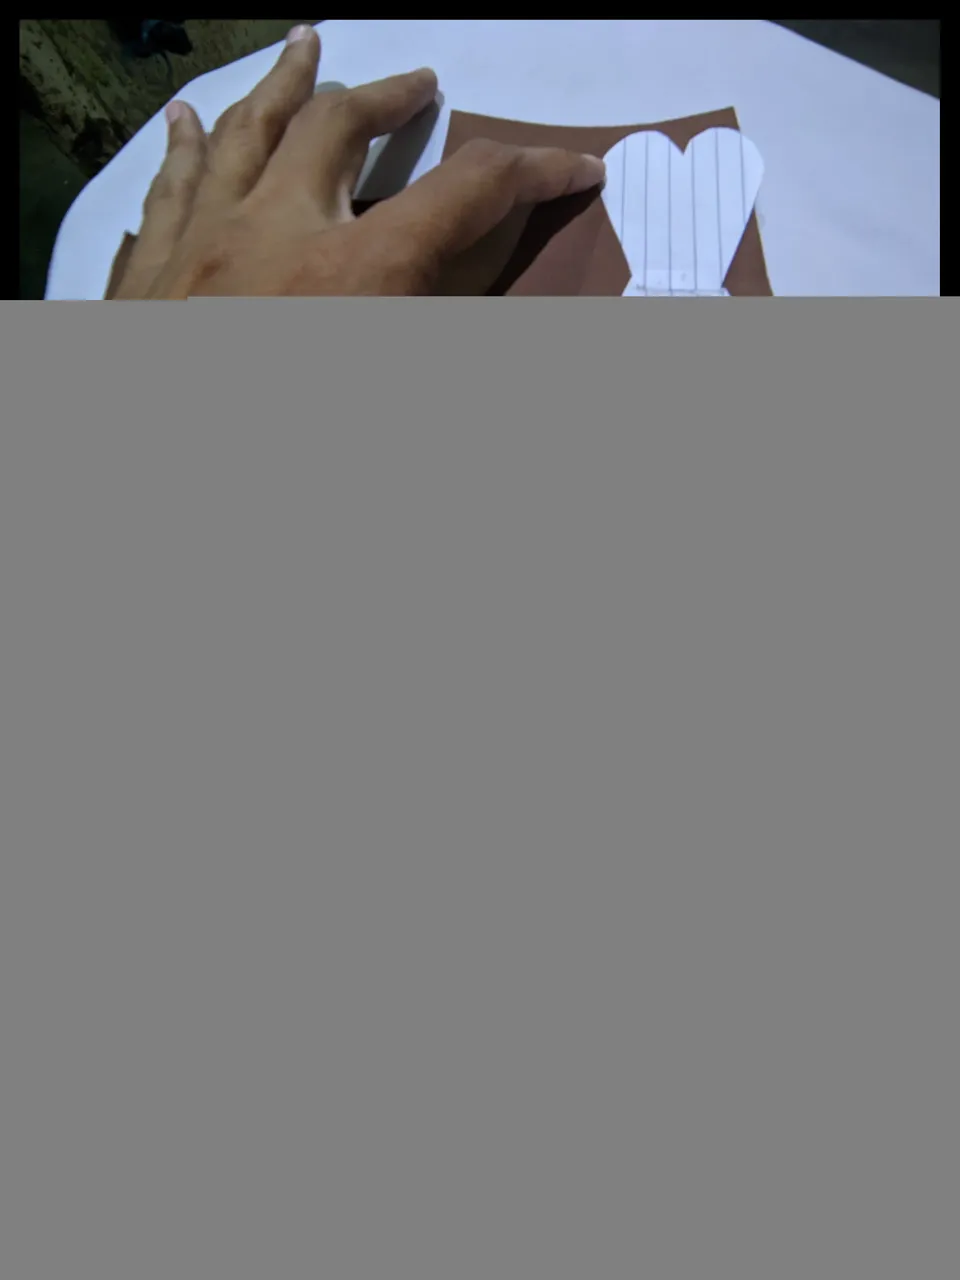
🦋Paso 3🦋
Después el patrón lo recorte un poco más pequeño y repito el paso anterior, colocó el patrón encima del Foami escarchado de color azul y dibujo también dos piezas iguales, recuerden que estás dos piezas deben ser más pequeñas que las dos piezas de color marrón.

🦋Paso 4🦋
Recorte un pedacito de foami marrón que lo voy a utilizar más adelante.

🦋Paso 5🦋
Después coloque la pieza de color marrón y le puse un poquito de silicón líquido, solo en el centro, y después le monte encima la pieza azul y le presione un poco para que fijé bien, esto lo repetí en la otra pieza.

🦋Paso 6🦋
Cuando las piezas están secas y pegadas, las agarre y doble a la mitad y le puse un poco de silicón líquido en el centro y presionó para que pegue, lo mismo en la otra pieza, espere un rato y cuando están secas, pegamos las dos piezas con silicón líquido y presionamos para que pegue, yo me ayude con un gancho de ropa para que pegará más rápido.

🦋Paso 7🦋
Ahora agarre el pedacito de foami marrón que recortamos y le puse silicón líquido, después lo coloque en el centro y dejamos que se seque bien, yo le volví a colocar el gancho para que seque y fijé mejor.

🦋Paso 8🦋
Después le puse silicón en la parte de atrás y fijamos a la peineta, aquí volví a usar el gancho de ropa para que se fije mejor en la peineta y así se evita que se mueva.

🦋Paso 9🦋
Después recorté otra tirita de foami marrón y la doble a la mitad, luego le puse silicón líquido y lo pegué en el centro para que sean las antenitas.

🦋Paso 10🦋
Aplique un poco de silicón líquido en el centro y allí coloque las Mostacillas y le dan un toque bonito al trabajo y listo hemos terminado.

🦋Trabajo listo.🦋
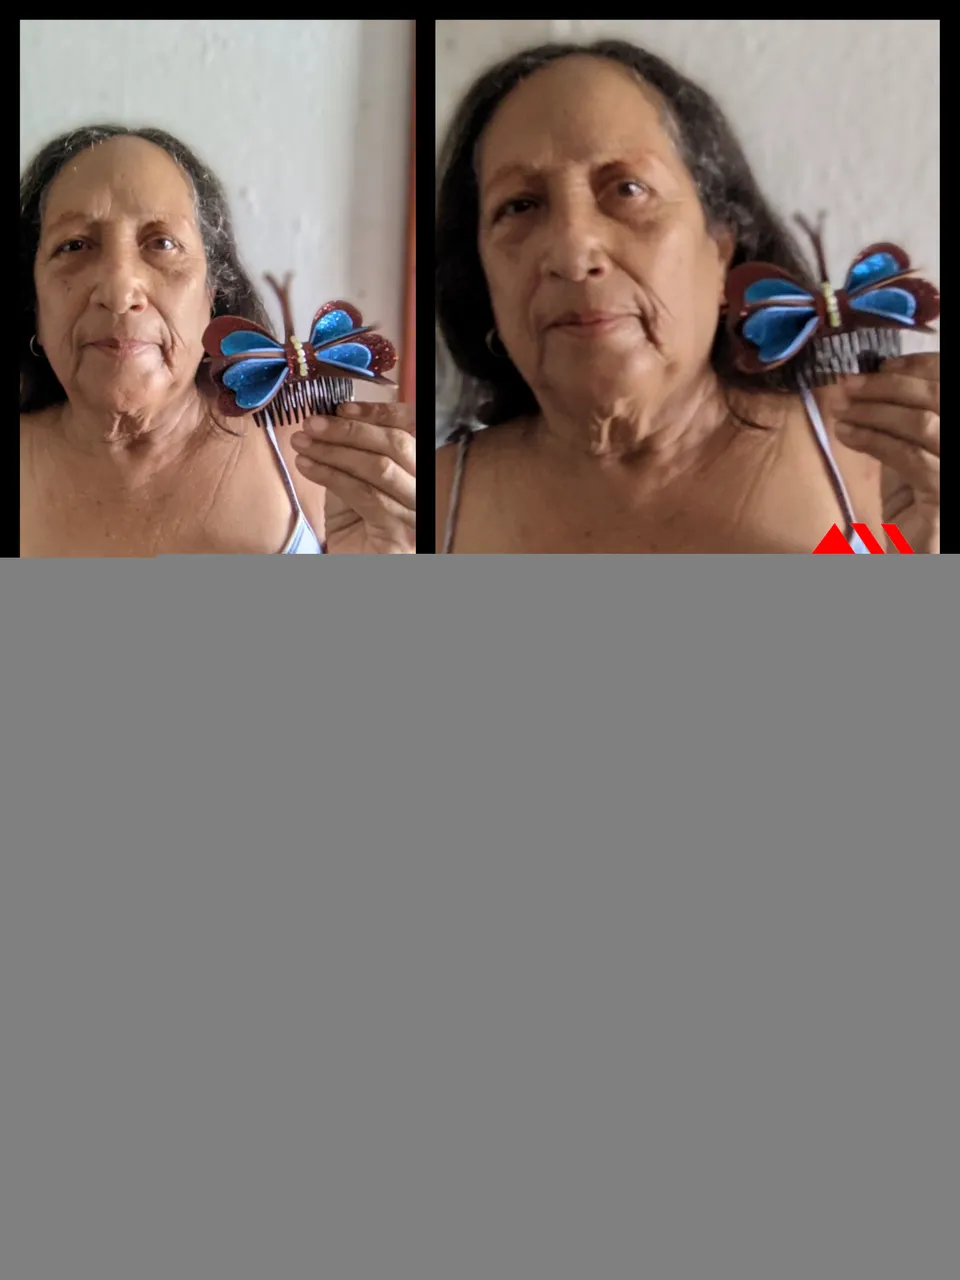


Vieron que fue fácil de hacer el lazo, eso sin contar que lo hicimos con nuestras manos y le dan más valor al detalle a la hora de hacer un regalo a esa princesa hermosa que estoy segura que le va a encantar, ¿verdad que quedó hermoso mis nietecitos?.
📷 Las fotos las tomé con mi teléfono redmi y son mías.
📷 Para este post me ayudé con el programa polish y canvas para hacer la portada y el traductor deepl que es gratis.

🦋🦋🦋 ENGLISH 🦋🦋🦋
Hello to all my #hive grandchildren I send a big and strong hug full of many blessings to all the members of this ecosystem, today I return with another craft work, because as I am retired I have enough time to do these manual tasks and that incidentally serve me to give a nice detail to my beautiful flower when she comes to visit.
Today I brought you a step by step how we can make a butterfly bow for our princesses, which will make them look beautiful, and best of all it is easy and quick to do, and can be made in any color to match all clothes.
🦋MATERIALS TO USE🦋
🦋 Brown frosted foami.
🦋 Blue colored frosted foami.
🦋 Liquid silicone.
🦋 Blue frosted foami.
🦋 Comb.
🦋 Small beads.
🦋 Silicone.
🦋 Scissors.
🦋 Pencil.
🦋 Clothes hook.
🦋 Tissue hook.
🦋 recycling paper.
🦋Step 1🦋
First on a notebook sheet I drew the pattern I am going to work with, and you can see it in the picture, then I cut it out.
When I had the pattern, I put it on top of the brown foami and with the pencil I marked it and drew two pieces of the same size and the same color.
🦋 Step 2🦋
When it's already drawn I grabbed the scissors and cut out the two pieces I had drawn, it's very easy.
🦋Step 3🦋
Then I cut the pattern a little smaller and repeat the previous step, I placed the pattern on top of the blue frosted Foami and I also draw two equal pieces, remember that these two pieces must be smaller than the two brown pieces.
🦋Step 4🦋
Cut out a little piece of brown foami that I'll use later.
🦋Step 5🦋
Then I put the brown piece and put a little bit of liquid silicone on it, only in the center, and then I put the blue piece on top of it and press it a little bit to fix it well, I repeated this on the other piece.
🦋Step 6🦋
When the pieces are dry and glued, I took them and folded them in half and put a little liquid silicone in the center and pressed to stick, the same on the other piece, wait a while and when they are dry, we glue the two pieces with liquid silicone and press to stick, I helped me with a clothespin so it will stick faster.
🦋Step 7🦋
Now grab the little piece of brown foami that we cut out and put liquid silicone on it, then place it in the center and let it dry well, I put the hook back on it so it dries and set it better.
🦋Step 8🦋
Then I put silicone on the back and we attach it to the comb, here I used the clothes hanger again so that it is better attached to the comb and thus prevents it from moving.
🦋Step 9🦋
Then I cut out another strip of brown foami and folded it in half, then I put liquid silicone on it and glued it in the center to be the antennas.
🦋Step 10🦋
Apply a little liquid silicone in the center and place the beads there to give a nice touch to the work and you're done.
</div class="text-justify">🦋Job done.🦋
You saw how easy it was to make the bow, not to mention that we did it with our hands and it gives more value to the detail when making a gift to that beautiful princess that I'm sure she will love, right it was beautiful my grandchildren?.
📷 The photos were taken with my redmi phone and are mine.
📷 For this post I used polish and canvas to make the cover and the free deepl translator.