
Hola amigos, creativos y creadores de arte, feliz jueves, espero que se encuentren muy bien.
Hoy les comparto una manualidad que me encanta, se trata de un lindo llavero con diseño de mandala, mi llavero actual ya no lucía de lo mejor, así que pensé en renovarlo, es una pieza muy importante para mantener las llaves visibles, muchas veces no las conseguimos porque no las identificamos con un accesorio llamativo, cada año trato de cambiar los llaveros y ahora que estoy enfocada en crear mis propios accesorios me animo y me enorgullece decir que hice este, cuando alguna de mis amigas me pregunta por un accesorio que estoy usando.
Sin más preámbulos te invito a que me acompañes en este relajante momento de arte.
Hello friends, creatives and art makers, happy Thursday, I hope you are feeling great.
Today I share with you a craft that I love, this is a nice keychain with mandala design, my current keychain no longer looked the best, so I thought to renew it, it is a very important piece to keep the keys visible, many times we do not get them because we do not identify them with a striking accessory, every year I try to change the keychains and now that I am focused on creating my own accessories I am encouraged and proud to say that I made this, when some of my friends ask me for an accessory that I am using.
Without further ado, I invite you to join me in this relaxing moment of art.
Las fotografías que verán a continuación, fueron tomadas con mi teléfono modelo TECNO SPARK GO 2024.


Materiales:
💟 Fieltro
💟 Hilos
💟 Moldes
💟 Tijera
💟 Aguja
💟 Lápiz
💟 Argolla para llavero
Materials:
💟 Felt.
💟 Threads
💟 Molds
💟 Scissors
💟 Needle
💟 Pencil
💟 Keychain ring
 |  |  |
|---|
Comencé tomando el molde de cartulina circular de 7 cm de diámetro, para hacer las 2 piezas de fieltro, una pieza en color morado y otro en color verde, enseguida corte las otras piezas en miniatura utilizando el resto de moldes en cartulina que elabore antes de llevar el proyecto a fieltro, este paso es muy importante para ahorrar material porque ya estás trabajando con piezas precisas a lo que se quiere lograr.
I started by taking the circular cardboard mold of 7 cm in diameter, to make the 2 pieces of felt, one piece in purple and one in green, then cut the other pieces in miniature using the rest of the cardboard molds that I made before taking the project to felt, this step is very important to save material because you are already working with precise pieces to what you want to achieve.
 |  |  |
|---|
Después de acumular todas las piezas, fue el momento de presentarlas a la circunferencia de fieltro verde para posicionarlas, y darles secuencia, una vez que vi la forma como iban cada una de las piezas, marque un punto en el centro del círculo para que todo quedase bien centrado, así que comencé a enhebrar la aguja con hilo blanco para realizar unas cuantas puntadas que le van muy bien al diseño de mandalas. Aunque también se pueden hacer pegadas, me gusto la idea de hacerlas con puntos de bordados.
After accumulating all the pieces, it was time to present them to the circumference of green felt to position them, and give them sequence, once I saw the way each of the pieces were going, I marked a point in the center of the circle so that everything was well centered, so I started to thread the needle with white thread to make a few stitches that go very well to the mandala design. Although they can also be glued, I liked the idea of making them with embroidery stitches.
 |  |  |
|---|
Centrando un segundo y tercer círculo de 3 y 1,5 cm de diámetro, realice costuras de punto corrido, luego sobre el borde del círculo de 1,5 cm borde una flor blanca, con punto margarita, con un punto francés en el centro, terminando con este paso, coloque el primer corazón para bordarlo por todo el borde, con punto de ojal, el mismo se realiza pasando la aguja de derecha a izquierda hasta completar todo el número de corazones que van en este diseño.
Después enhebré la aguja con hilo azul celeste, para bordar los bordes de las flores de tulipán, en este paso borde con otro punto de ojal que se realiza haciendo una vuelta y se pasa la aguja de derecha a izquierda o de izquierda a derecha todo va a depender de como lo dominemos mejor, aunque dependiendo de la forma como se haga la putada, verás un efecto diferente en este punto.
Centering a second and third circle of 3 and 1.5 cm in diameter, make running stitch seams, then on the edge of the circle of 1.5 cm border a white flower, with daisy stitch, with a French stitch in the center, finishing with this step, place the first heart to embroider around the edge, with buttonhole stitch, the same is done by passing the needle from right to left to complete the entire number of hearts that go in this design.
Then I threaded the needle with light blue thread, to embroider the edges of the tulip flowers, in this step border with another buttonhole stitch that is done by making a turn and passing the needle from right to left or left to right everything will depend on how we master it better, although depending on how you make the stitch, you will see a different effect in this stitch.
 |  |  |
|---|
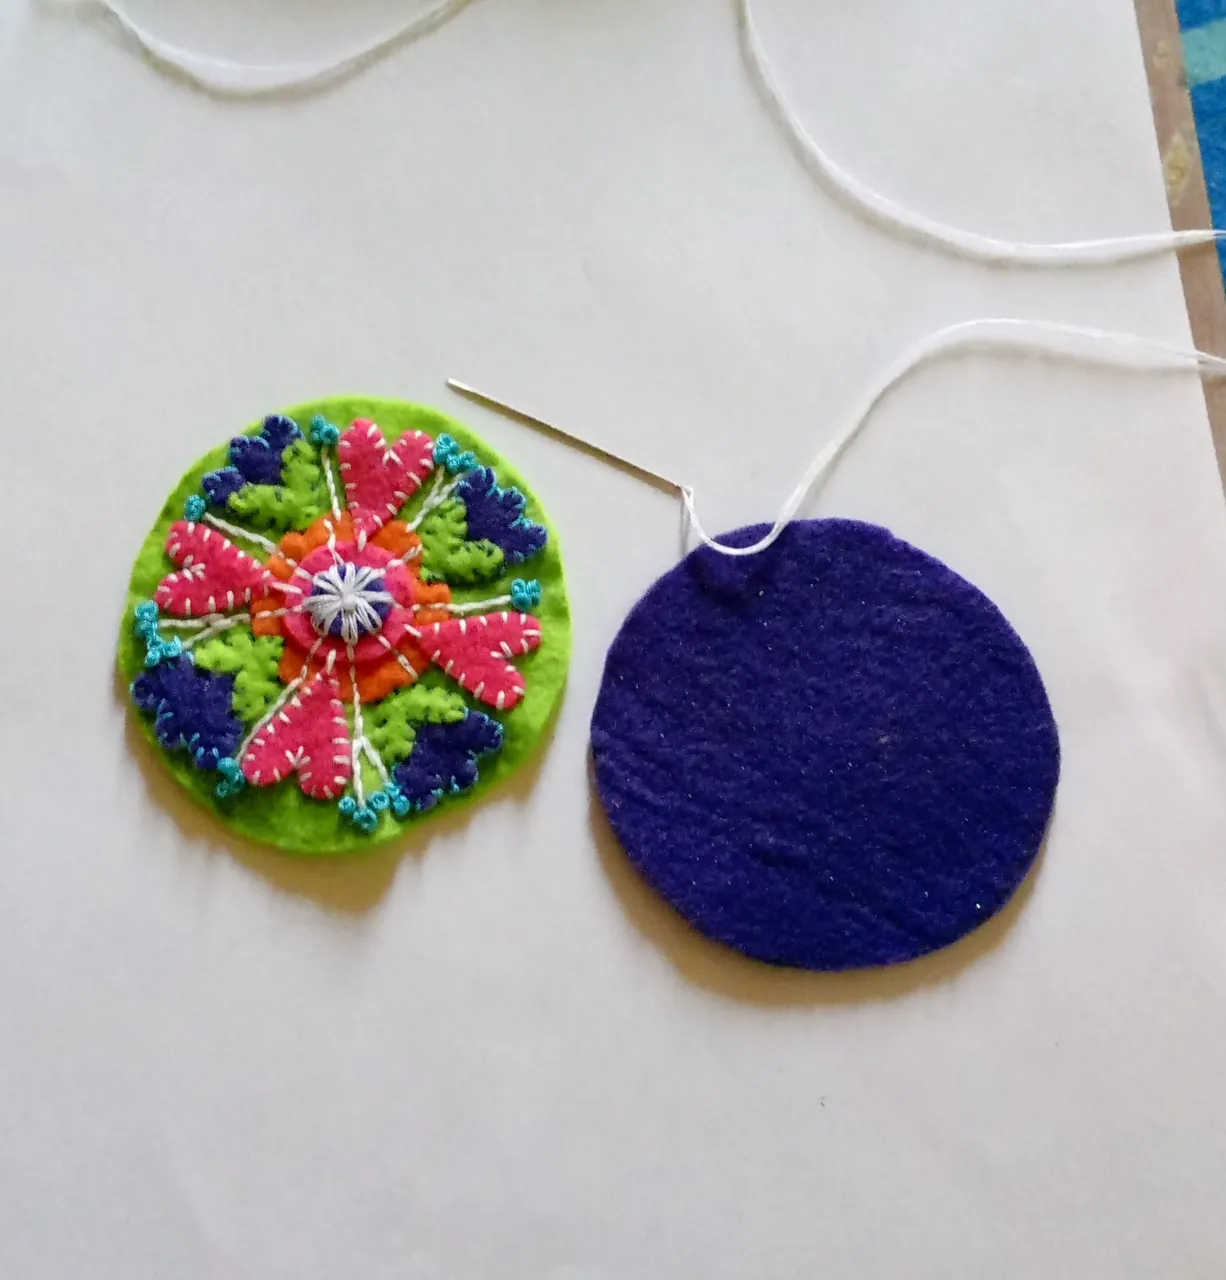
Ya casi para culminar la decoración, utilicé hilo de tono verde menta para resaltar la hoja del fieltro base, que también es del mismo tono de verde, aunque me hubiera gustado otro tono para la base, pero no tenía otro para variar.
Ahora, para cubrir las puntadas del reverso del fieltro, coloque el círculo morado, y con la aguja enhebrada con hilo blanco, bordee todo el borde con puntada de ojal para cerrar las caras.
I used mint green thread to highlight the leaf of the base felt, which is also the same shade of green, although I would have liked another shade for the base, but I didn't have another one for a change.
Now, to cover the stitches on the back of the felt, place the purple circle, and with the needle threaded with white thread, border all around the edge with buttonhole stitch to close the faces.
 |  |  |
|---|
Por último coloqué al llavero, la argolla con la ayuda de una pinza, y cerré, finalmente es aquí donde ya tengo un nuevo llavero para estrenar con ustedes el día de hoy.
Finally I attached the key ring to the key ring with the help of a clamp and closed it, finally I have a new key ring to show off to you today.

Este es un trabajo simple, pero te trae una maravillosa conexión con las buenas emociones y la concentración, te relaja y te da satisfacción, realmente es una opción muy beneficiosa.
Espero que les guste, y como siempre, les deseo buena salud.
Desde aquí, muchas Bendiciones con todo mi cariño.
This is a simple work, but it brings you a wonderful connection with good emotions and concentration, it relaxes you and gives you satisfaction, it really is a very beneficial option.
I hope you like it, my dear friends, and as always, I wish you good health.
From here I bless you with all my love.
social networks / redes sociales

Traductor Deepl
Translated Deepl
Ediciones Canva
Editions Canva

