
¡Hola, comunidad de Manualistas Creativos! Espero como siempre que todos estén sanos y felices.
Hoy quiero compartir con ustedes un proyecto sencillo pero muy significativo que realicé para organizar mis documentos pedagógicos. Después de un tiempo sin aparecer por aquí, retomo con ganas y creatividad esta maravillosa comunidad que tanto me inspira.
El tiempo, como siempre, vuela. Apenas hace una semana salimos de vacaciones y ya estamos a punto de regresar a las aulas. Sinceramente, siento que no he descansado del todo, pero decidí poner manos a la obra para empezar el próximo ciclo escolar con todo en orden.
Durante el año pasado acumulé muchos papeles con instrucciones pedagógicas, bosquejos y materiales que guardaba por aquí y por allá: en gavetas, en cuadernos, en carpetas mezcladas con otros documentos. Pero no tenía un sistema organizado para acceder a ellos fácilmente. Cada vez que llegaba la hora de utilizarlos, con mucha pena debo confesar tenia que poner mi habitación de cabeza para poder conseguirlos. Así que me propuse crear una carpeta especial donde pudiera tener todo bien clasificado y a la mano.
English Version
Hello, Creative Crafters community! I hope as always that everyone is healthy and happy.
Today I want to share with you a simple but very meaningful project I did to organize my educational documents. After some time without appearing here, I return with enthusiasm and creativity to this wonderful community that inspires me so much.
Time, as always, flies. Just a week ago we left for vacation and we are about to return to the classroom. Honestly, I feel like I haven't rested at all, but I decided to get down to work to start the next school year with everything in order.
During the past year I accumulated a lot of papers with pedagogical instructions, sketches and materials that I kept here and there: in drawers, in notebooks, in folders mixed with other documents. But I had no organized system to access them easily. Every time it was time to use them, I had to turn my room upside down to get them. So I decided to create a special folder where I could have everything well classified and at hand.
Materiales que utilicé:
- Foami de varios colores
- Silicón caliente
- Tijeras
- Regla
- Lápiz
- Una carpeta básica para forrar y decorar.
English Version
Materials that I used:
- Foami of various colors
- Hot glue
- Scissors
- Ruler
- Pencil
- A basic folder for lining and decorating.

El proceso creativo:
Primero, elegí la temática para decorar la carpeta: ¡los crayolas! Un motivo clásico que nunca pasa de moda y que me encanta por su colorido y alegría, los colores que escogi fueron bien llamativos no queria nada que transmitiera desanimo ni apatia. Saqué el molde de los crayones,los ojos y las divisiones de las crayola todo lo marqué en foami, los corté con cuidado y luego forré la carpeta por ambas caras con un color liso para que resaltara la decoración.
English Version
The creative process:
First, I chose the theme to decorate the folder: crayons! A classic motif that never goes out of style and that I love for its colorfulness and joy, the colors I chose were very bright, I didn't want anything that would transmit discouragement or apathy. I took the crayon mold, the eyes and the crayon divisions, I marked them all in foami, cut them carefully and then I lined the folder on both sides with a plain color to highlight the decoration.

Como segundo paso, comencé a pegar los crayones sobre la carpeta solo de un lado el de la abertura. Para darles un toque especial, y. O se viera muy recargada, recorté bordes superiores e inferiores en foami negro para que se vieran más definidos cada uno de los creyones. También les añadí ojitos divertidos, pero para evitar que se vieran amontonados, los coloqué intercalados, dándole un aspecto dinámico y simpático.
English Version
As a second step, I started gluing the crayons on the folder only on one side of the opening. To give them a special touch, and. To give them a special touch, I cut out the top and bottom edges in black foami to make each of the crayons look more defined. I also added funny little eyes, but to prevent them from looking crowded, I placed them in between, giving them a dynamic and friendly look.

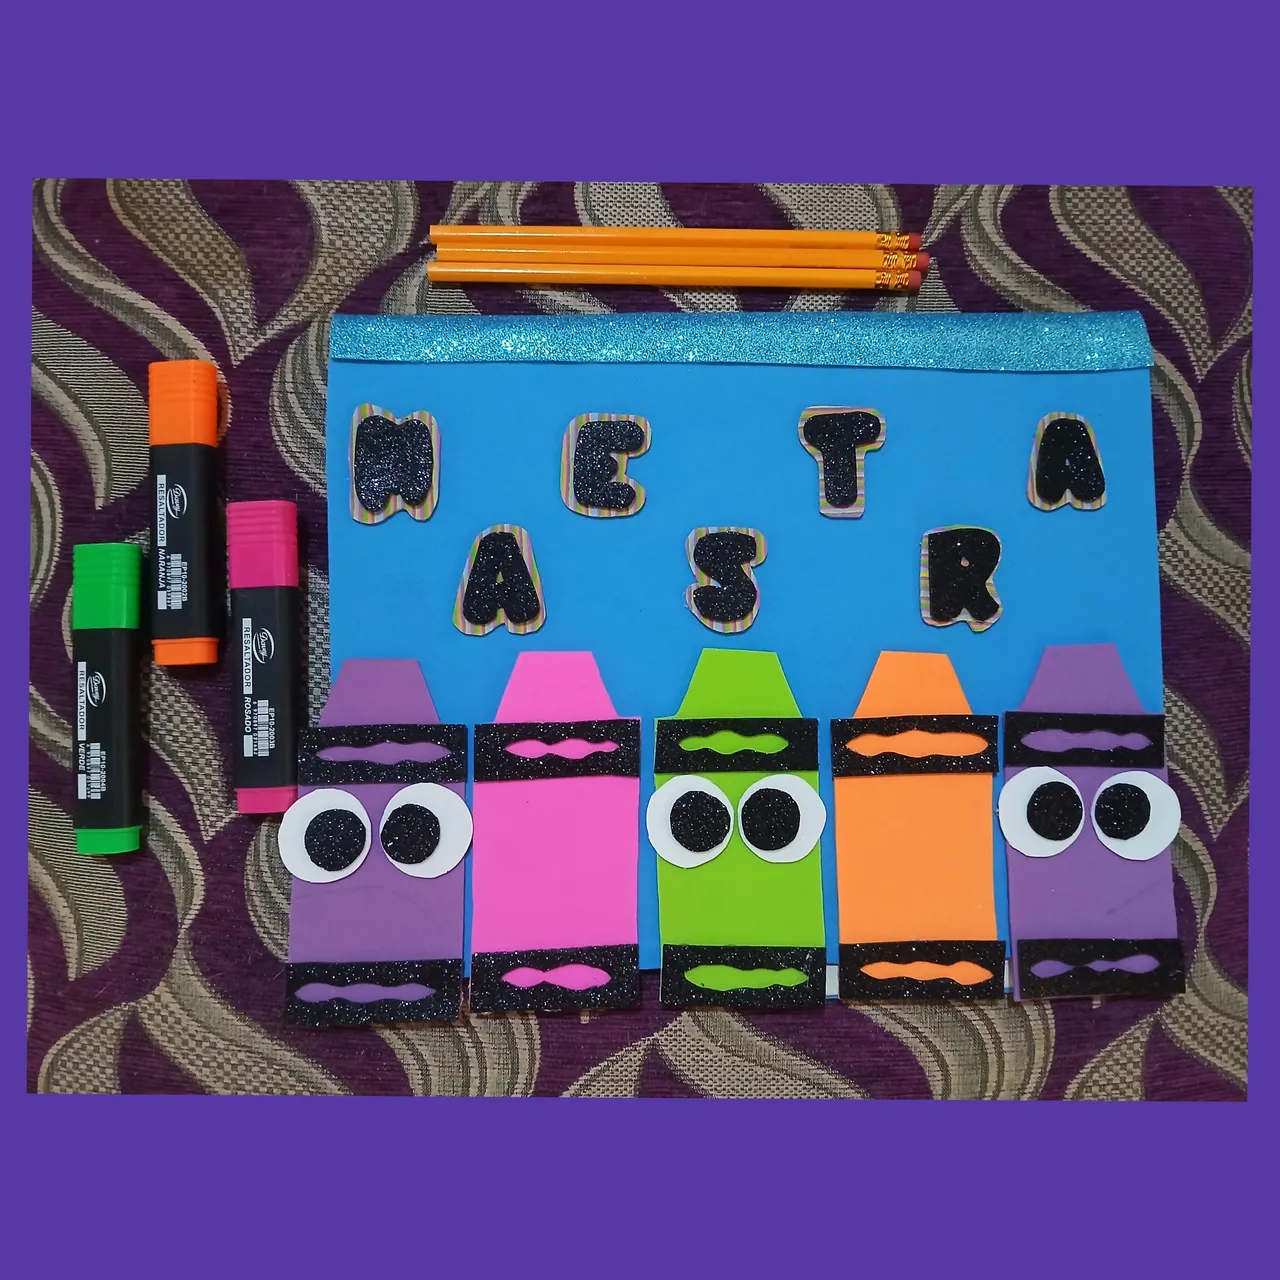
Para cerrar con broche de oro, hice la palabra “Maestra” en letras de doble foami para que resaltara bien y la pegué en la parte superior de la carpeta, salteadas unas para arriba y otra para abajo. Así, no solo es funcional, sino también muy bonita y personalizada.
English Version
To close with a flourish, I made the word “Maestra” in double foami letters so that it would stand out well and glued it on the top of the folder, skipped some at the top and one at the bottom. This way, it is not only functional, but also very pretty and personalized.

Aquí les comparto una imagen de cómo quedó mi tarea creativa de hoy. Espero que esta idea les guste y les sirva de inspiración para organizar sus materiales pedagógicos con un toque personal y creativo.
English Version
Here is a picture of how my creative assignment turned out today. I hope you like this idea and that it will inspire you to organize your teaching materials with a personal and creative touch.
Todas las imágenes son de mi propiedad, capturadas con mi Samsung A15.📸 Editadas con GridArt versión gratuita.Imagen principal y Banner final editado con Canva versión libre.🔁Deeptraductor fue utilizado para esta publicación.
English Version
All images are my own, captured with my Samsung A15.📸 Edited with GridArt free version.Main image and final Banner edited with Canva free version.🔁Deeptranslator was used for this publication.📶
