¡Saludos Comunidad Creativa! | ¡Greetings Creative Community!
¡Feliz Domingo! Espero que hayan tenido un gran fin de semana, ya solo falta un día para San Valentín y yo por mi parte sigo preparando detalles para este día, por tal motivo hoy les traigo un tutorial diferente a lo que he venido compartiendo pero con un resultado muy lindo, en lugar de manualidades el día de hoy les comparto como elaborar un hermoso adorno con globos ideal para complementar tu decoración del 14 de febrero, muy fácil de hacer, por lo que no hay que ser un experto trabajando con globos para su elaboración, espero que les guste y les sirva de idea para decorar en San Valentín o cualquier ocasión especial, ahora sí, comencemos.
¡Happy Sunday! I hope you had a great weekend, there is only one day left until Valentine's Day and for my part I am still preparing details for this day, for this reason today I bring you a different tutorial than what I have been sharing but with a very good result. cute, instead of crafts today I share with you how to make a beautiful decoration with balloons ideal to complement your decoration for February 14, very easy to do, so you don't have to be an expert working with balloons to make it, I hope you like it and it serves as an idea to decorate on Valentine's Day or any special occasion, now, let's start.


Materiales | Materials
🎈 6 Globos rojos.
🎈 6 Globos blancos.
🎈 8 Globos cromados dorados.
🎈 1 Globo metalizado en forma de corazón con estampado de san Valentín.
🎈 Inflador de globos.
🎈 Pabilo.
🎈 Tijera.
🎈 Cinta adhesiva transparente.
🎈 6 red balloons.
🎈 6 white balloons.
🎈 8 gold chrome balloons.
🎈 1 Heart-shaped metallic balloon with Valentine's Day print.
🎈 Balloon inflator.
🎈 Wick.
🎈 Scissor.
🎈 Transparent adhesive tape.

Procedimiento ✂ | Process ✂
🎈 PASO 1. Lo primero que debemos hacer es inflar los globos rojos y blancos, una vez llenos todos los uniremos de 2 en 2, teniendo cada par uno de cada color, siendo en total 6 pares de globos.
🎈 STEP 1. The first thing we must do is inflate the red and white balloons, once they are full we will join them 2 by 2, each pair having one of each color, making a total of 6 pairs of balloons.


🎈 PASO 2. Ahora uniremos los globos en juegos de 4, unimos 2 pares entre si quedando rojo, blanco, rojo blanco.
🎈 STEP 2. Now we will unite the balloons in sets of 4, we unite 2 pairs together leaving red, white, red white.


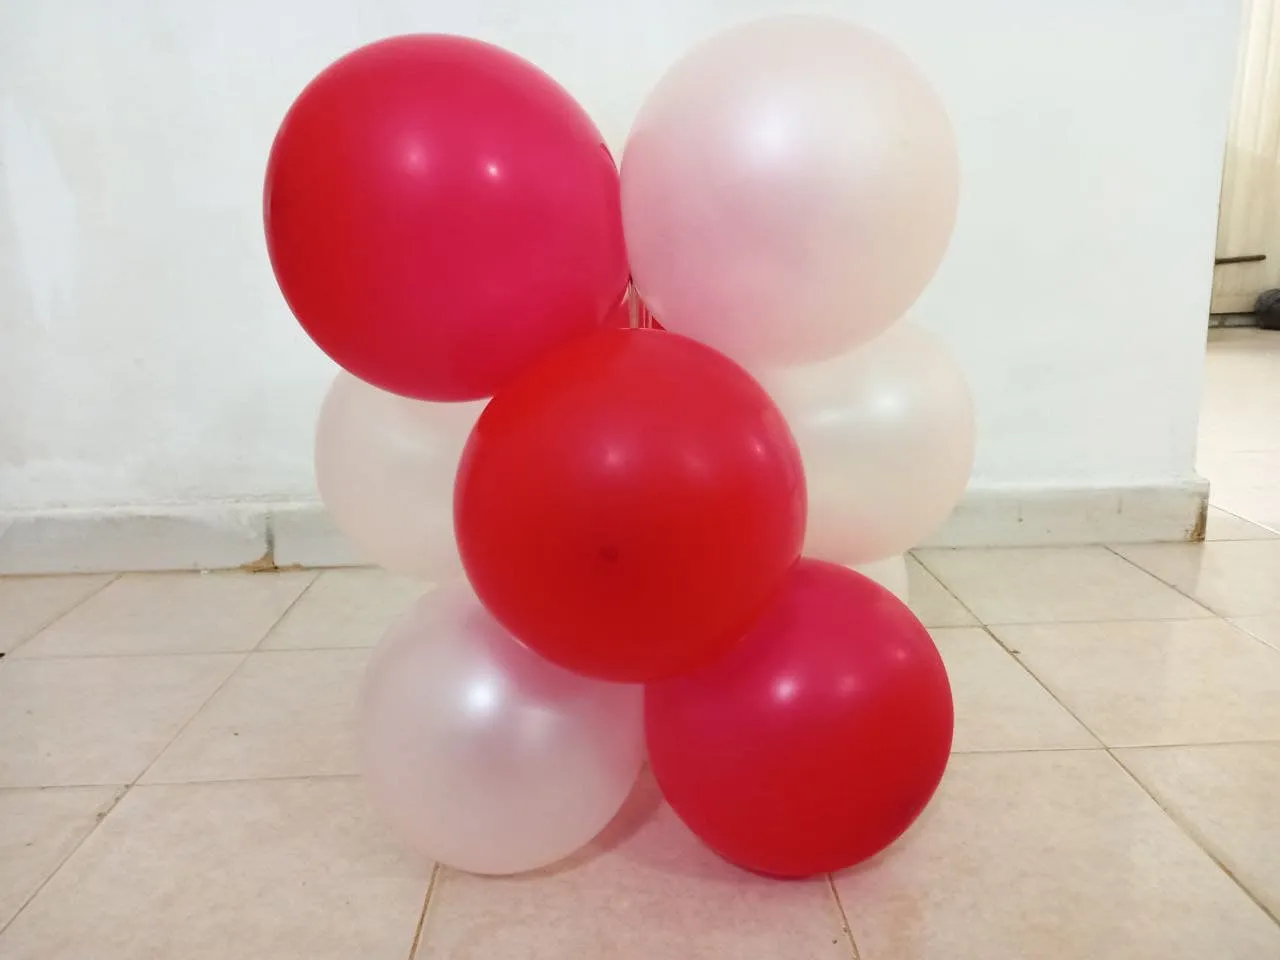
🎈 PASO 3. Amarramos la punta del pabilo a uno de los juegos de 4 globos, luego sobre ese colocaremos otro juego y luego el que resta, debemos colocarlos de tal forma que los globos del mismo color queden debajo de los globos del color contrario, es decir, los rojos sobre los blancos y los blancos sobre los rojos y a medida que los vamos ordenando los vamos uniendo entre sí con pabilo para fijarlos bien y no pierdan su forma.
🎈 STEP 3. We tie the tip of the wick to one of the sets of 4 balloons, then on that we will place another set and then the one that remains, we must place them in such a way that the balloons of the same color are under the balloons of the opposite color, that is, the red ones on the white ones and the white ones on the red ones and as we are ordering them we are joining them together with wick to fix them well and not lose their shape.


🎈 PASO 4. Inflamos 4 globos cromados dorados de tamaño pequeño, mucho más pequeños que los globos rojos y blancos y repetimos el procedimiento que hicimos con los otros globos, es decir, los unimos en pares y luego los pares hasta quedar 4, luego los colocamos en la parte superior de los globos que armamos al principio y los fijamos a estos con el pabilo teniendo en cuenta que los globos dorados deben ubicarse en el centro de las uniones de los globos que están debajo de ellos y una vez que fijemos bien cortamos el pabilo.
🎈 STEP 4. We inflate 4 small chrome gold balloons, much smaller than the red and white balloons and repeat the procedure we did with the other balloons, that is, we join them in pairs and then pair them until they are 4, then we place them on top of the balloons that we put together at the beginning and fix them to these with the wick keeping in mind that the gold balloons must be located in the center of the unions of the balloons that are below them and once that we fix well we cut the wick.


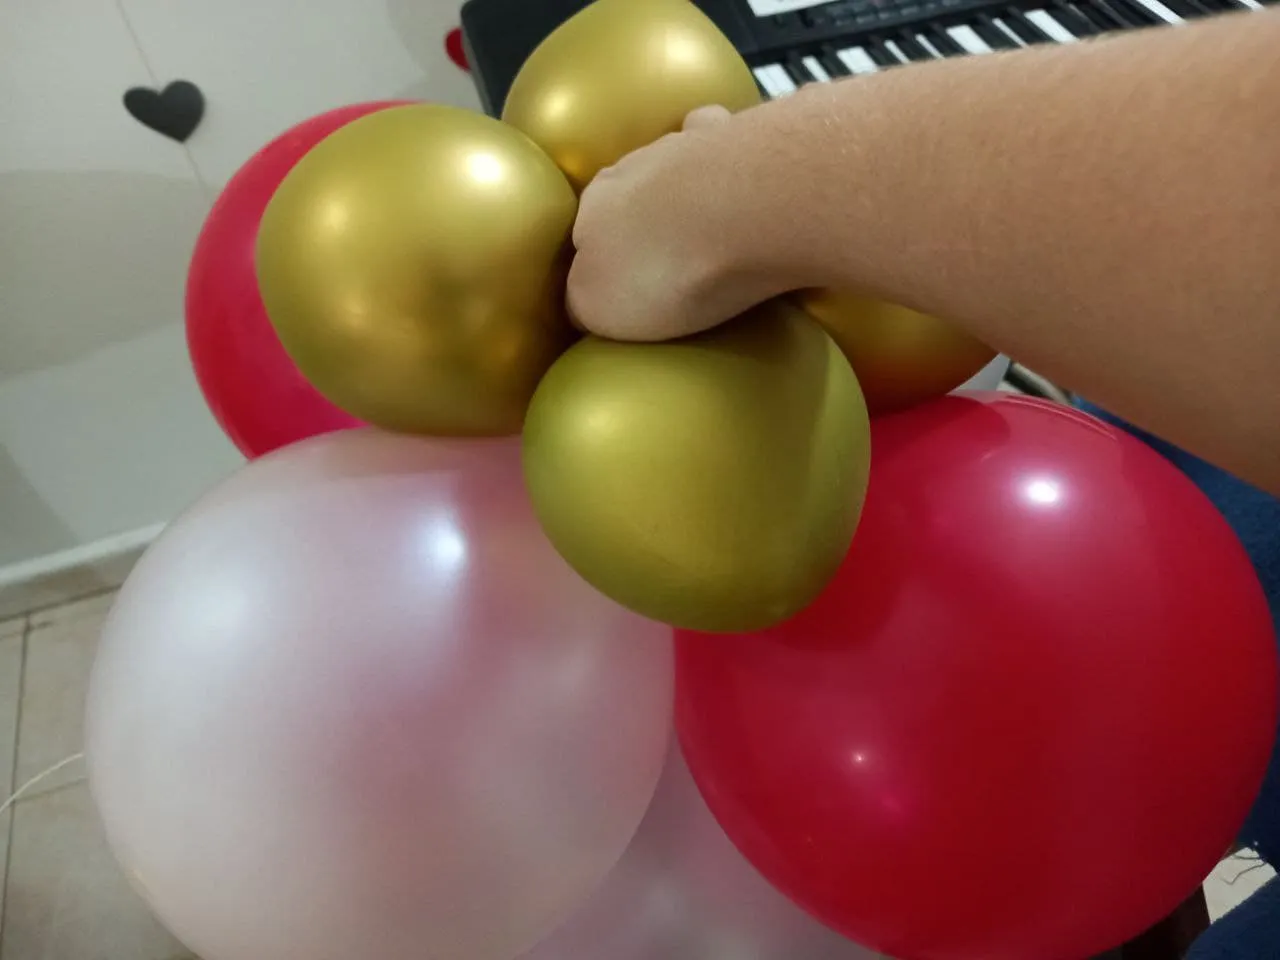

🎈PASO 5. Inflamos 4 globos más cromados dorados que sean pequeñitos también al igual que los otros, cortamos 4 tiras cortas de pabilo y amarramos una de las puntas a los nudos de los globos, luego uniremos estos al resto de los globos colocándolos en las uniones o partes vacías para rellenar y esto lo haremos pasando el pabilo por los globos de su alrededor hasta fijarlos bien.
🎈STEP 5. We inflate 4 more chromed gold balloons that are also small like the others, we cut 4 short strips of wick and we tie one of the ends to the knots of the balloons, then we will join these to the rest of the balloons. balloons by placing them in the joints or empty parts to fill and we will do this by passing the wick through the balloons around them until they are well fixed.


🎈 PASO 6. Finalizamos inflando el globo metalizado en forma de corazón, le colocamos un poco de cinta adhesiva en la parte frontal y trasera de su punta inferior y lo pegamos sobre los globos dorados, es decir, la parte superior de la base de globos que formamos con anterioridad, teniendo en cuenta que la parte frontal de esta es donde se ven los globos dorados pequeños con los que rellenamos las partes vacías.
🎈 STEP 6. We finish by inflating the heart-shaped metallic balloon, we put some adhesive tape on the front and back of its lower tip and stick it on the gold balloons, that is, the upper part of the base of balloons that we formed previously, keeping in mind that the front part of this is where you can see the small golden balloons with which we fill the empty parts.


¡Y listo! De esta forma tan sencilla tenemos un hermoso adorno de globos para decorar en San Valentín, aunque también podríamos usarlo para decorar en fiestas de cumpleaños o cualquier otra celebración, es muy lindo y llamativo por lo que es ideal para decorar cualquier espacio, espero que les haya gustado este tutorial y lo puedan intentar en casa, les aseguro que luce muy lindo, nos vemos en un próximo tutorial con una nueva idea creativa.
¡And ready! In this simple way we have a beautiful balloon decoration to decorate on Valentine's Day, although we could also use it to decorate at birthday parties or any other celebration, it is very cute and striking so it is ideal for decorating any space, I hope you like it. If you liked this tutorial and you can try it at home, I assure you that it looks very nice, see you in a next tutorial with a new creative idea.
Resultado 🎈 | Result 🎈


Todas las fotografías son de mi propiedad.
Fotografías capturadas con mi Samsung Galaxy A12
Separador de texto elaborado en Canva.
Nos vemos en mi próxima publicación.
¡Tengan un feliz día!
All photographs are my property.
Photos captured with my Samsung Galaxy A12
Text separator made in Canva.
See you in my next post.
¡Have a happy day!