¡Saludos Comunidad Creativa! | ¡Greetings Creative Community!
¡Feliz Día de San Valentín! Deseo para todos un feliz día lleno de muchas sorpresas y detalles, que lo puedan disfrutar mucho junto a esa o esas personas especiales ❤ En este gran día festivo les quiero compartir un tutorial para que puedan hacer una linda decoración para celebrar este día, se trata de la elaboración de un hermoso corazón de globos en la pared, ideal para ambientar un espacio de nuestro hogar para la celebración, es una decoración muy hermosa y original para variar un poco de las decoraciones comunes, espero que les guste y puedan intentarlo en casa.
¡Happy Valentines Day! I wish you all a happy day full of many surprises and details, that you can enjoy a lot with that or those special people ❤ On this great holiday I want to share a tutorial so you can make a nice decoration to celebrate this day, it is of the elaboration of a beautiful balloon heart on the wall, ideal to set a space in our home for the celebration, it is a very beautiful and original decoration to vary a little from the common decorations, I hope you like it and you can try it at home .


Materiales | Materials
🎈 40 Globos rojos.
🎈 10 Globos cromados dorados.
🎈 Cinta adhesiva transparente.
🎈 Inflador de globos.
🎈 Cartón.
🎈 Lápiz.
🎈 Tijera.
🎈 Cutter.
🎈 Hoja de papel.
🎈 Foami escarchado negro.
🎈 Objeto circular.
🎈 40 red balloons.
🎈 10 gold chrome balloons.
🎈 Transparent adhesive tape.
🎈 Balloon inflator.
🎈 Cardboard.
🎈 Pencil.
🎈 Scissor.
🎈 Cutter.
🎈 Sheet of paper.
🎈 Black frosty foami.
🎈 Circle object.

Procedimiento ✂ | Process ✂
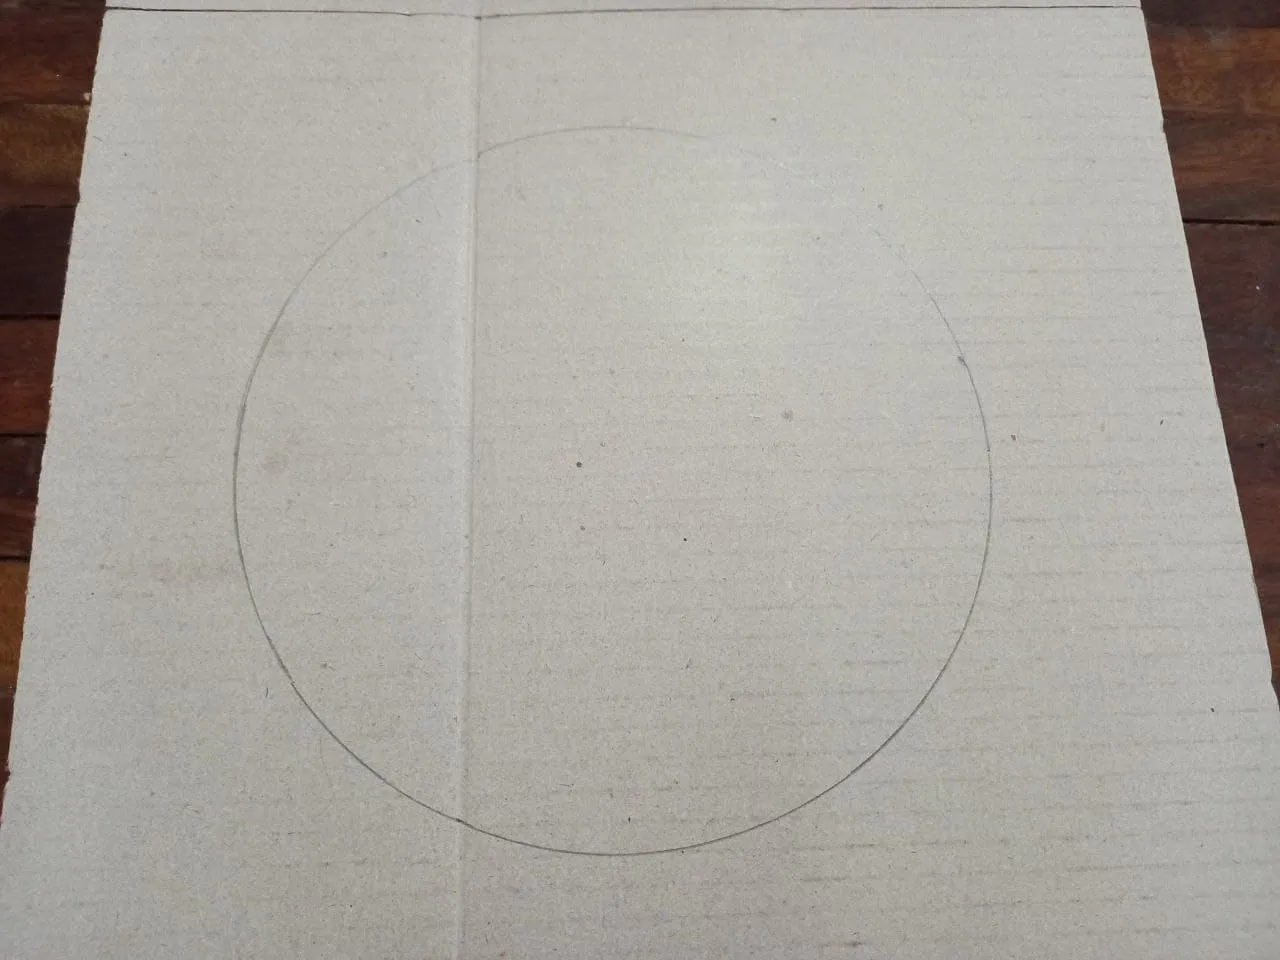
🎈 PASO 1. Antes de comenzar a elaborar el corazón de globos necesitamos hacer un calibrador de globos casero de dos tamaños diferentes, una herramienta que nos ayudará a que todos los globos que inflemos queden del mismo tamaño para que nuestra decoración luzca lo más perfecta posible, para hacer un calibrador de globos necesitamos un objeto circular del tamaño de nuestra preferencia (del tamaño que deseamos los globos) dibujamos el círculo sobre el cartón y recortamos con ayuda del cutter, luego tomamos un objeto circular mucho más pequeño y repetimos, de esta forma obtendremos las 2 medidas que necesitamos para los globos.
🎈 STEP 1. Before starting to make the balloon heart, we need to make a homemade balloon gauge of two different sizes, a tool that will help us ensure that all the balloons that we inflate are the same size so that our decoration looks as perfect as possible, to make a balloon gauge we need a circular object of the size of our preference (the size we want the balloons) we draw the circle on the cardboard and cut it out with the help of the cutter, then we take a much smaller circular object and we repeat, in this way we will obtain the 2 measurements that we need for the balloons.


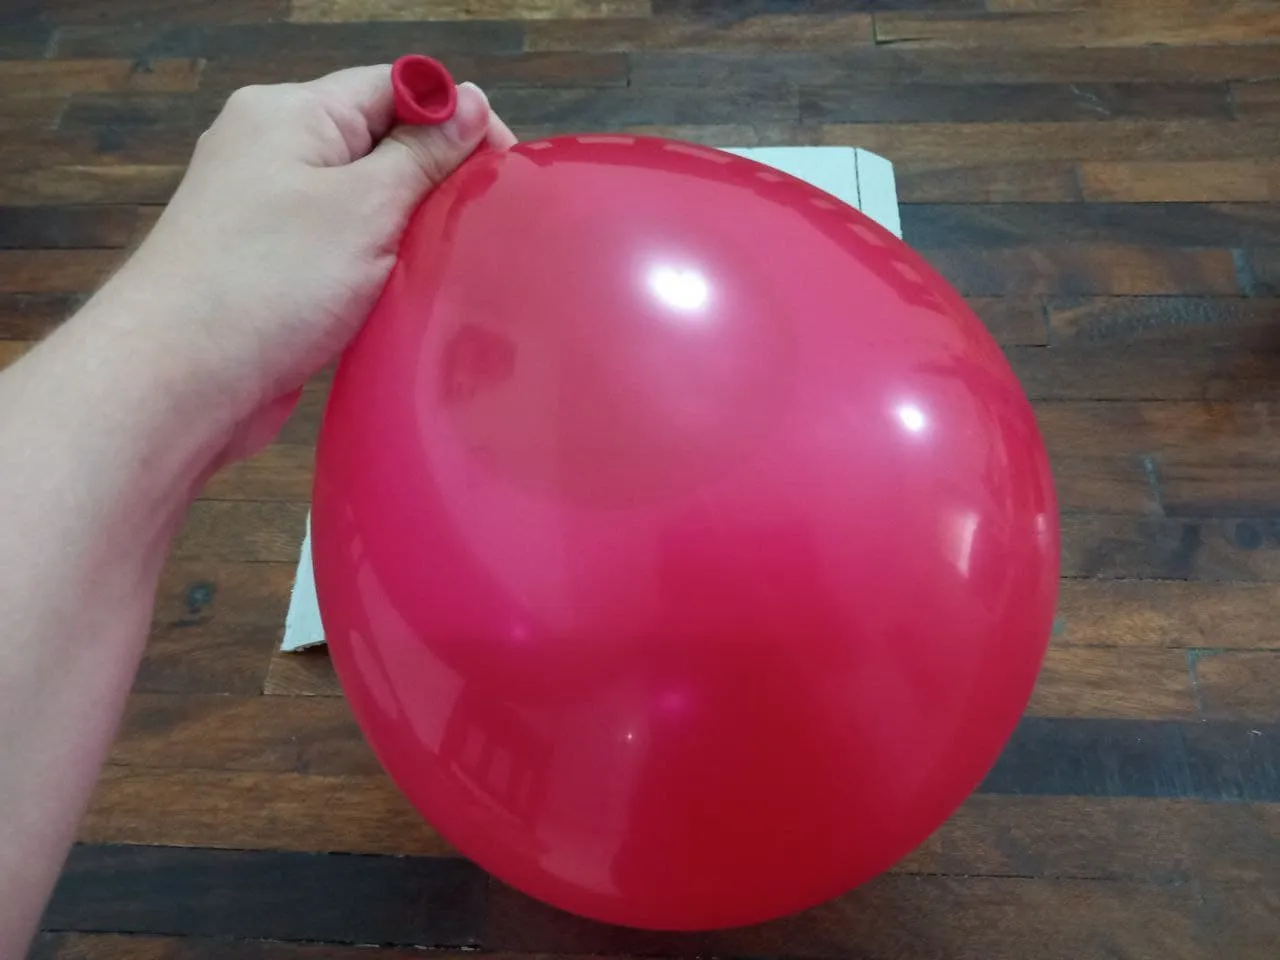
🎈 PASO 2. Luego de tener el calibrador de globos comenzamos a inflar los globos, 40 rojos del tamaño más grande y 10 cromados dorados del tamaño más pequeño, inflaremos los globos rojos de un buen tamaño y luego intentamos pasarlos por el agujero grande del cartón, si no pasa solo debemos vaciarlo un poco hasta que quepa y pase hasta la mitad, de esa medida inflaremos todos los globos rojos mientras que para los dorados utilizaremos la medida pequeña repitiendo el mismo procedimiento que con los globos rojos.
🎈 STEP 2. After we have the balloon calibrator we start to inflate the balloons, 40 red ones of the largest size and 10 gold chrome ones of the smallest size, we will inflate the red balloons to a good size and then we try to pass them through the large hole in the cardboard, if it does not go through, we just have to empty it a little until it fits and go halfway, from that measure we will inflate all the red balloons while for the gold ones we will use the small measure repeating the same procedure as with the red balloons.


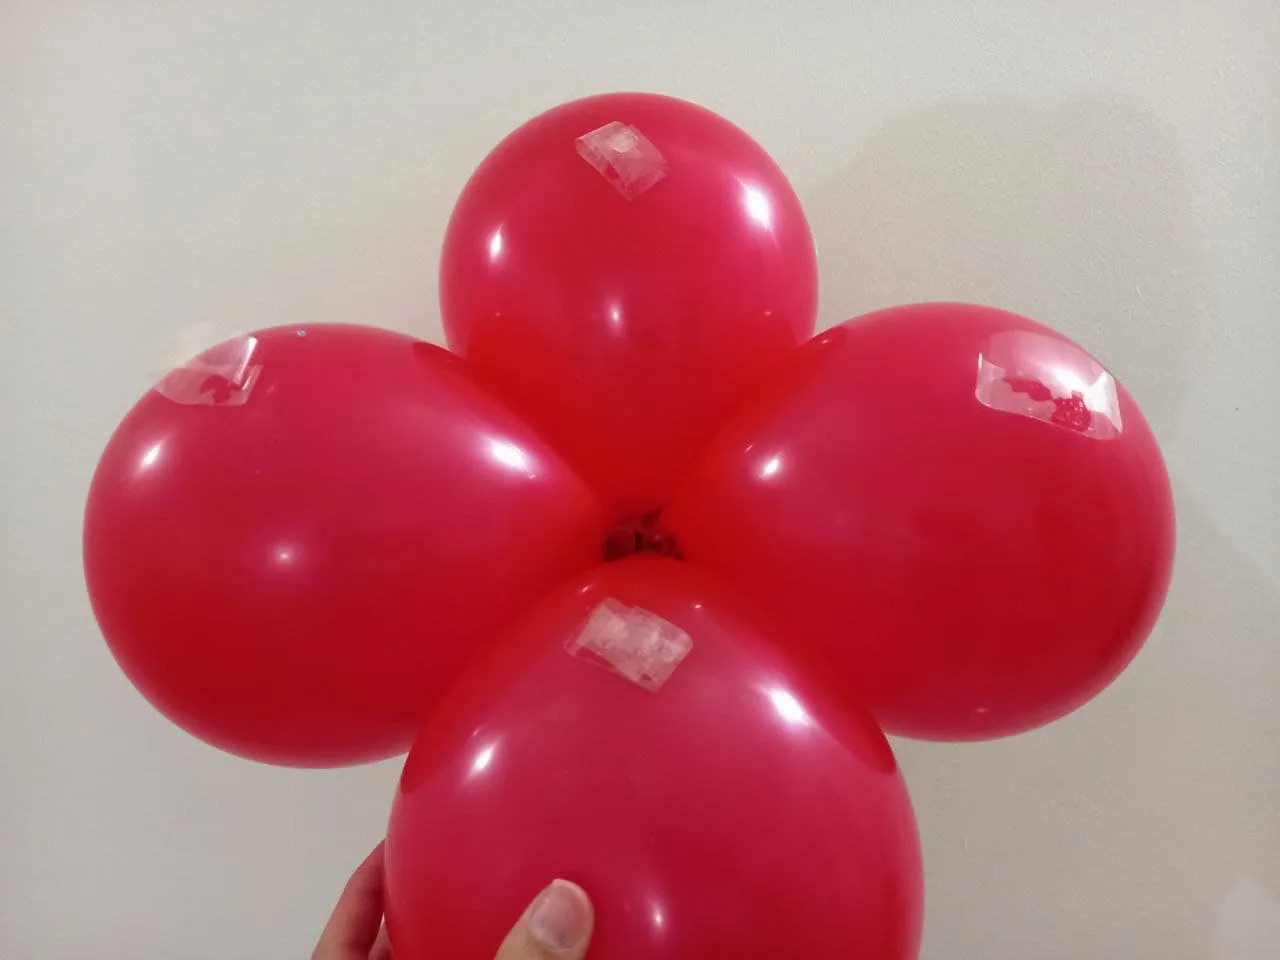
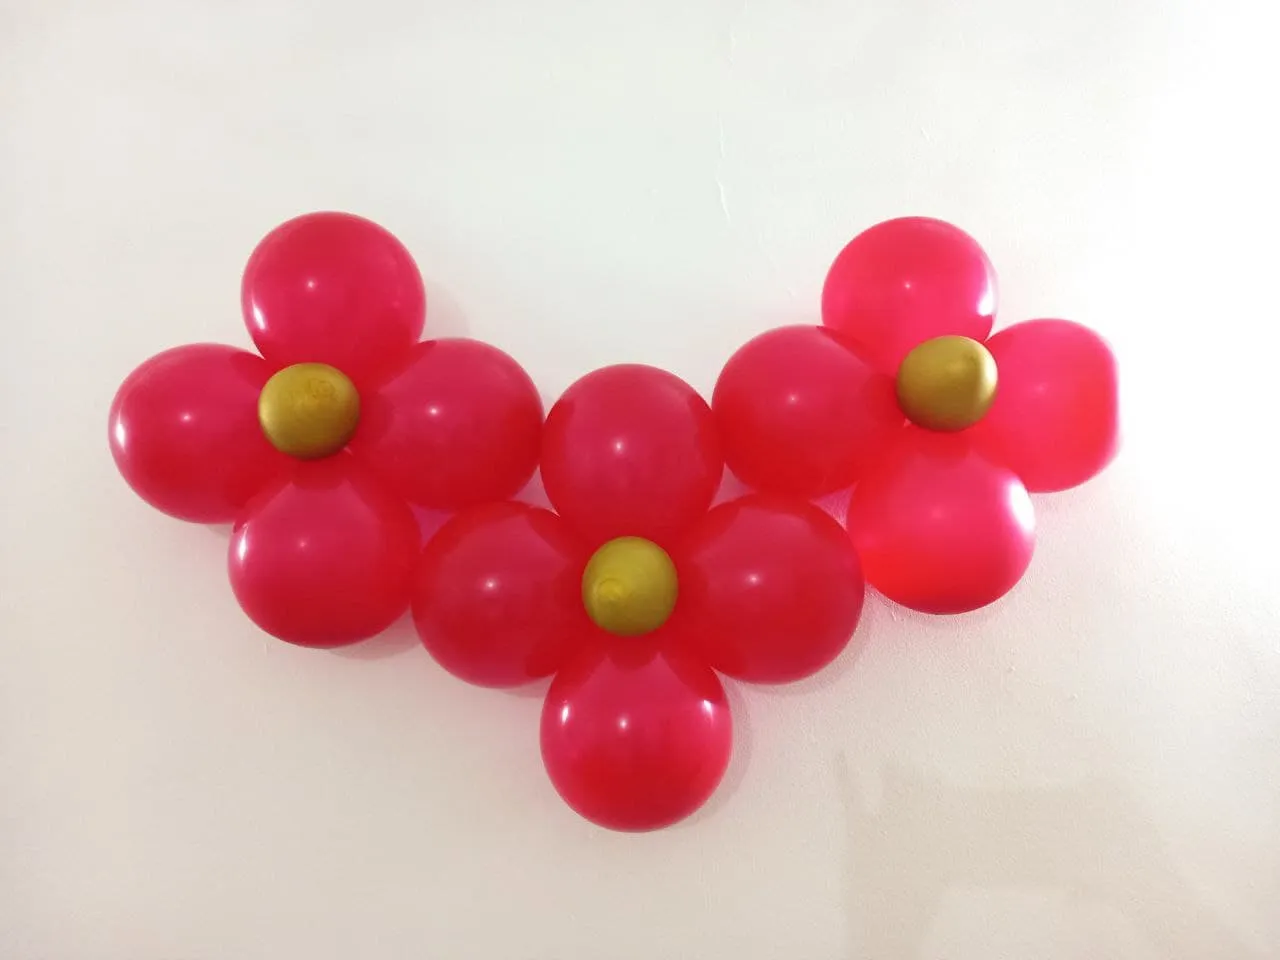
🎈 PASO 3. Luego de tener todos los globos inflados vamos a unirlos y formar juegos de 5, para ello primero vamos a unir los globos rojos de 2 en 2, luego a la mitad de ellos les añadimos un globo dorado quedando la mitad de los juegos de 2 globos y la otra mitad de 3 globos, luego uniremos los juegos de 2 con los de 3 formando juegos de 5 globos en forma de flor quedando el globo dorado en el centro ( en total son 10 en forma de flor)
🎈 STEP 3. After having all the balloons inflated we are going to unite them and form sets of 5, for this first we are going to unite the red balloons 2 by 2, then to half of them we add a golden balloon remaining half of the sets of 2 balloons and the other half of 3 balloons, then we will join the sets of 2 with those of 3 forming sets of 5 balloons in the shape of a flower, leaving the golden balloon in the center (in total there are 10 in the shape of flower)


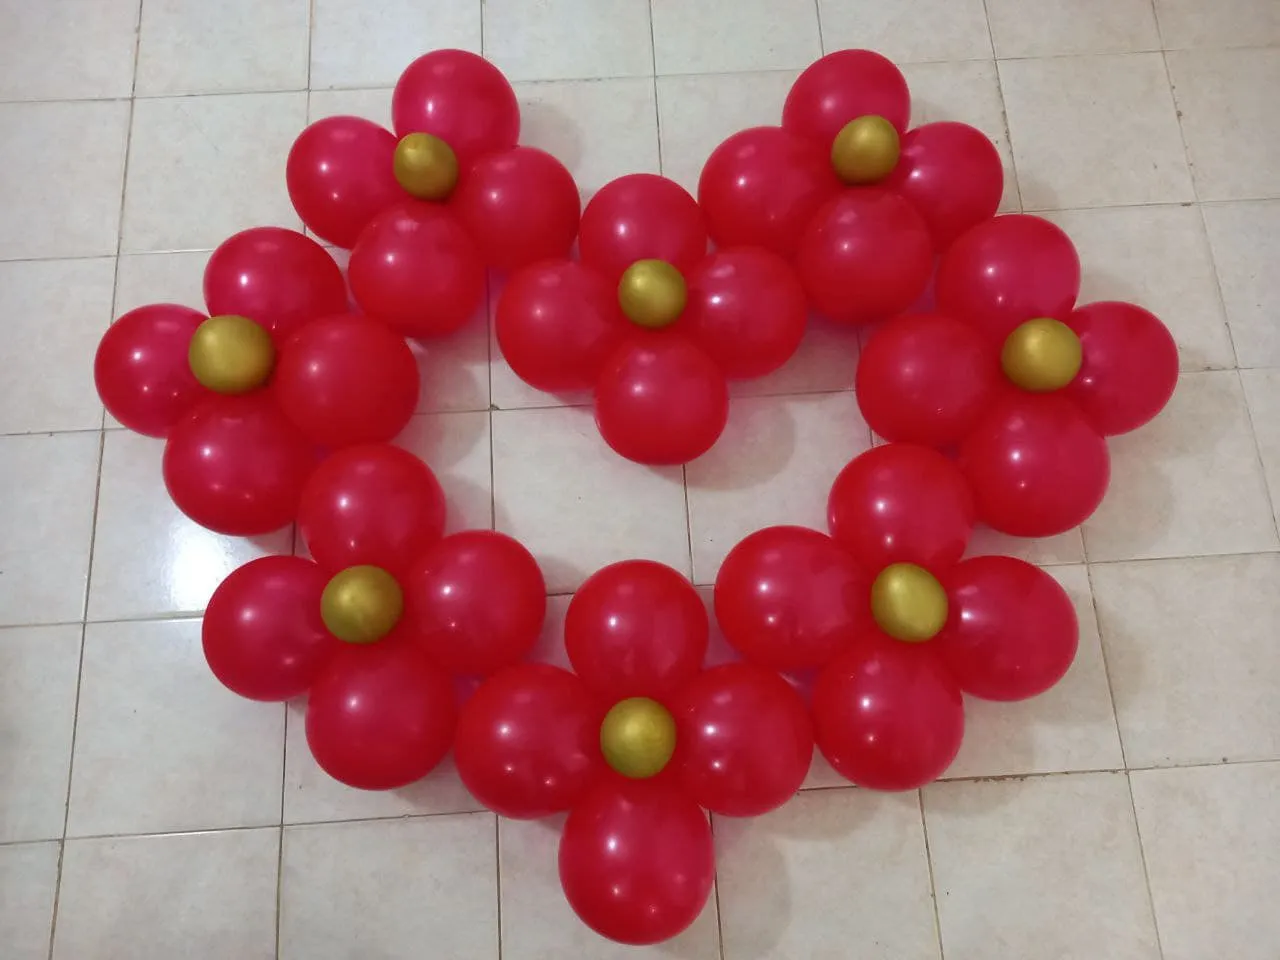
🎈 PASO 4. Antes de comenzar a formar el corazón de globos en la pared es necesario y recomendable hacerlo primero en el piso, de esta forma podemos establecer mejor su tamaño y la posición de los globos, para un corazón grande se utilizan los 10 juegos de globos y para uno más pequeño solo se necesitan 8, es a elección personal el tamaño del corazón, recomiendo tomar una fotografía luego de hacerlo en el piso para que nos sirva de guía a la hora de hacerlo en la pared.
🎈 STEP 4. Before starting to form the heart of balloons on the wall, it is necessary and recommended to do it first on the floor, in this way we can better establish its size and the position of the balloons, for a large heart it is they use the 10 sets of balloons and for a smaller one only 8 are needed, the size of the heart is a personal choice, I recommend taking a picture after doing it on the floor to serve as a guide when doing it on the wall.

🎈 PASO 5. Luego de tener la idea de cómo deben ir los globos podemos comenzar a formar el corazón en la pared y necesitamos que esta tenga suficiente espacio, iniciamos colocando cinta adhesiva transparente en la parte trasera de los globos rojos, tomamos uno de los juego y lo pegamos en el centro de la pared a una buena altura quedando 2 globos en horizontal y 2 en vertical.
🎈 STEP 5. After having the idea of how the balloons should go, we can start to form the heart on the wall and we need it to have enough space, we start by placing transparent adhesive tape on the back of the red balloons, We take one of the sets and stick it in the center of the wall at a good height, leaving 2 balloons horizontally and 2 vertically.

🎈 PASO 6. Continuamos pegando ahora un juego a cada lado del primero encajándolos en la unión de la parte superior, luego seguimos pagando un juego a cada lado y encajándolos entre sí y mientras tanto debemos ir dándole la forma de corazón hasta pegar el último juego que sería la punta de este.
🎈 STEP 6. We now continue gluing a set on each side of the first, fitting them into the union at the top, then we continue paying a set on each side and fitting them together and meanwhile we must give it the shape of a heart until hit the last game that would be the tip of this.


🎈 PASO 7. En la hoja de papel hacemos un cupido y lo pasamos al foami escarchado negro, recortamos, le colocamos cinta adhesiva transparente en su parte trasera y lo pegamos en el centro del corazón de globos.
🎈 STEP 7. On the sheet of paper we make a cupid and pass it to the black frosted foami, cut it out, put transparent adhesive tape on its back and stick it in the center of the balloon heart.


¡Y listo! De esta manera tenemos un hermoso y enorme corazón de globos ideal para decorar en este día de San Valentín, un adorno perfecto para las fotos en pareja o con familiares y amigos y dejar un bonito recuerdo de esta fecha, espero que les haya gustado este tutorial y les pueda servir de guía para que lo hagan en casa, es muy fácil y los animo a intentarlo ❤
¡And ready! In this way we have a beautiful and huge balloon heart ideal to decorate on this Valentine's Day, a perfect adornment for photos as a couple or with family and friends and leave a nice memory of this date, I hope you liked this tutorial and it can serve as a guide for you to do it at home, it's very easy and I encourage you to try it ❤
Resultado 🎈 | Result 🎈


Todas las fotografías son de mi propiedad.
Fotografías capturadas con mi Samsung Galaxy A12
Separador de texto elaborado en Canva.
Nos vemos en mi próxima publicación.
¡Tengan un feliz día!
All photographs are my property.
Photos captured with my Samsung Galaxy A12
Text separator made in Canva.
See you in my next post.
¡Have a happy day!