

¡Feliz día amigos creativos de Hive Diy! Espero que estén pasando una linda semana. Por mi parte sigo activa creando más y más cositas lindas y esta vez pensando en nuevas ideas se me ocurrió hacer nuevamente lazos de foami para niñas con una temática que nunca antes había tomado en cuenta y que se está viendo mucho en estos días y es la de conejito, pensando un poco ideé 2 modelos diferentes pero con la misma temática para hacer estos lazos y el día de hoy les comparto ambas ideas en este tutorial, espero que les guste, ahora sin más, ¡vamos a crear!
Happy day creative friends from Hive Diy! I hope you are having a nice week. For my part, I am still active creating more and more cute things and this time thinking about new ideas it occurred to me to make foam bows for girls again with a theme that I had never taken into account before and that is being seen a lot these days and that is bunny, thinking a little I came up with 2 different models but with the same theme to make these bows and today I share both ideas with you in this tutorial, I hope you like it, now without further ado, let's create!

• Foami rosado y morado sin escarcha.
• Lapicero de tinta rosada.
• Cinta de raso fina rosada.
• 2 Ganchos para el cabello.
• Estambre blanco.
• Abrehuecos.
• Tijera.
• Silicón.
• Lápiz.
• Pink and purple foam without frost.
• Pink ink pen.
• Thin pink satin ribbon.
• 2 Hair clips.
• White stamen.
• Open holes.
• Scissors.
• Silicone.
• Pencil.


Primer diseño • • First design
✤ PASO 1. Lo primero que hice fue elaborar las piezas para formar el lazo, en este caso serían 6 y todas en su color de foami correspondiente.
✤ STEP 1. The first thing I did was make the pieces to form the bow, in this case there would be 6 and all in their corresponding foam color.


✤ PASO 2. Seguidamente tomé un lapicero de tinta rosada y le remarqué los bordes a las 2 piezas de foami rosado sin escarcha (la parte inferior del lazo y las orejas internas).
✤ STEP 2. Next I took a pink ink pen and highlighted the edges of the 2 pieces of pink foam without frost (the lower part of the bow and the inner ears).

✤ PASO 3. Con ayuda de la plancha de ropa le apliqué un poco de calor a las piezas internas de las orejas (las de foami rosado sin escarcha) para darle un poco de relieve a las piezas.
✤ STEP 3. With the help of the clothes iron I applied a little heat to the inner pieces of the ears (the pink foam ones without frost) to give the pieces a little relief.


✤ PASO 4. Luego procedí a pegar estas piezas sobre las orejas (las piezas de foami escarchado blanco) y al tener las orejas listas pegué la pieza completa en la parte superior de la pieza de foami rosado sin escarcha (la parte inferior del lazo).
✤ STEP 4. Then I proceeded to glue these pieces on the ears (the pieces of white frosted foam) and when I had the ears ready I glued the complete piece on top of the piece of pink foam without frost (the part bottom of the loop).


✤ PASO 5. Uní los extremos de las otras 2 piezas del lazo pegando sus puntas en el centro, luego pegué la pieza pequeña sobre la grande, es decir, la de foami rosado escarchado sobre la de foami blanco escarchado, para luego pegar esta sobre la pieza inferior (la que tiene las orejas) procurando que quede bien centrada.
✤ STEP 5. I joined the ends of the other 2 pieces of the bow by gluing their tips in the center, then I glued the small piece on top of the large one, that is, the frosty pink foam piece on the frosty white foam piece, to then glue this on the bottom piece (the one with the ears) making sure it is well centered.


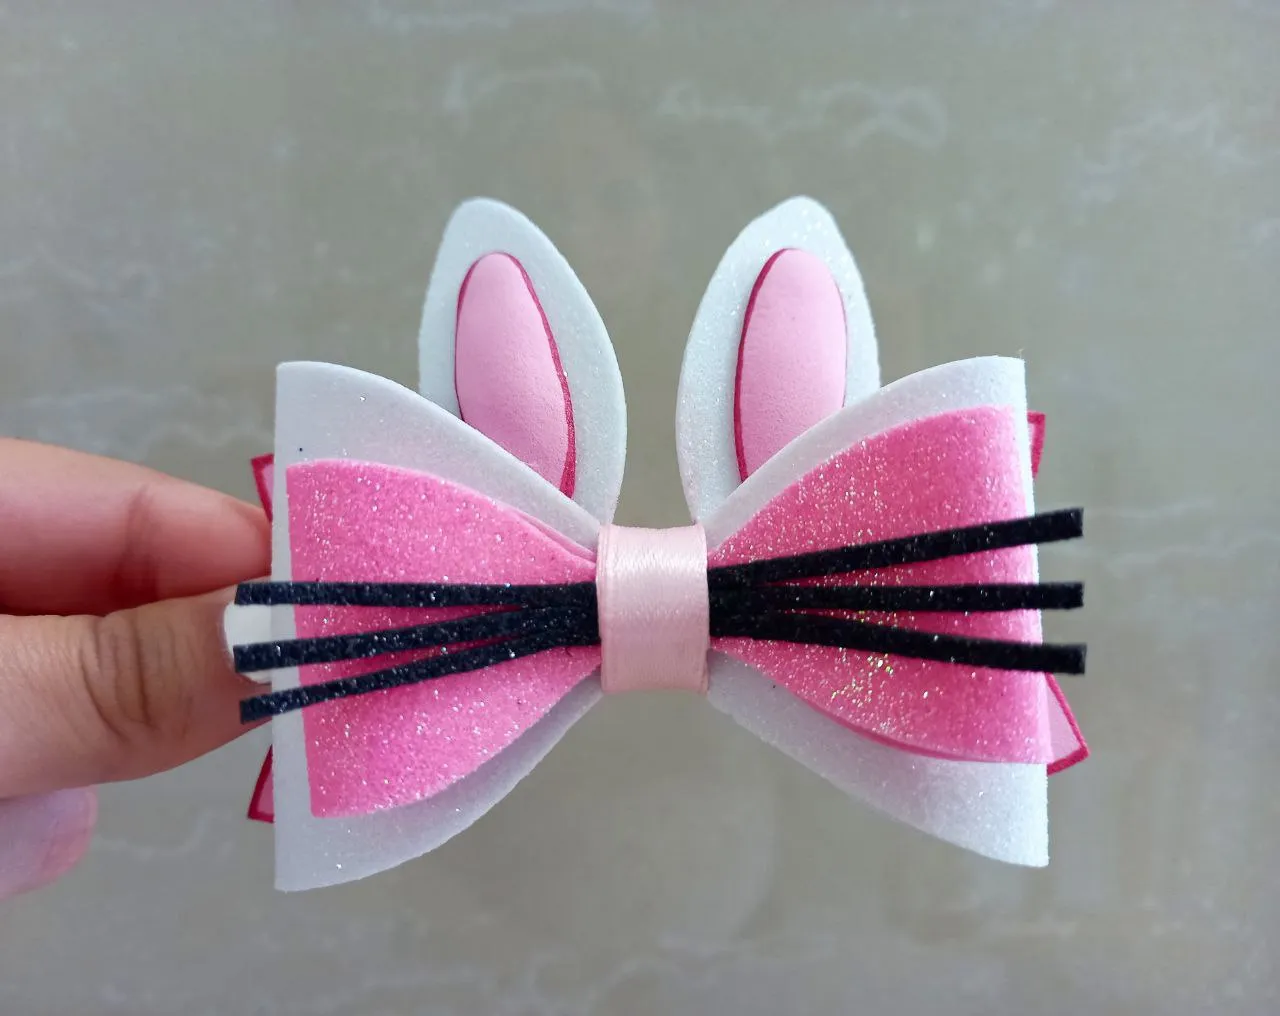
✤ PASO 6. Recorté una tira de foami escarchado negro y le hice 2 cortes horizontales de cada lado dejando el centro sin recortar, obteniendo así la forma de los bigotes del conejo, esta pieza luego la pegué justo en el centro de la parte superior del lazo que ya tenía formado.
✤ STEP 6. I cut out a strip of black frosted foam and made 2 horizontal cuts on each side, leaving the center uncut, thus obtaining the shape of the rabbit's whiskers. I then glued this piece right in the center of the upper part of the loop that had already been formed.


✤ PASO 7. Por ultimo pegué una tira de la cinta de raso rosada en el centro del lazo para unir mejor todas sus piezas y cubrir esa parte del lazo, finalmente pegué el gancho de cabello en la parte central trasera con silicón.
✤ STEP 7. Finally I glued a strip of pink satin ribbon in the center of the bow to better join all its pieces and cover that part of the bow, finally I glued the hair clip in the central back part with silicone .


Segundo diseño • • Second design
✤ PASO 1. Para este segundo modelo de lazo comencé elaborando las piezas necesarias en foami, esta vez utilizando los colores morado y blanco escarchado y morado sin escarcha, en total fueron 7 piezas.
✤ STEP 1. For this second bow model I started making the necessary pieces in foam, this time using the colors purple and frosted white and purple without frost, in total there were 7 pieces.

✤ PASO 2. Le apliqué calor a las piezas internas de las orejas (las de color morado sin escarcha), luego las pegué sobre las piezas blancas y seguidamente pegué las orejas sobre la pieza de foami escarchado blanco, una de cada lado dejando el centro libre, pegando luego esta sobre la pieza de foami morado escarchado (la más corta).
✤ STEP 2. I applied heat to the inner pieces of the ears (the purple ones without frost), then I glued them on the white pieces and then I glued the ears on the white frosted foam piece, one of each side leaving the center free, then gluing it on the piece of frosty purple foam (the shortest one).


✤ PASO 3. Uní los extremos de la pieza de foami morado escarchado restante pegándolos en el centro de esta, luego pegué esta pieza sobre la que ya tenía lista y seguidamente recorté una pequeña tira de foami morado sin escarcha y la pegué en el centro del lazo uniendo así todas las piezas.
✤ STEP 3. I joined the ends of the remaining piece of frosty purple foam by gluing them in the center of it, then I glued this piece on the one I already had ready and then I cut out a small strip of purple foam without frost and glued it in the center of the bow thus joining all the pieces.


✤ PASO 4. Hice un pequeño pompón para simular la colita del conejito, para ello enrollé una buena cantidad de estambre blanco en un lápiz, luego lo retireé y le hice un nudo con el mismo estambre, seguidamente recorté el extremos contrario y con ayuda de un peine le di su forma esponjosa y al tenerlo listo lo pegué en el centro del lazo.
✤ STEP 4. I made a small pompom to simulate the bunny's tail, to do this I rolled a good amount of white yarn around a pencil, then I removed it and tied a knot with the same yarn, then I trimmed the opposite ends and with the help of a comb I gave it its fluffy shape and when I had it ready I glued it in the center of the bow.


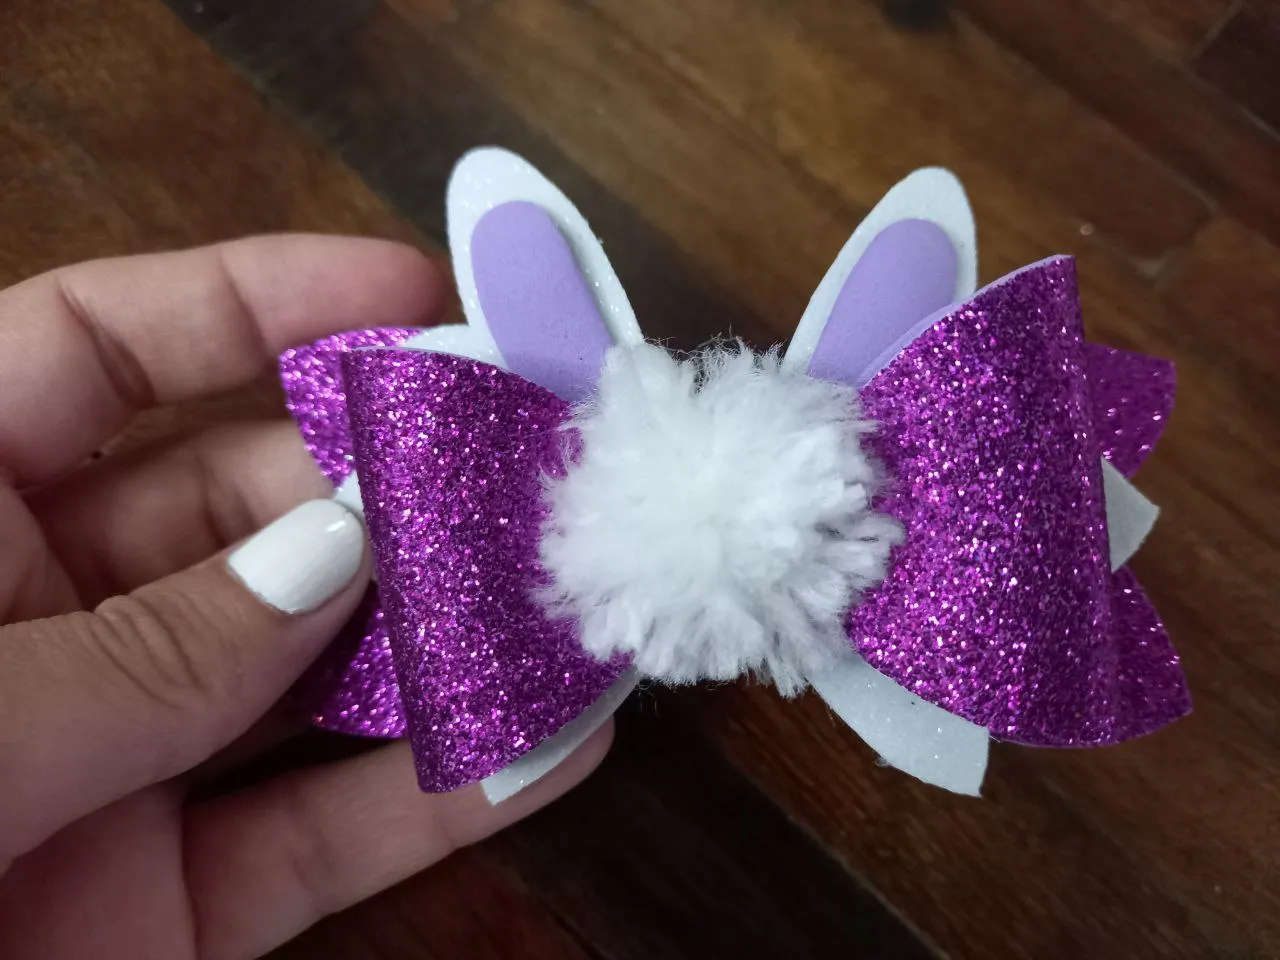
✤ PASO 5. Por último con ayuda del abrehuecos hice 4 círculos de foami morado sin escarcha y los pegué en los extremos de la pieza inferior del lazo, para finalizar pegué el gancho de cabello en la parte trasera del lazo con silicón.
✤ STEP 5. Finally, with the help of the gap opener I made 4 circles of purple foam without frost and glued them to the ends of the lower piece of the bow, to finish I glued the hair clip to the back of the bow with silicone .


¡Y listo! De esta manera tan sencilla fue como elaboré estos 2 lindos modelos de lazos de foami para niñas con temática de conejito que como ven son muy sencillos pero lucen bastante y no se a ustedes pero a mí me gustaron mucho ambos, aun no me decido sobre cuál es más hermoso ¿Qué les pareció a ustedes? Espero que les haya gustado este tutorial y las ideas que les he presentado, gracias por pasar nos vemos pronto con una nueva idea creativa.
And ready! In this simple way I made these 2 cute models of foam bows for girls with a bunny theme, which as you can see are very simple but they look pretty and I don't know about you but I really liked both, I still haven't decided which one. It is more beautiful. What did you think? I hope you liked this tutorial and the ideas that I have presented to you, thanks for stopping by, see you soon with a new creative idea.


Todas las fotografías son de mi propiedad.
Fotografías capturadas con mi Samsung Galaxy A12
Separador de texto elaborado en Canva.
Nos vemos en mi próxima publicación.
¡Tengan un feliz día!
All photographs are my property.
Photos captured with my Samsung Galaxy A12
Text separator made in Canva.
See you in my next post.
¡Have a happy day!