¡Saludos Comunidad Creativa! | ¡Greetings Creative Community!
¡Feliz viernes y lindo día para todos! Hoy quiero compartir con ustedes la elaboración de una linda Catarina o mariquita de cartulina con alas en 3D, muy fácil de hacer en apenas unos pocos pasos, es ideal para decorar espacios o habitaciones infantiles y a su vez es divertida gracias a sus alas que hacen movimiento simulando así que este insecto vuela, de verdad espero que les guste, acá les dejo el procedimiento.
¡Happy Friday and nice day to all! Today I want to share with you the elaboration of a beautiful cardboard Catarina or ladybug with wings in 3D, very easy to do in just a few steps, it is ideal for decorating spaces or children's rooms and at the same time it is fun thanks to its wings that make movement thus simulating that this insect flies, I really hope you like it, here I leave the procedure.


Materiales | Materials
🐞 Cartulina escolar negra, roja y blanca.
🐞 Lápiz.
🐞 Silicón caliente.
🐞 Tijera.
🐞 2 Objetos circulares (grande y mediano)
🐞 Black, red and white school cardboard.
🐞 Pencil.
🐞 Hot silicone.
🐞 Scissor.
🐞 2 circular objects (large and medium)

Procedimiento ✂ | Process ✂
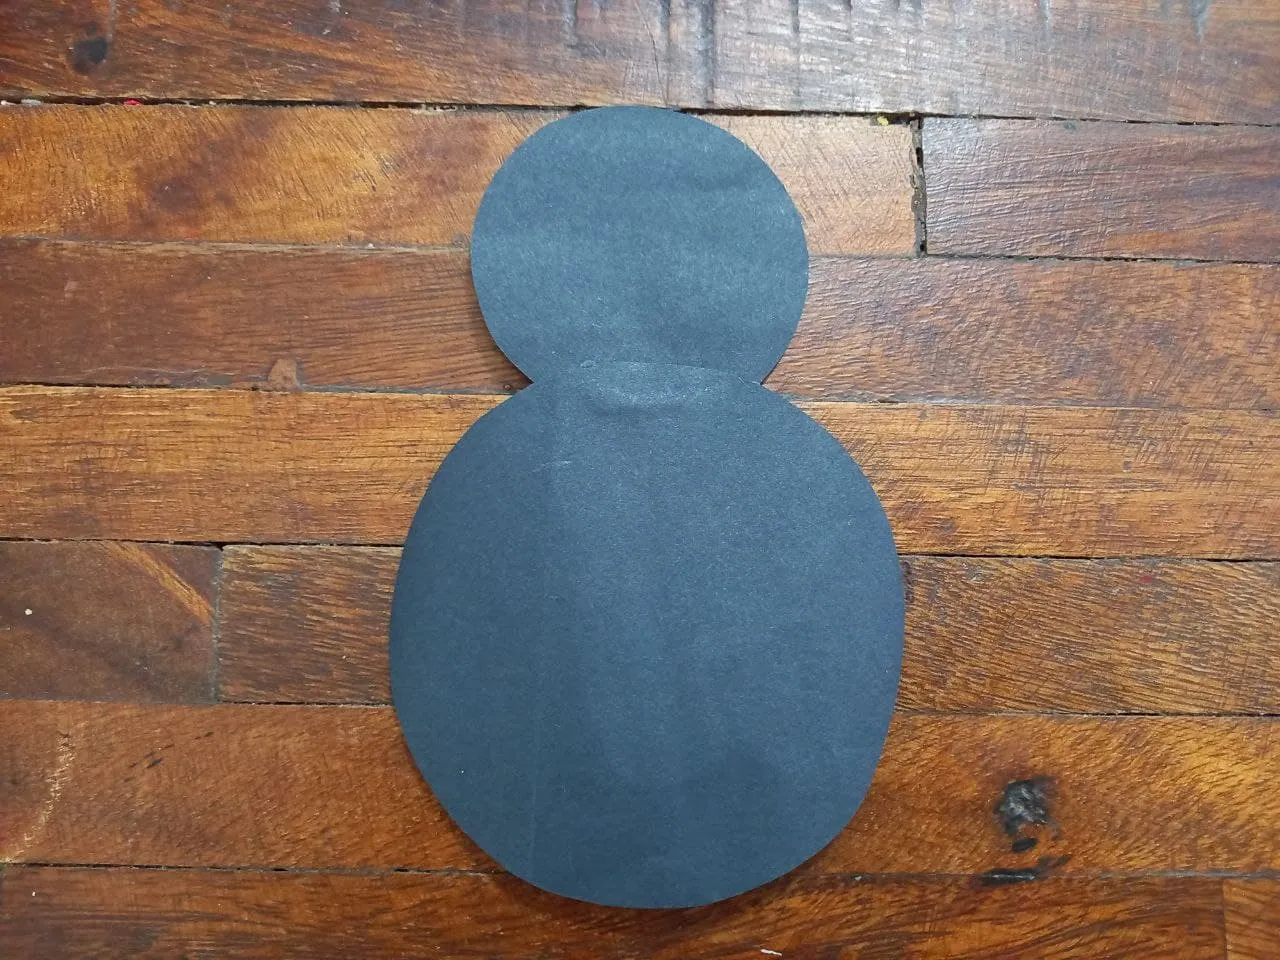
🐞 PASO 1. Con ayuda de los objetos circulares hacemos 4 círculos de cartulina, 3 grandes (2 rojos y uno negro) y 1 mediano de color negro y luego recortamos.
🐞 STEP 1. With the help of the circular objects, we make 4 circles of cardboard, 3 large (2 red and one black) and 1 medium black and then cut.

🐞 PASO 2. Aplicamos silicón en una de las orillas del circulo negro mediano y lo pegamos en la orilla de la parte trasera del circulo grande negro, el grande es el cuerpo de la Catarina y el mediano es la cabeza.
🐞 STEP 2. We apply silicone on one of the edges of the medium black circle and paste it on the edge of the back of the large black circle, the large one is the body of the Ladybug and the medium one is the head.


🐞 PASO 3. Doblamos los círculos de cartulina roja por la mitad y aplicamos silicón en una de sus partes externas, estas serán las alas de la Catarina, luego las pegamos sobre el cuerpo quedando en paralelo una de la otra y uniendo sus puntas en la parte superior.
🐞 STEP 3. We fold the red cardboard circles in half and apply silicone on one of their external parts, these will be the wings of the Ladybug, then we glue them on the body, staying parallel to each other and joining their tips at the top.


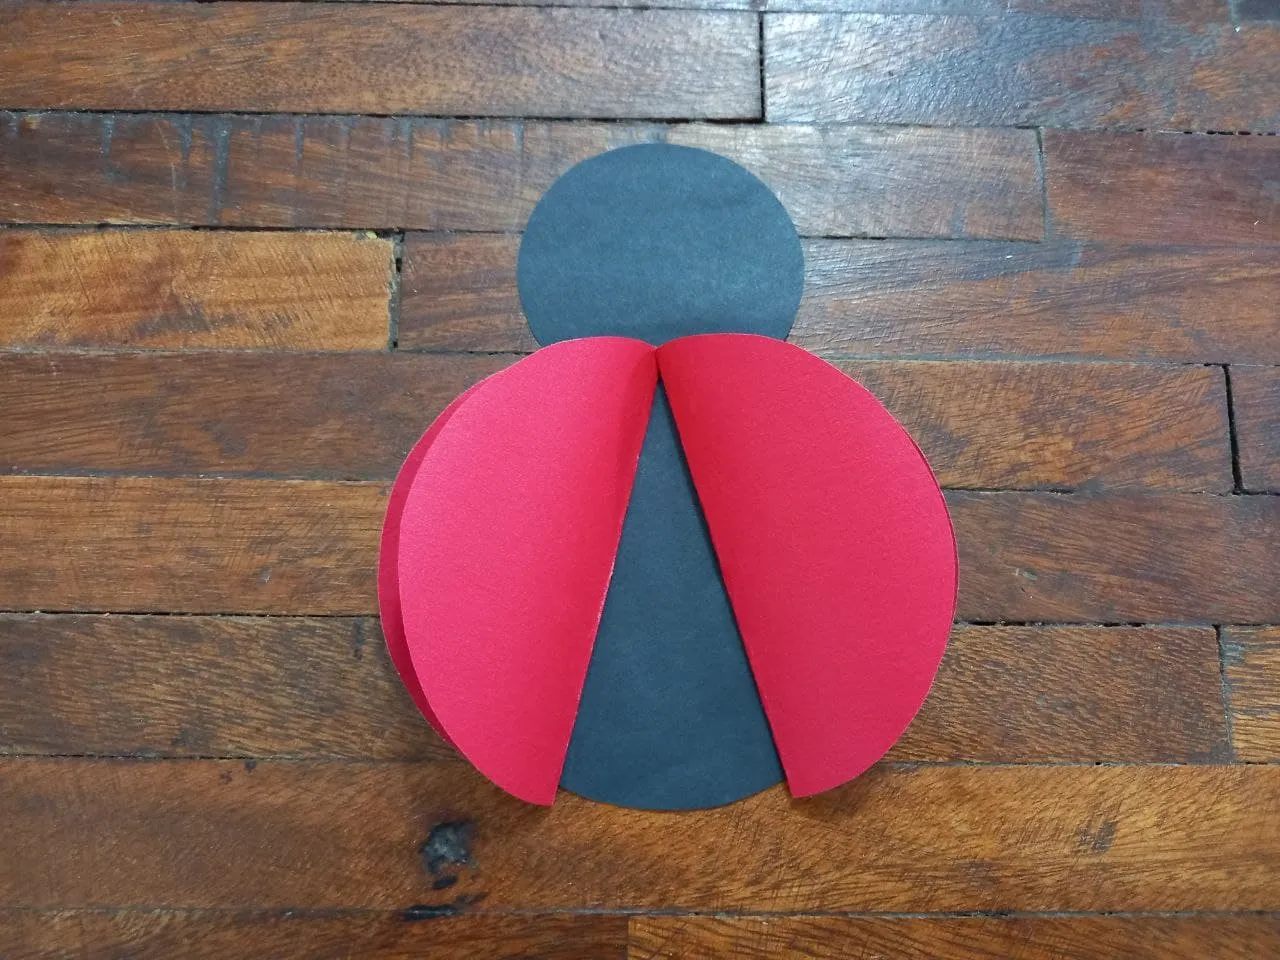
🐞 PASO 4. Hacemos 6 círculos pequeños de cartulina negra y pegamos uno a uno sobre las alas, quedando 3 de cada lado.
🐞 STEP 4. We make 6 small circles of black cardboard and glue one by one on the wings, leaving 3 on each side.


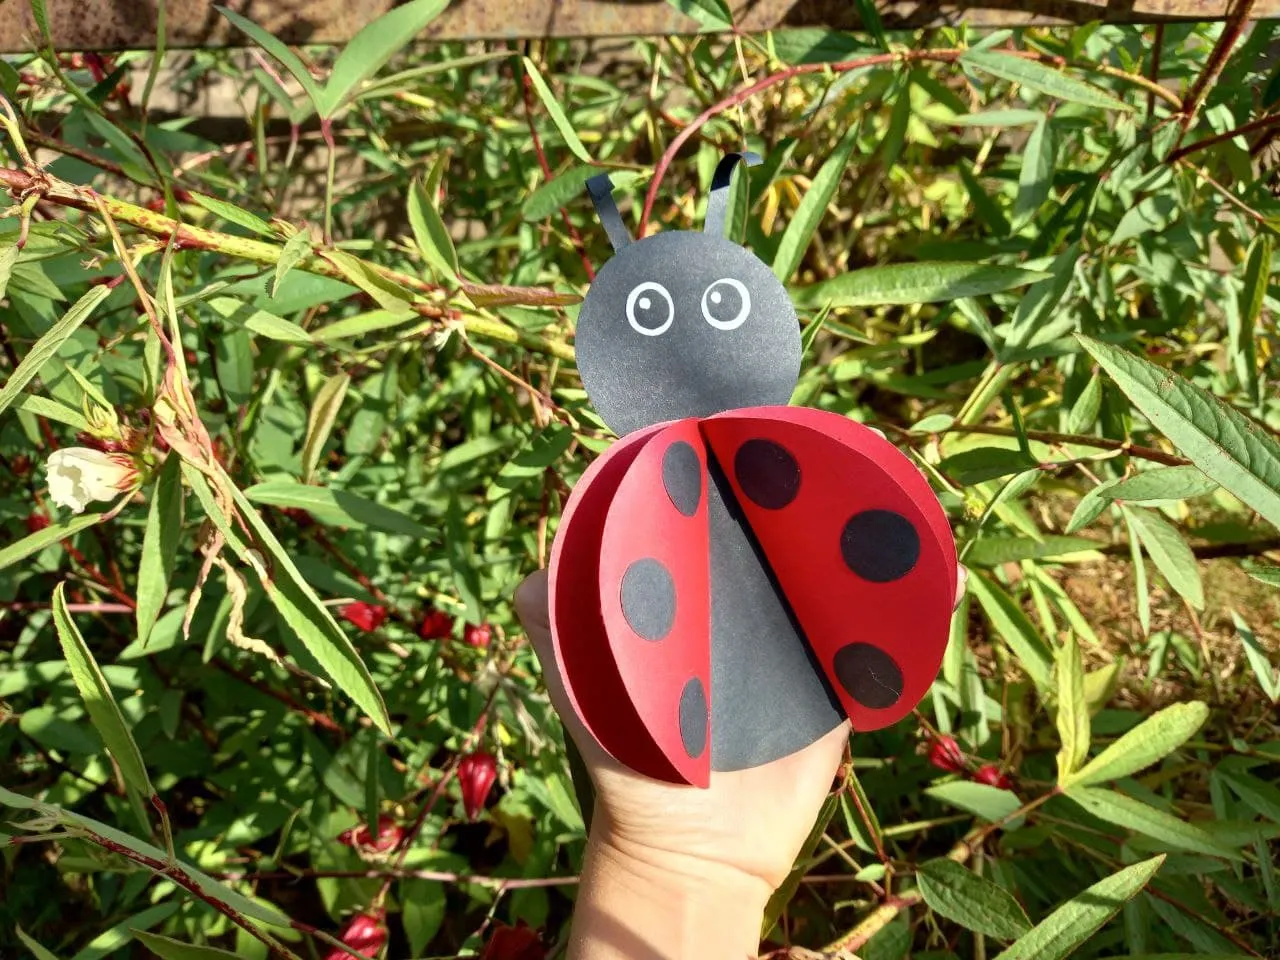
🐞 PASO 5. Hacemos 2 círculos pequeños de cartulina blanca, 2 más pequeños de cartulina negra y 2 tiras pequeñas y delgadas de cartulina negra, pegamos los círculos negros sobre los blancos y les dibujamos un puntito con pintura blanca aunque es opcional, una vez hecho eso ya tenemos los ojos listos, pegamos las tiras de cartulina negra en la orilla superior de la parte trasera de la cabeza de la Catarina, estas serán las antenitas, luego con un lápiz las arqueamos un poco hacia adelante y finalmente pegamos los ojos.
🐞 STEP 5. We make 2 small circles of white cardboard, 2 smaller ones of black cardboard and 2 small and thin strips of black cardboard, we stick the black circles on the white ones and we draw a dot with white paint although it is optional , once that is done we already have the eyes ready, we paste the strips of black cardboard on the upper edge of the back of the head of the Catarina, these will be the antennae, then with a pencil we arch them a little forward and finally we paste the eyes.


¡Y listo! Ya tenemos una linda Catarina de papel ideal para decorar las habitaciones de los niños o simplemente para jugar, de cualquier forma queda linda y sus alas en 3D permiten simular el movimiento de volar, lo que la hace más interesante, espero que les haya gustado este tutorial y se animen a recrearlo en casa, nos vemos en un siguiente post con una nueva manualidad.
¡And ready! We already have a cute paper Catarina ideal for decorating children's rooms or just to play, in any way it is cute and its 3D wings allow you to simulate the movement of flying, which makes it more interesting, I hope you liked this tutorial and are encouraged to recreate it at home, see you in a next post with a new craft.
Resultado 🐞 | Result 🐞


¡Gracias por detenerte a leer!
Todas las fotografías son de mi propiedad.
Fotografías capturadas con mi Samsung Galaxy A12
Separador de texto elaborado en Canva.
Nos vemos en mi próxima publicación.
¡Tengan un feliz día!
¡Thanks for stopping to read!
All photographs are my property.
Photos captured with my Samsung Galaxy A12
Text separator made in Canva.
See you in my next post.
¡Have a happy day!