¡Saludos abejitas creativas! | ¡Greetings creative bees!
Sé que ya Halloween pasó pero es que hice tantas manualidades para esa fecha que me ha quedado un tutorial sin compartir y hoy les los quiero dejar por aquí lo que elaboré reciclando una lata de cerveza y convirtiéndola en un bonito adorno de Frankenstein, les muestro el procedimiento de cómo lo hice, espero que les guste, sin más, ¡manos a la obra!
I know that Halloween is already over but I did so many crafts for that date that I have left a tutorial without sharing and today I want to leave you here what I made by recycling a beer can and turning it into a nice Frankenstein ornament, I show you the procedure of how I did it, I hope you like it, without further ado, ¡let's get to work!

◈ 1 Lata de cerveza.
◈ Pintura verde.
◈ Foami escarchado negro y blanco.
◈ Silicón caliente.
◈ Pincel.
◈ Tijera.
◈ Lápiz.
◈ 1 can of beer.
◈ Green paint.
◈ Black and white frosted foami.
◈ Hot silicone.
◈ Brush.
◈Scissors.
◈ Pencil.


● PASO 1. Lo primero es pintar la lata con la pintura verde hasta cubrirla bien, luego dejar secar por completo por unos minutos.
● STEP 1. The first thing is to paint the can with the green paint until it is well covered, then let it dry completely for a few minutes.


● PASO 2. Con el foami escarchado negro y blanco hacemos la forma del cabello, los ojos, la boca y la cicatriz característica de este personaje, hacemos todas estas piezas de la forma de nuestra preferencia y recortamos.
● STEP 2. With the black and white frosted foami we make the shape of the hair, the eyes, the mouth and the characteristic scar of this character, we make all these pieces in the shape of our preference and cut them.

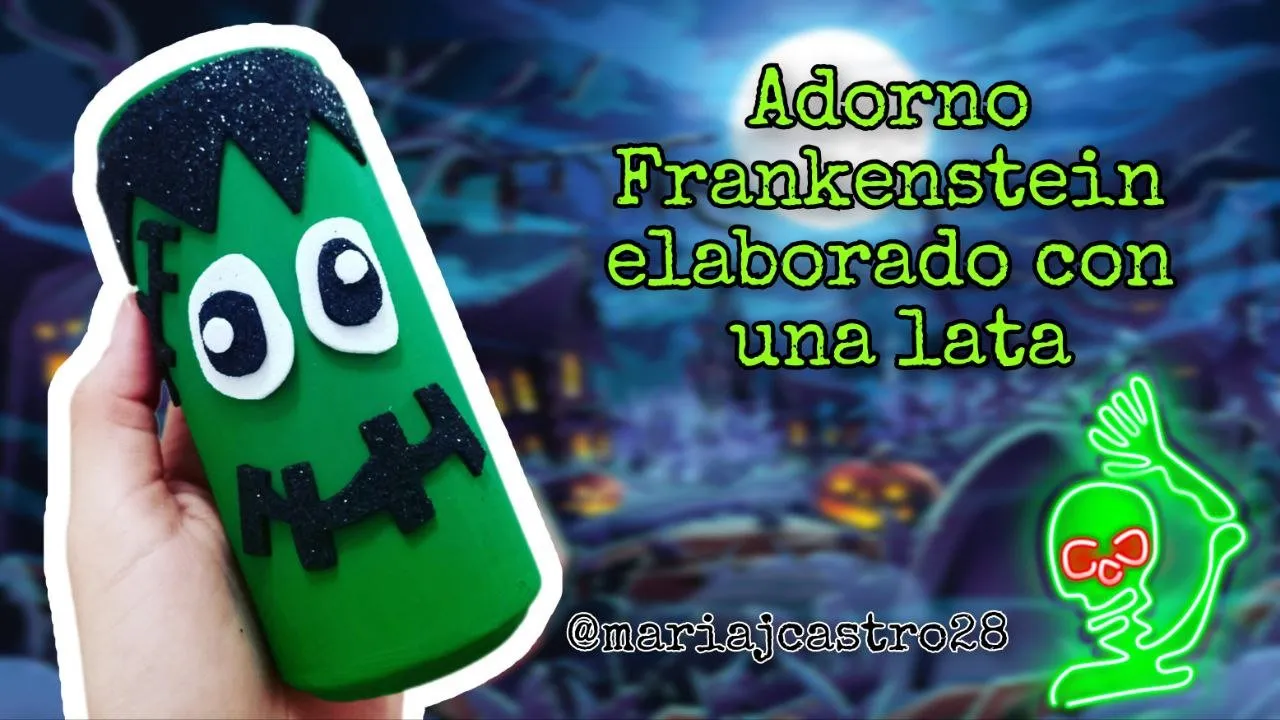
● PASO 3. Luego comenzamos a pegar las piezas sobre la lata dándole la forma del rostro, pegamos el cabello arriba, los ojos en el centro, la cicatriz a un lado y la boca abajo.
● STEP 3. Then we begin to glue the pieces on the can giving it the shape of the face, we glue the hair on top, the eyes in the center, the scar on one side and the mouth on the bottom.


Y listo, esta es una forma sencilla de convertir una simple lata en un lindo adorno para Halloween, muy económico, creativo, y es una manera de reciclar materiales en lugar de desecharlos, ¿les gusta la idea? A mí me encantó y es una manera fácil y económica de elaborar un adorno para decorar. Gracias por visitar mi post, nos vemos pronto con un nuevo tutorial pero ahora serán navideños, estoy preparando cosas muy lindas para compartir con ustedes y pronto las verán.
And that's it, this is a simple way to turn a simple can into a cute Halloween decoration, very cheap, creative, and it's a way to recycle materials instead of throwing them away, do you like the idea? I loved it and it is an easy and cheap way to make an ornament to decorate. Thank you for visiting my post, see you soon with a new tutorial but now it will be Christmas, I am preparing very nice things to share with you and you will see them soon.


Todas las fotografías son de mi propiedad.
Fotografías capturadas con mi Samsung Galaxy A12
Separador de texto elaborado en Canva.
Nos vemos en mi próxima publicación.
¡Tengan un feliz día!
All photographs are my property.
Photos captured with my Samsung Galaxy A12
Text separator made in Canva.
See you in my next post.
¡Have a happy day!