¡Saludos Comunidad Creativa! | ¡Greetings Creative Community!
¡Feliz viernes! Espero que todos tengan un gran fin de semana, es un gusto para mi poder compartir nuevamente una manualidad para Halloween, fecha que se aproxima y la cual me ha motivado a trabajar en diferentes creaciones para compartir con ustedes, en esta ocasión les traigo algo muy diferente a lo que he compartido hasta ahora, ya que no utilicé ni foami ni cartulina como acostumbro, sino que utilicé únicamente una botella plástica de refresco y pinturas al frio como materiales principales, con ello elaboré un lindo cotillón o dulcero con temática de Frankenstein a la vez que estoy reciclando, espero que esta idea les guste, aquí les dejo el proceso, sin más, ¡a trabajar!
¡Happy Friday! I hope everyone has a great weekend, it is a pleasure for me to be able to share again a craft for Halloween, a date that is approaching and which has motivated me to work on different creations to share with you, this time I bring you something very different from what I have shared so far, since I did not use foam or cardboard as usual, but I only used a plastic bottle of soda and cold paints as main materials, with this I made a nice party favors or candy box with Frankenstein theme while I'm recycling, I hope you like this idea, here I leave the process, without further ado, get to work!


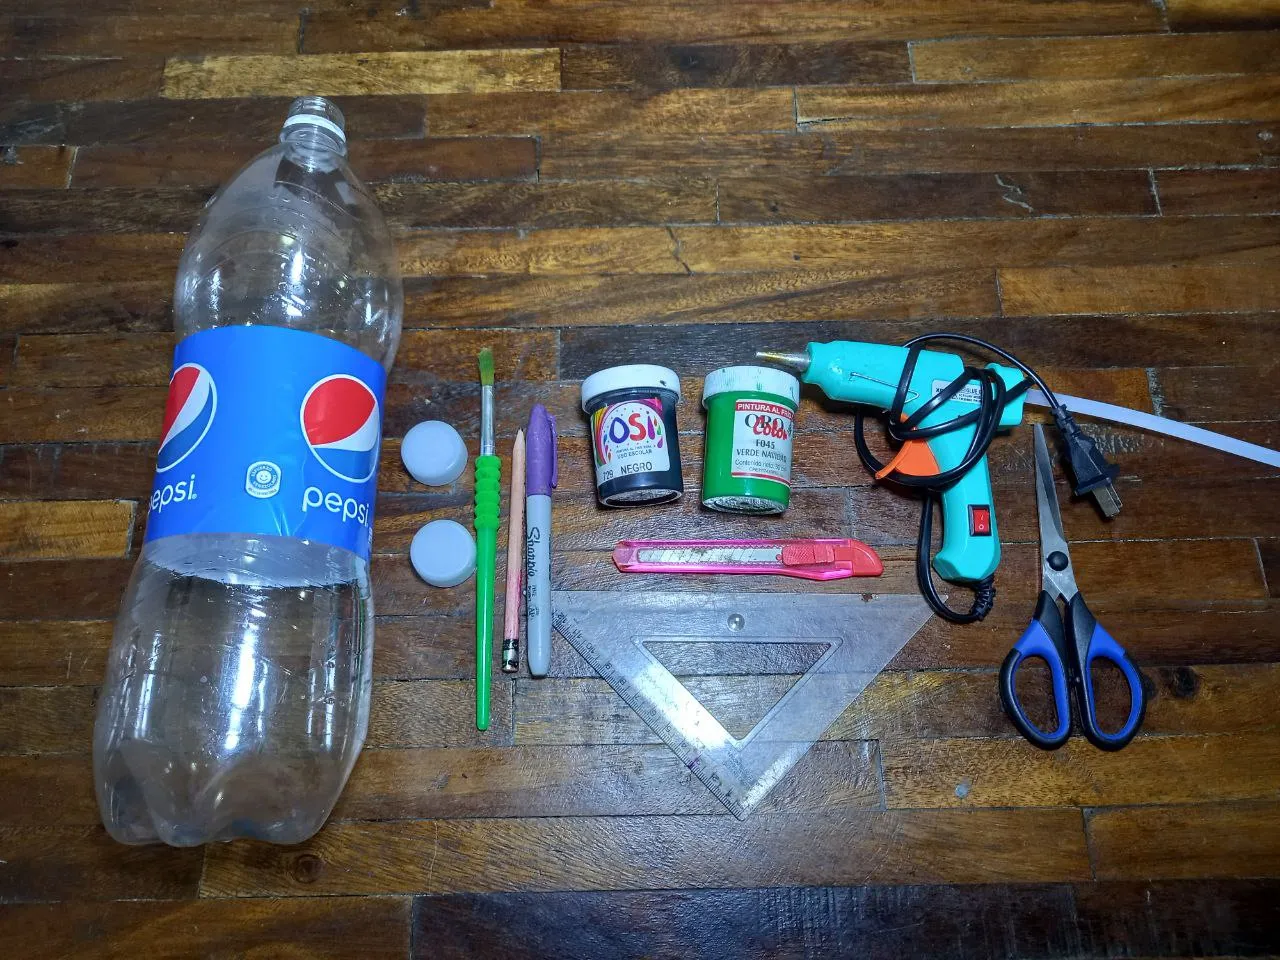
☠ 1 Botella plástica de refresco.
☠ 2 Tapas de refresco.
☠ Pintura al frío verde, negra y blanca.
☠ Silicón caliente.
☠ Pincel.
☠ Marcador.
☠ Lápiz.
☠ Tijera.
☠ Cutter.
☠ Regla.
☠ 1 plastic soda bottle.
☠ 2 soft drink tapas.
☠ Green, black and white cold paint.
☠ Hot silicone.
☠ Brush.
☠ Bookmark.
☠ Pencil.
☠ Scissor.
☠ Cutter.
☠ Ruler.

☠ PASO 1. Comenzamos recortando una pieza de la botella de plástico, con el cutter vamos a cortar justo en la línea donde termina la etiqueta del refresco, si no les queda derecho como a mi podemos corregir y darle forma recta con la tijera.
☠ STEP 1. We start by cutting out a piece of the plastic bottle, with the cutter we are going to cut right on the line where the soft drink label ends, if it doesn't fit as it did for me, we can correct it and shape it straight with scissors.


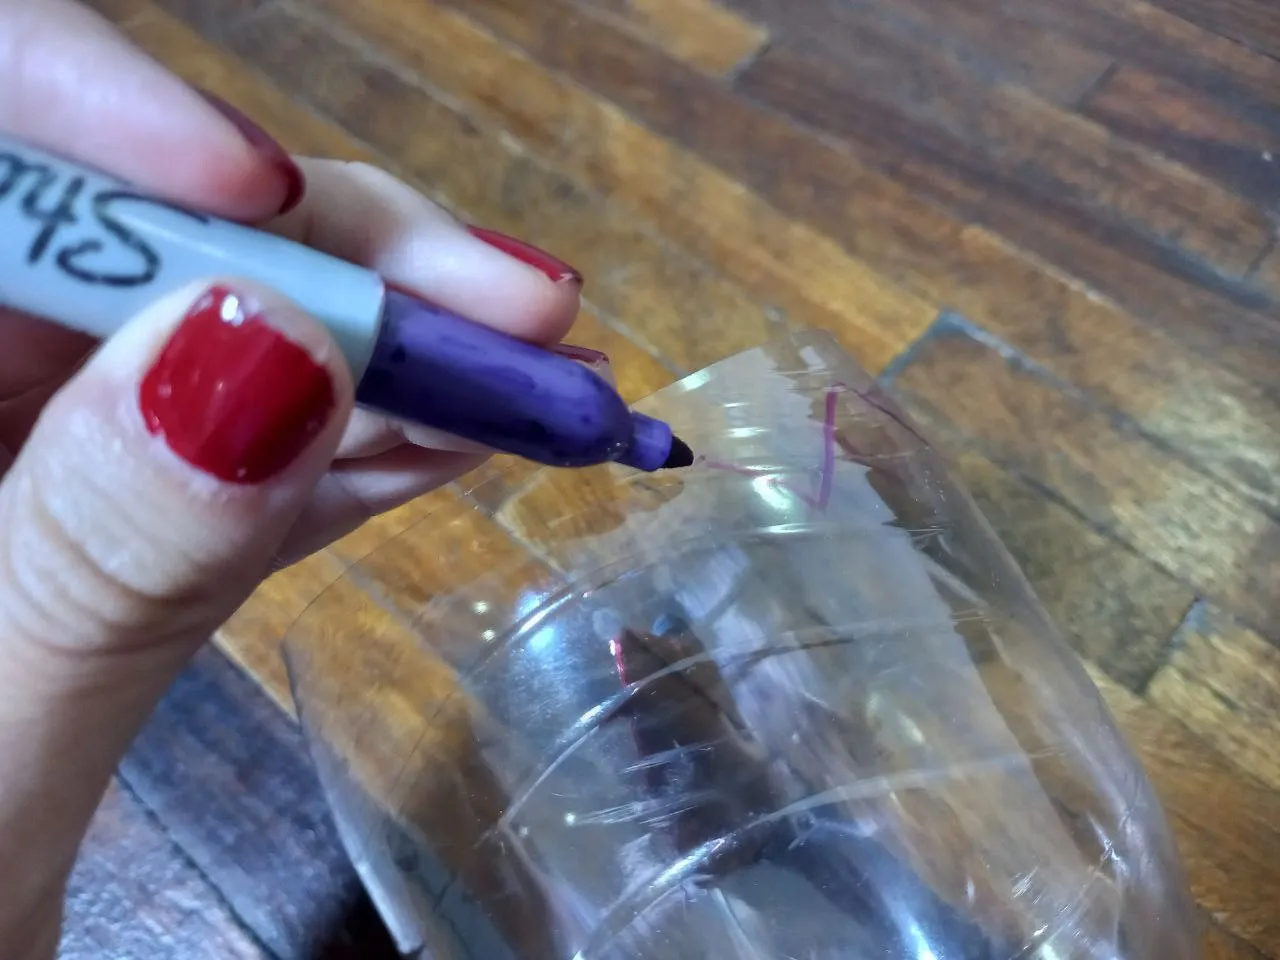
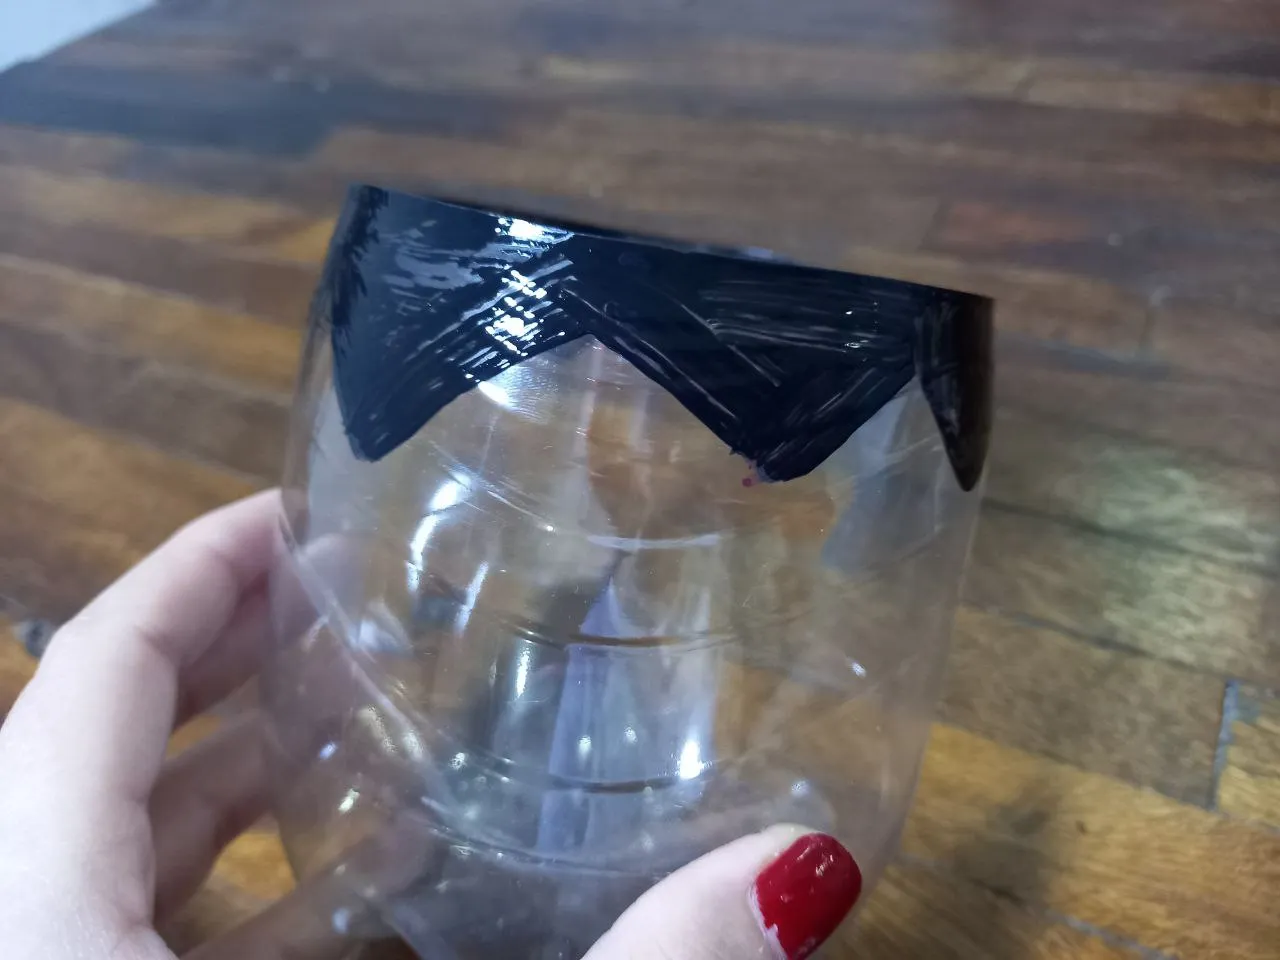
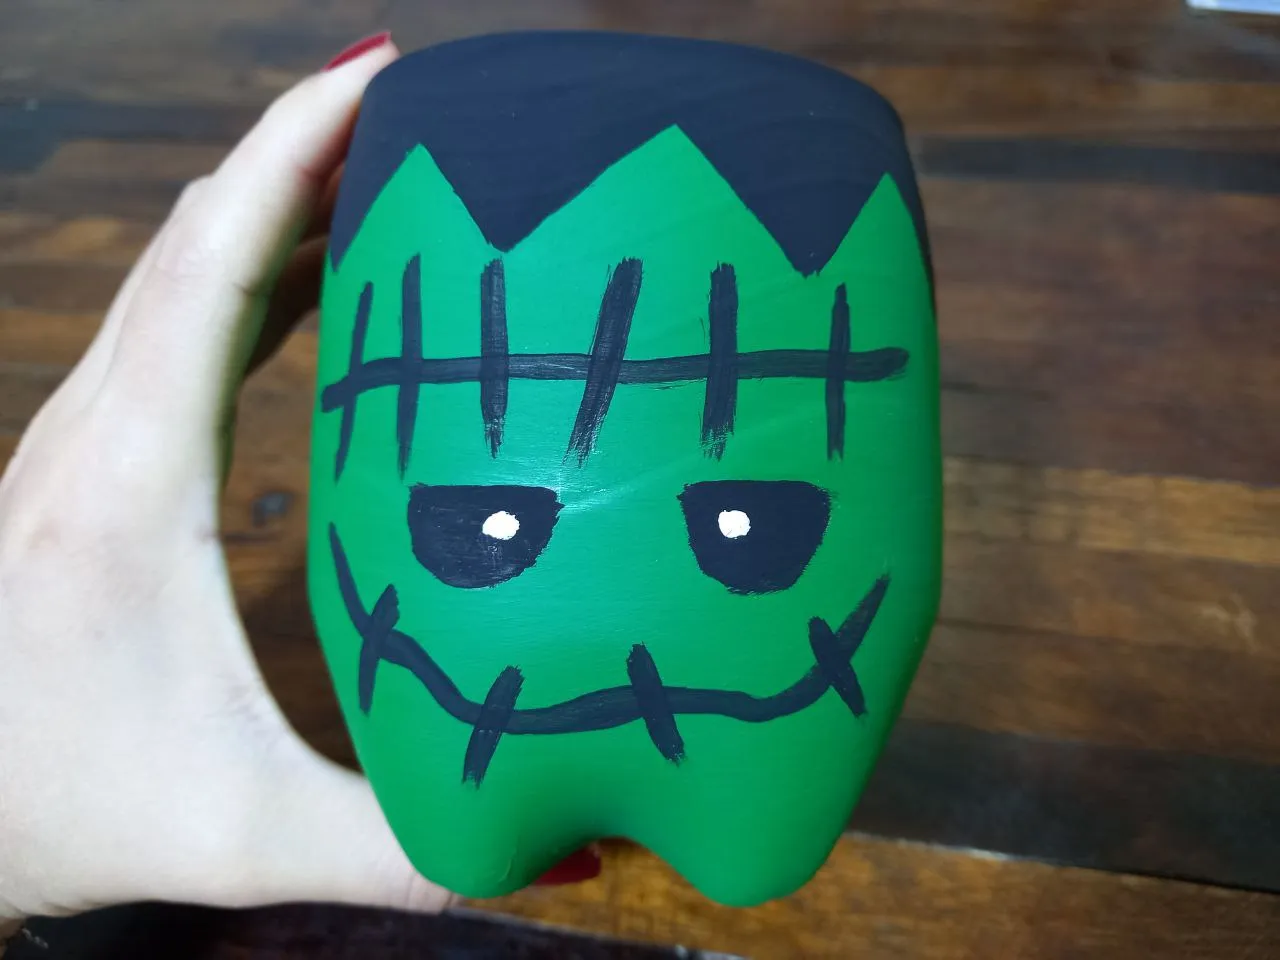
☠ PASO 2. Con el marcador dibujamos el cabello en la parte superior de la forma de nuestra preferencia, en mi caso lo hare en forma de zigzag, debemos hacerlo por toda la orilla de la botella, no solamente al frente, luego de dibujar comenzamos a pintar dentro de la línea con pintura negra, con dos pasadas de pintura bastará, siempre que dejemos secar bien la primera.
☠ STEP 2. With the marker we draw the hair in the upper part of the shape of our preference, in my case I will do it in a zigzag shape, we must do it along the entire edge of the bottle, not just in front, After drawing we begin to paint inside the line with black paint, with two passes of paint it will suffice, as long as we let the first one dry well.


☠ PASO 3. Mientras se seca la pintura negra vamos a pintar el resto de la botella con pintura verde procurando no pintar sobre la parte negra, al igual que en el paso anterior debemos darle dos pasadas de pintura dejando secar bien la primera.
☠ STEP 3. While the black paint dries, we are going to paint the rest of the bottle with green paint, trying not to paint over the black part, as in the previous step, we must give it two coats of paint, letting the bottle dry well. first.


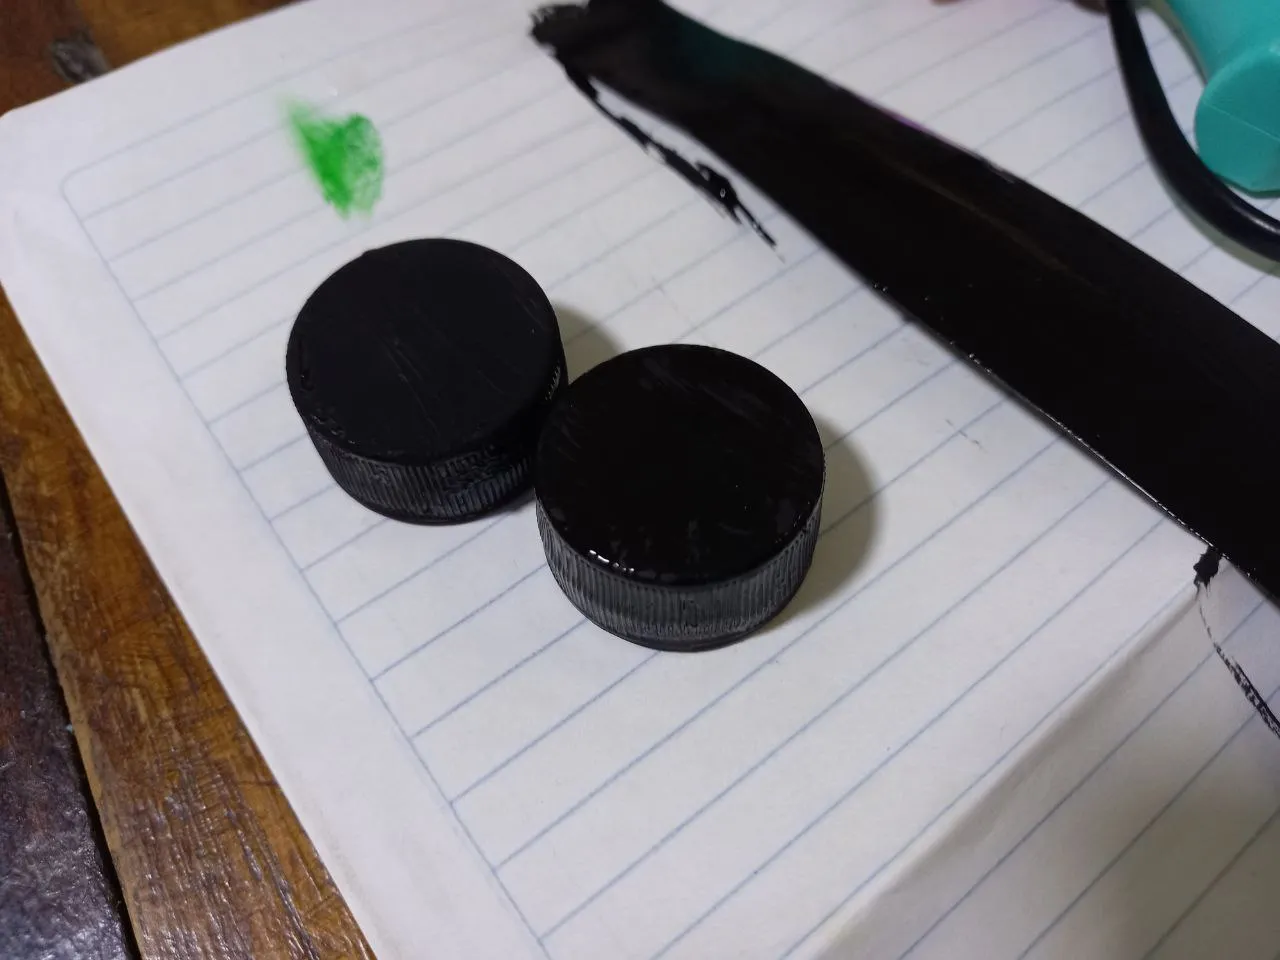
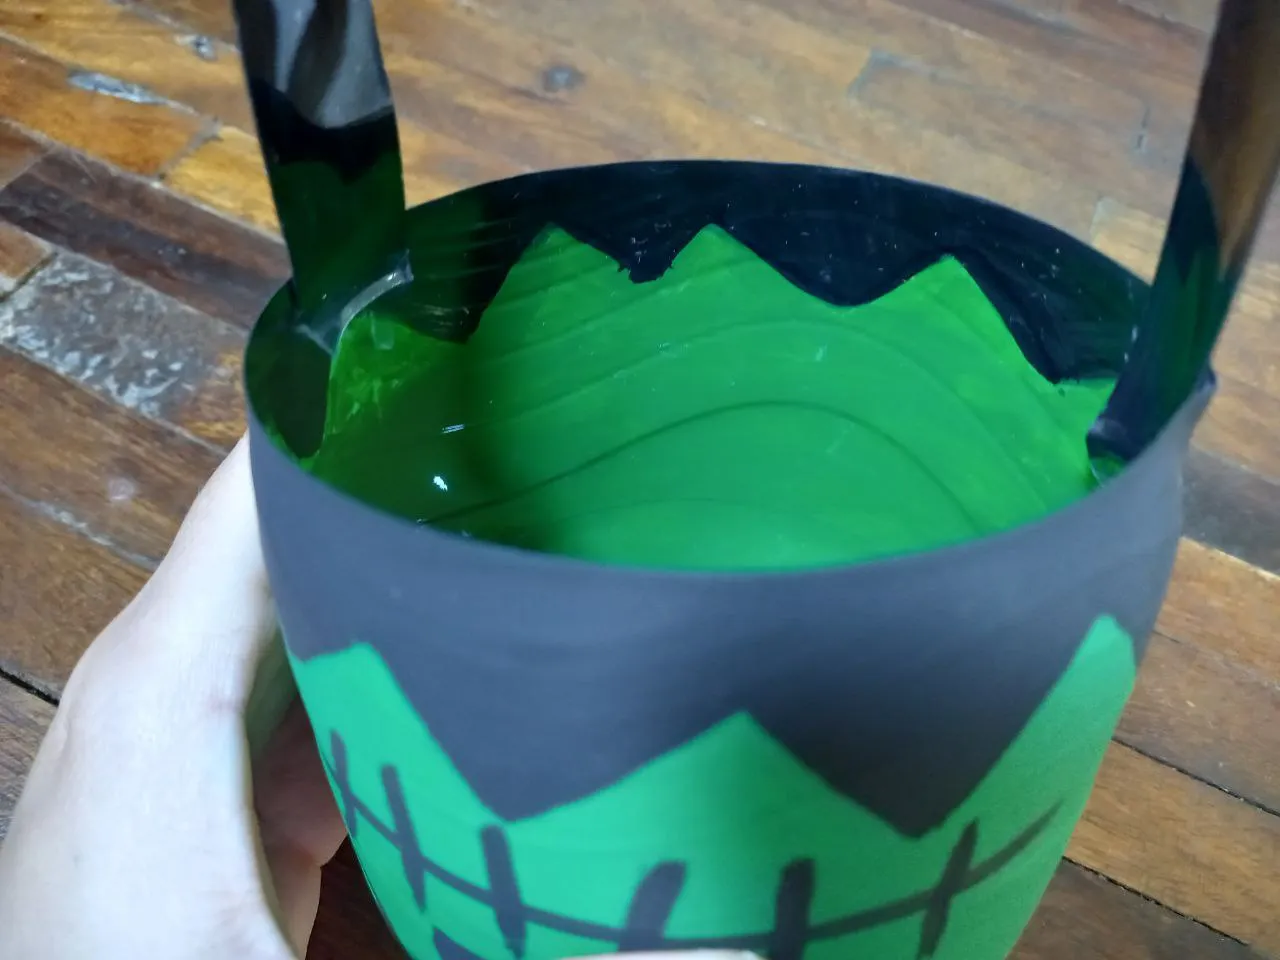
☠ PASO 4. Mientras dejamos secar bien la pintura vamos a recortar una tira de la botella de refresco con el restante de esta, con la regla y el marcador medimos para que esta sea recta y recortamos, luego la extendemos sobre una hoja de papel y pintamos con pintura negra, bastará con dos pasadas dejándolas secar muy bien.
☠ STEP 4. While we let the paint dry well we are going to cut a strip of the soda bottle with the rest of it, with the ruler and the marker we measure so that it is straight and we cut it, then we extend it on a sheet of paper and paint with black paint, two passes will suffice, letting them dry very well.


☠ PASO 5. Continuamos pintando las dos tapas de refresco con pintura negra, nos aseguramos de cubrirlas bien y dejamos secar.
☠ STEP 5. We continue painting the two soda caps with black paint, making sure to cover them well and let dry.

☠ PASO 6. Cuando la pintura de la botella de refresco se haya secado por completo podemos continuar y lo siguiente es dibujar el rostro con el lápiz, lo hacemos de la manera que más nos guste, luego con el pincel (preferiblemente con punta delgada) remarcamos con pintura negra y finalizamos dibujando un punto con pintura blanca en cada ojo, en mi caso yo utilicé esmalte de uñas.
☠ STEP 6. When the painting on the soda bottle has completely dried we can continue and the next thing is to draw the face with the pencil, we do it in the way we like the most, then with the brush (preferably with a thin tip) we highlight with black paint and finish by drawing a dot with white paint on each eye, in my case I used nail polish.


☠ PASO 7. Aplicamos silicón en una de las puntas de la tira de plástico que pintamos anteriormente y la pegamos en la parte superior interna del envase de refresco, luego repetimos con el otro extremo y esta será el asa de nuestro dulcero, debemos asegurarnos de pegarlo a los lados quedando el rostro de frente.
☠ STEP 7. We apply silicone to one of the ends of the plastic strip that we painted earlier and stick it to the top inside of the soda container, then we repeat with the other end and this will be the handle of our candy box , we must make sure to stick it to the sides, leaving the face in front.


☠ PASO 8. Por último, aplicamos silicón en la orilla de las tapas de refresco pintadas y las pegamos a los lados del rostro y justo en el centro de la botella de refresco, podemos pegarlas justo debajo del asa para que todo quede centrado, las tapas serán como los tornillos de la cabeza que tiene Frankenstein.
☠ STEP 8. Finally, we apply silicone on the edge of the painted soda caps and stick them to the sides of the face and right in the center of the soda bottle, we can stick them just below the handle so that everything centered, the caps will be like the screws in Frankenstein's head.


¡Y listo! De esta manera hemos elaborado un lindo dulcero con temática de Frankenstein para Halloween reciclando una botella plástica de refresco, el procedimiento es muy fácil y el resultado muy lindo, económico y divertido, especial para los niños en la noche de brujas, solo resta llenarlo de dulces, podemos decorarlo de la manera que más nos guste y hacerlo de diferentes motivos, los cuales estaré compartiendo en los próximos días, espero que les haya gustado esta nueva idea y la puedan poner en práctica en casa, nos vemos en un siguiente post con una nueva idea creativa.
¡And ready! In this way we have made a cute Frankenstein-themed candy box for Halloween by recycling a plastic soda bottle, the procedure is very easy and the result is very cute, cheap and fun, especially for children in the Halloween, all that remains is to fill it with sweets, we can decorate it the way we like the most and do it for different reasons, which I will be sharing in the next few days, I hope you liked this new idea and can put it into practice at home , see you in a next post with a new creative idea.


Todas las fotografías son de mi propiedad.
Fotografías capturadas con mi Samsung Galaxy A12
Separador de texto elaborado en Canva.
Nos vemos en mi próxima publicación.
¡Tengan un feliz día!
All photographs are my property.
Photos captured with my Samsung Galaxy A12
Text separator made in Canva.
See you in my next post.
¡Have a happy day!