

¡Feliz día amigos creativos de Hive Diy! Espero que se encuentre muy bien. En este lindo día quiero compartir con ustedes un nuevo tutorial de una de mis creaciones más recientes, se trata de un lindo topper para tortas con temática de Flork el cual elaboré para el cumpleaños de mi pareja, hace mucho que no hago toppers porque con tantos que tengo guardados no veía necesario hacer uno nuevo para cada cumpleaños, sin embargo, este año quise variar un poco y se me ocurrió hacer uno divertido para esta ocasión y este fue el resultado, espero que les guste, sin más, ¡vamos a crear!
Happy day creative friends from Hive Diy! I hope you are well. On this beautiful day I want to share with you a new tutorial of one of my most recent creations, it is a cute Flork themed cake topper which I made for my partner's birthday, I haven't made it in a long time. toppers because with so many that I have saved I didn't see it necessary to make a new one for each birthday, however, this year I wanted to vary a little and it occurred to me to make a fun one for this occasion and this was the result, I hope you like it, without further ado, We are going to create!

• Foami escarchado rojo, negro y dorado.
• Cartulina metalizada dorada.
• Cartulina perlada blanca.
• Cinta metalizada dorada.
• Pintura negra.
• Palito para globo.
• Lápiz.
• Tijera.
• Silicón.
• Pincel.
• Red, black and gold frosted foam.
• Gold metallic cardboard.
• White pearlescent cardstock.
• Gold metallic ribbon.
• Black paint.
• Balloon stick.
• Pencil.
• Scissors.
• Silicone.
• Brush.


★ PASO 1. Lo primero que hice fue dibujar la silueta del Flork en foami blanco y recorté, luego con ayuda de un pincel punta fina remarqué las líneas de la silueta con pintura negra, dibujé también los ojos y dejé secar.
★ STEP 1. The first thing I did was draw the silhouette of the Flork in white foam and cut it out, then with the help of a fine tip brush I highlighted the lines of the silhouette with black paint, I also drew the eyes and I let it dry.


★ PASO 2. Hice un gorrito de fiesta en foami rojo escarchado y dorado, luego de armarlo lo pegué en la parte superior del Flork, también hice el brazo con foami negro sin escarcha y lo pegué a uno de los costados de la figura.
★ STEP 2. I made a party hat in frosted red and gold foam, after putting it together I glued it to the top of the Flork, I also made the arm with black foam without frost and glued it to one from the sides of the figure.


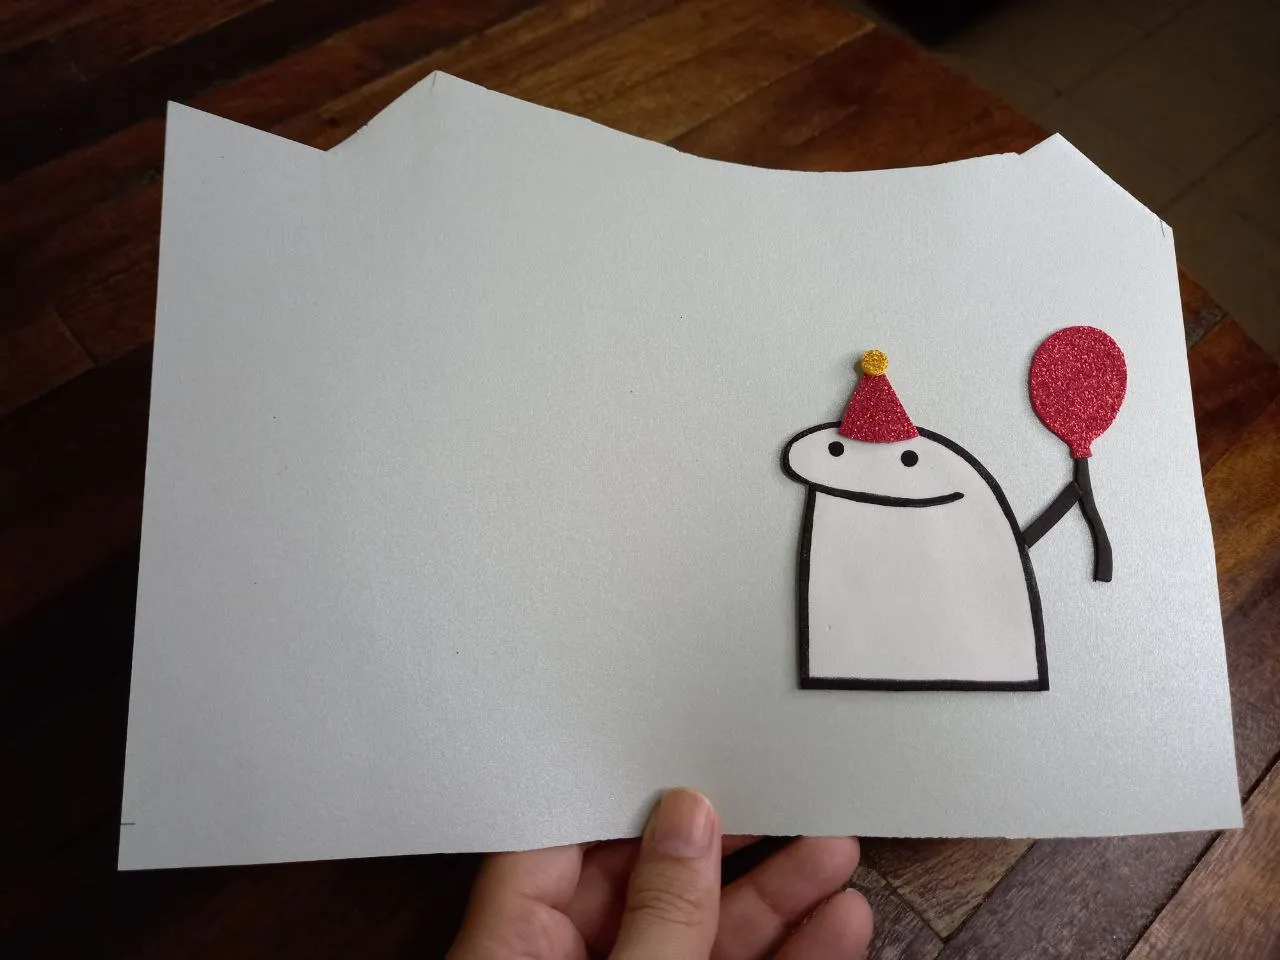
★ PASO 3. Recorté una pieza de cartulina perlada blanca y comencé a armar el topper pegando sobre esta a un lado un globo que hice en foami escarchado rojo y negro sin escarcha. Justo al lado del globo pegué el Flork de tal forma que quedara sujetando el globo.
★ STEP 3. I cut out a piece of white pearlescent cardboard and began to assemble the topper by gluing a balloon that I made in red and black frosted foam without frost to it on one side. Right next to the balloon I glued the Flork in such a way that it was holding the balloon.

★ PASO 4. Elaboré la frase “Feliz Cumple” en foami escarchado negro y recorté, luego la pegué sobre la cartulina perlada blanca al lado del Flork, seguidamente recorté la cartulina dejando un borde delgado alrededor de las letras y la figura como fondo de estas.
★ STEP 4. I made the phrase “Happy Birthday” in black frosted foam and cut it out, then I glued it on the white pearlized cardboard next to the Flork, then I cut out the cardboard leaving a thin border around the letters and the figure as the background of these.


★ PASO 5. Recorté varios cuadros pequeños de foami negro y los uní de 2 en 2 para luego pegarlos en la parte trasera del topper, hecho esto le apliqué silicón a todas las piezas de foami y pegué el topper sobre cartulina metalizada dorada para luego recortar el exceso de esta y dejar un borde como fondo final del topper.
★ STEP 5. I cut out several small squares of black foam and joined them 2 by 2 and then glued them on the back of the topper. Once this was done, I applied silicone to all the foam pieces and glued the topper on metallic cardboard. golden and then cut off the excess and leave a border as the final background of the topper.


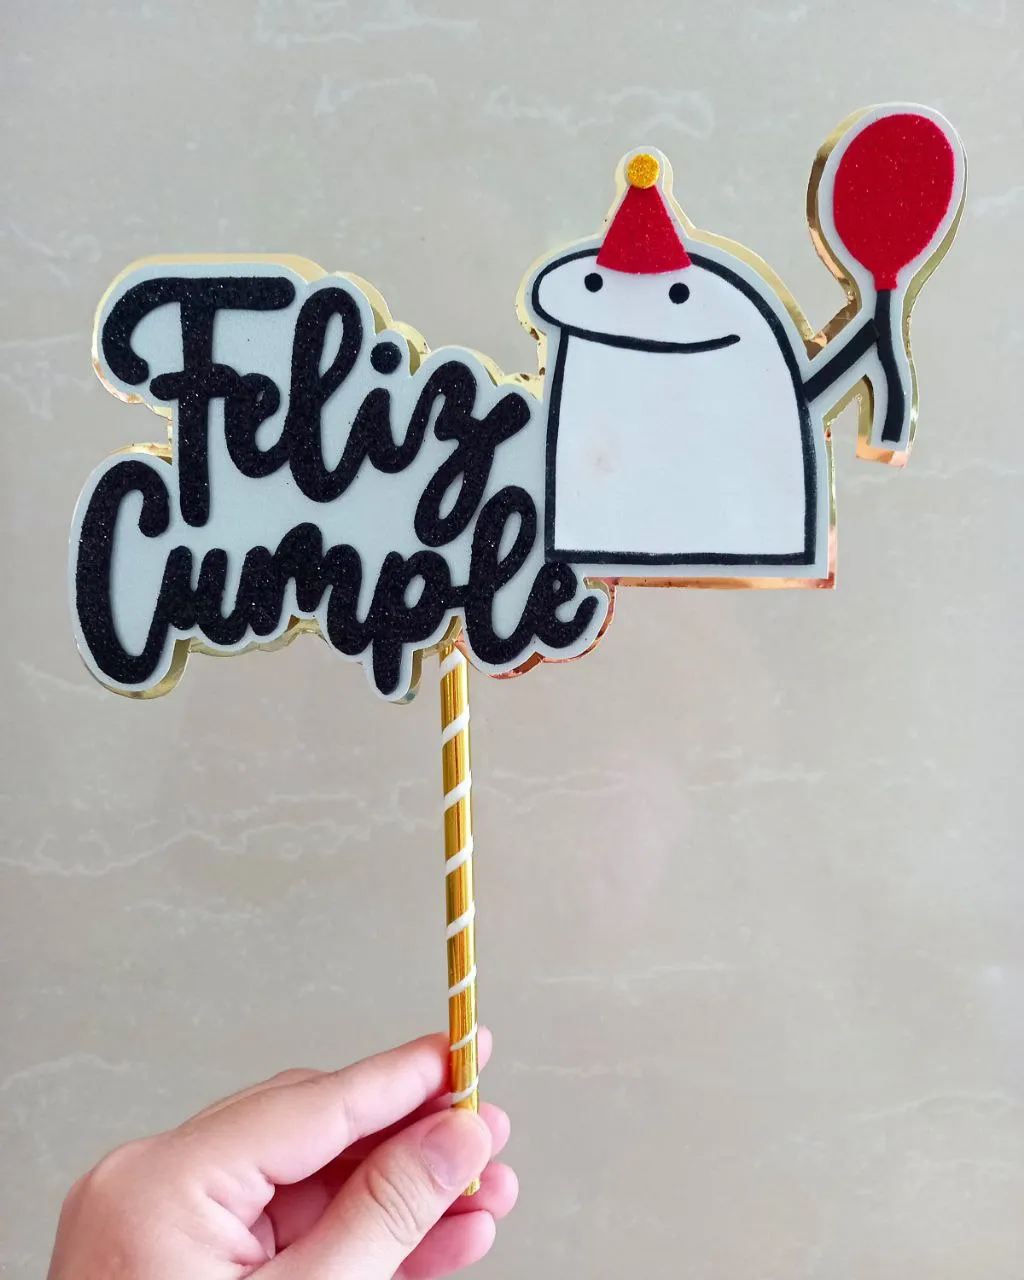
★ PASO 6. Como detalle final recorté una tira de cinta metalizada dorada y con ella adorné el palito de globo, luego este lo pegué en la parte central trasera del topper.
★ STEP 6. As a final detail I cut out a strip of gold metallic ribbon and decorated the balloon stick with it, then I glued it to the central back part of the topper....


¡Y listo! De esta manera tan sencilla fue como elaboré este lindo topper de cumpleaños con temática de Flork, una que no pasa de moda y que es además una forma divertida de celebrar una ocasión especial, además los colores eran perfectos porque además de que combinan entre si quedaron muy bien con el resto de los regalos y detalles que hice para ese día. ¿Qué les pareció a ustedes? A mi me encantó y espero que a ustedes también. Gracias por pasar, nos vemos pronto con una nueva y creativa idea.
And ready! In this simple way I made this cute Flork themed birthday topper, one that never goes out of style and is also a fun way to celebrate a special occasion, plus the colors were perfect because in addition to the fact that They combine well with each other and looked great with the rest of the gifts and details I made for that day. What did you think? I loved it and I hope you do too. Thanks for stopping by, see you soon with a new and creative idea.


Todas las fotografías son de mi propiedad.
Fotografías capturadas con mi Samsung Galaxy A12
Separador de texto elaborado en Canva.
Nos vemos en mi próxima publicación.
¡Tengan un feliz día!
All photographs are my property.
Photos captured with my Samsung Galaxy A12
Text separator made in Canva.
See you in my next post.
¡Have a happy day!