Hola Amigos de HiveDIY un placer poder estar nuevamente por acá, está vez les traigo unas hermosas mariposas hechas con materiales para reciclaje son súper fácil de hacer y les van a encantar. Quedaron muy lindas así que espero les guste.🦋❤️
Hello Friends of HiveDIY a pleasure to be here again, this time I bring you some beautiful butterflies made with recycling materials are super easy to make and you will love them. They turned out very nice so I hope you like them.🦋❤️

MATERIALES • MATERIALS
- Pintura de uñas (roja y blanca)
- Tijeras
- Botella de plástico transparente
- Lápiz
- Molde de mariposa
- Marcador Negro
- Nail polish (red and white)
- Scissors
- Clear plastic bottle
- Pencil
- Butterfly mold
- Black marker

Paso a Paso • Step by Step
🟥Vamos a comenzar tomando la botella plástica previamente limpia y seca, tomaremos la tijera y recortamos la parte lisa, o sea la parte del medio, y luego recortaremos en dos pedazos.
We will start by taking the plastic bottle previously cleaned and dried, we will take the scissors and cut the smooth part, that is, the middle part, and then we will cut it into two pieces.

🟥Tomaremos el molde de una mariposa, en este caso yo dibuje una mariposa, pero pueden imprimir una del tamaño que deseen. Está mariposa la pondremos debajo del plástico y con un gancho la aguantaremos, seguidamente con un marcador iremos marcando la mariposa en el plástico.
We will take the mold of a butterfly, in this case I drew a butterfly, but you can print one of the size you want. We will put this butterfly under the plastic and with a hook we will hold it, then with a marker we will mark the butterfly on the plastic.

🟥Luego tomaremos la pintura de uñas de color rojo y por el lado contrario de dónde marcamos vamos a ir pintando, esperamos que seque y pasamos dos capas de pintura.
Then we will take the red nail polish and on the opposite side of where we mark we are going to paint, wait for it to dry and apply two coats of paint.

🟥 Ahora por el lado derecho de la mariposa iremos haciendo unos puntos blancos con pintura de uña, así simulamos los puntos de las alas de la mariposa.
Now on the right side of the butterfly we will make some white dots with nail polish, so we simulate the dots of the butterfly's wings.

🟥 Seguidamente tomamos la tijera e iremos recortando el borde de la mariposa muy delicadamente para no pasarnos de la línea.
Then we take the scissors and trim the edge of the butterfly very delicately so as not to go over the line.

🟥Por último para darle forma a las alas, vamos a tomar una regla y doblaremos dónde finaliza las alas justo al lado del cuerpo de la mariposa, haremos esto en ambos lados, podemos doblar también la punta de las alas.
Finally to shape the wings, we will take a ruler and bend where the wings end right next to the body of the butterfly, we will do this on both sides, we can also bend the tip of the wings.

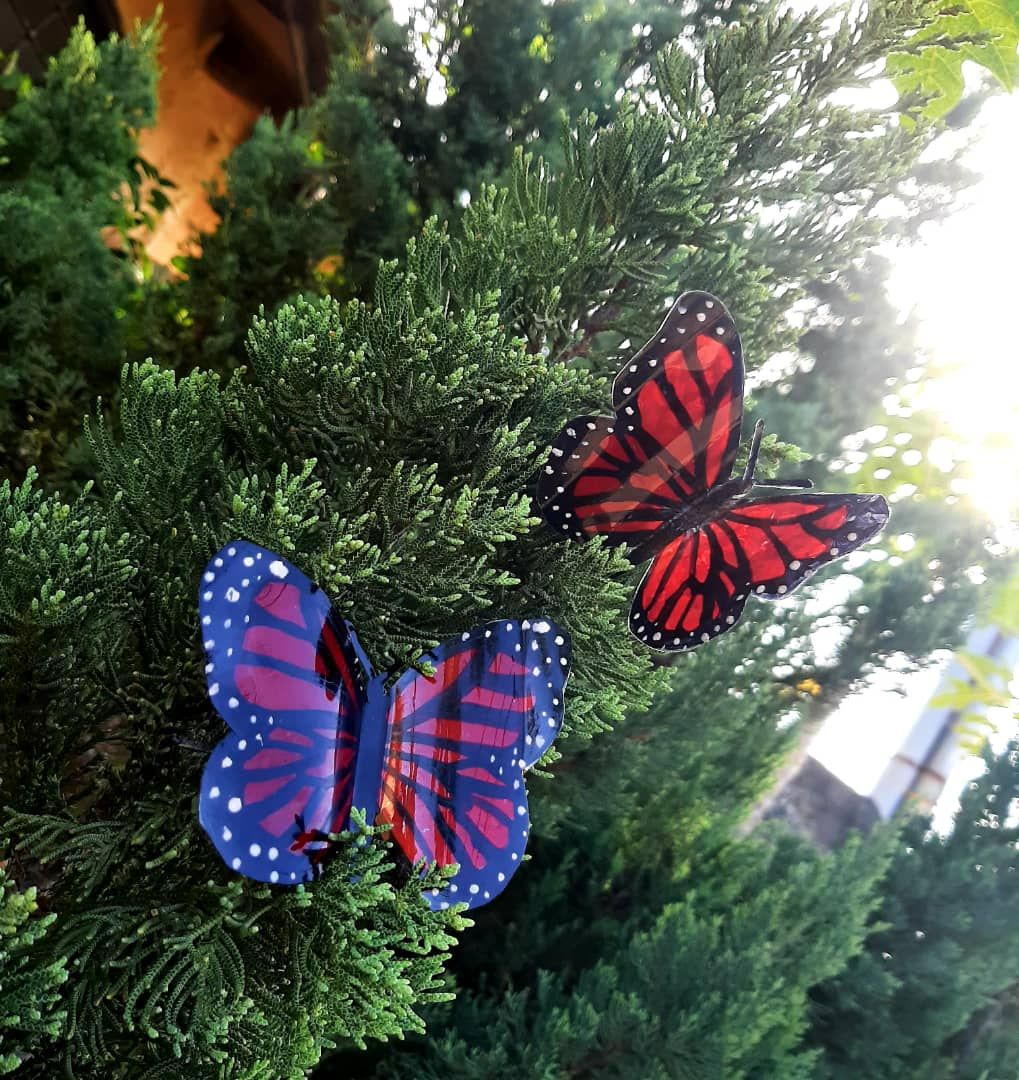
Con nuestras mariposas listas ahora es turno de tomarles unas fotos, para así lucir un resultado más bonito.
With our butterflies ready, now it's time to take some pictures of them, in order to show off a more beautiful result.


Queridos amigos, está fue mi manualidad para hoy con materiales de reciclaje, espero les haya gustado estas hermosas mariposas que podrían hacer de varios colores y lucirán totalmente hermosas. Les agradezco mucho por pasarse por mi blog y leer mi post, les mando un abrazo grande y les deseo mucho éxito a todos.❤️
Dear friends, this was my craft for today with recycling materials, I hope you liked these beautiful butterflies that you could make in various colors and they will look totally beautiful. I thank you very much for stopping by my blog and reading my post, I send you a big hug and I wish you all success.❤️