Hola amigos de HIVE DIY, es un gusto consistir parte de mis manualidades por esta querida comunidad, estudio tengan un día lleno de energías y creatividad para que realicen con éxitos todos sus proyectos.
Mi hijo hace poco compró una laptop, y se sentía preocupado de rayarla por fuera y decidió buscar en venta en Internet un forro y así protegerla, pero no consiguio acá en nuestra ciudad, así que tuve la idea de hacerle un forro especial para su computadora, aqui les dejo el paso a paso de este facil y sencillo forro para laptop:
Hello friends of HIVE DIY, it is a pleasure to make part of my crafts for this dear community, I hope you have a day full of energy and creativity so that you can successfully carry out all your projects.
My son recently bought a laptop, and he was worried about scratching it on the outside and decided to look for a cover for sale on the Internet to protect it, but he couldn't find it here in our city, so I had the idea of making a special cover for his computer. , here is the step by step of this easy and simple laptop cover:

➿➿➿➿🔸➿➿➿➿
MATERIALES
MATERIALS
Tengo varios proyectos en mente para realizar con plástico así que decidí ir a la tienda y comprar 1 metro de este material.
Este es el tipo de plástico que usan para manteles el cual viene en varios tipos de grosor, yo compré el más delgado y me salió por un precio de 1.5 $.
De ancho trae 1 ,37 y con un poco de creatividad lo podemos usar para diversas manualidades o proyectos, entre ellos se pueden hacer cartucheras, bolsos, forros, entre otros y rinde mucho.
un retazo de plástico transparente
un retazo de tela de su preferencias
si no tienes máquina de coser con paciencia y dedicación lo puedes coser a mano y te aseguro que queda muy bien.
I have several projects in mind to do with plastic so I decided to go to the store and buy 1 meter of this material.
This is the type of plastic they use for tablecloths which comes in various types of thickness, I bought the thinnest one and it cost me $1.5.
It is 1.37 in width and with a little creativity we can use it for various crafts or projects, among them you can make pencil cases, bags, linings, among others and it performs a lot.
a piece of transparent plastic
a piece of fabric of your preferences
If you don't have a sewing machine, with patience and dedication you can sew it by hand and I assure you it will look great.

➿➿➿➿🔸➿➿➿➿
PASO A PASO
STEP BY STEP
- Paso 1
-Step 1
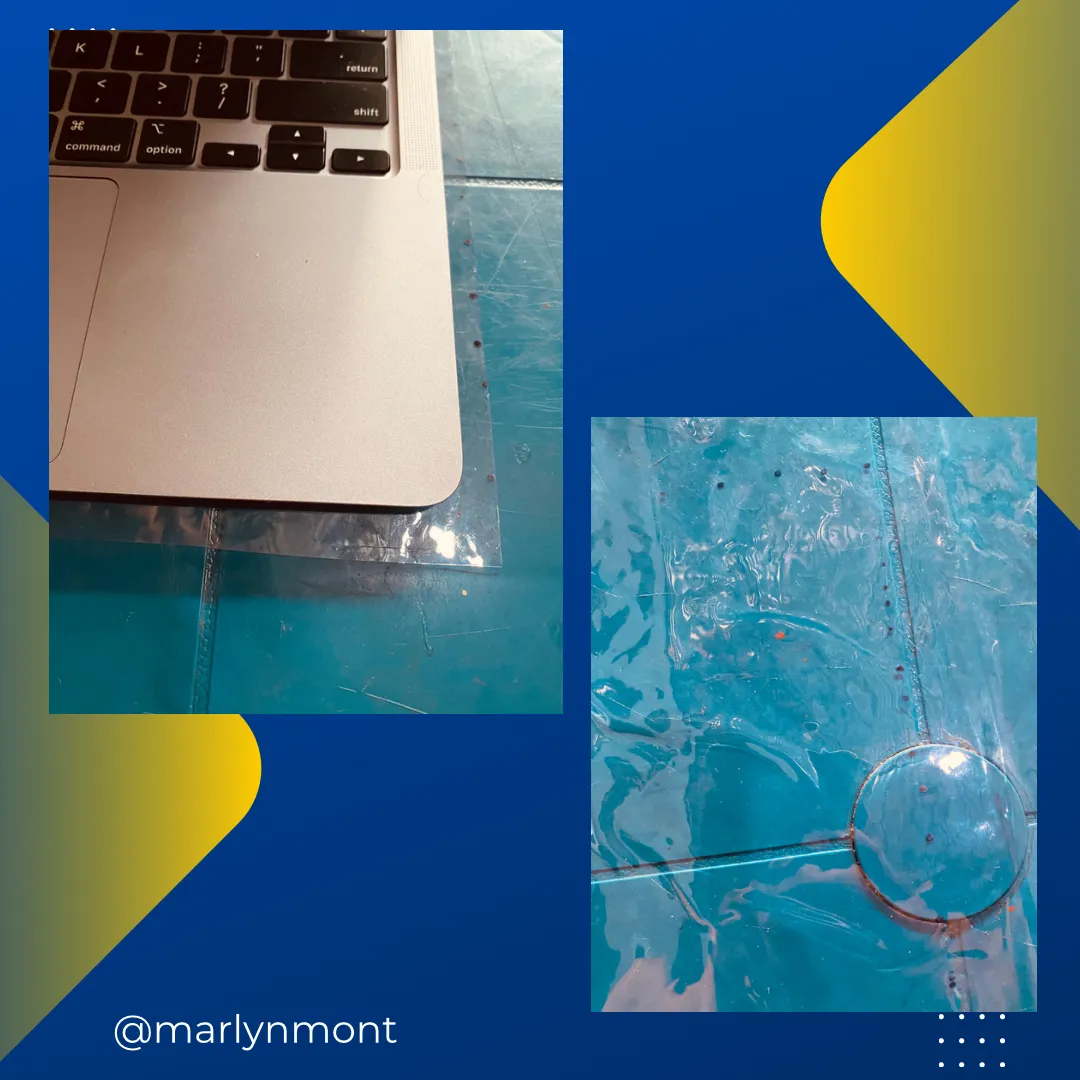
Cortaremos el plástico de 32cm de ancho por 44 de largo, por supuesto esto dependerá del tamaño de computadora para la cual vayas a hacer el forro
Para cortar hice pequeños puntos con un marcador para que se pudiera ver en la fotografía., y cortaremos 1 cm sobrante para cada lado
We will cut the plastic 32cm wide by 44cm long, of course this will depend on the size of the computer for which you are going to make the cover
To cut, I made small dots with a marker so that it could be seen in the photograph. And we'll cut 1 cm left over for each side
Paso 2
-Step2
Cortamos 1 cuadrado de tela de 10cm por cada lado, estos los vamos a dividir diagonalmente y obtendremos 2 triángulos de tela para colocar en las esquinas inferiores del forro.
También cortaremos 2 cuadrados de plástico transparente, este es para cubrir cada triángulo de tela, un tips para evitar que la tela se hilache es pasarle un poco de fuego en las orillas teniendo cuidado de no quemarla.
We cut 1 square of fabric measuring 10cm on each side, we are going to divide these diagonally and we will obtain 2 triangles of fabric to place in the lower corners of the lining.
We will also cut 2 squares of transparent plastic, this is to cover each triangle of fabric, A tip to prevent the fabric from fraying is to put a little heat on the edges, being careful not to burn it.

Paso 3
- Step 3
Procederemos a fijar los triángulos de las esquinas inferiores,, pasamos costura por el alrededor uniendo el triángulo que hicimos de tela y plástico al rectángulo que cortamos de plástico, luego cortamos los excedentes de las orillas.
We will proceed to fix the triangles of the lower corners, we sew around them, joining the triangle that we made of fabric and plastic to the rectangle that we cut out of plastic, then we cut the excess from the edges.

Paso 4
Step 4
Con un pequeño cuadrado de tela le hice el sesgo de 3 cm de ancho, luego planché para darle forma y que al momento de pasar costuras sea más fácil, les confieso que esta es la primera vez que pego un sesgo tan delgado, pero la idea es que no ocupe mucho espacio en el forro.
With a small square of fabric I made the 3 cm wide bias, then I ironed it to give it shape and make it easier when sewing. I confess that this is the first time I have glued such a thin bias, but the idea is that it does not take up much space in the lining

Paso 5
-Step 5
pegaremos el sesgo de la orilla de nuestro foro, en la orilla superior sólo le hice un pequeño doblez de 1 cm ya que si se lo hacía más grueso iba a tapar la visibilidad de la pantalla.
Coartémoos desde una esquina superior del forro , hasta finalizar en la orilla superior , rematamos costura en cada punta.
As we will paste the bias of the edge of our forum, on the upper edge I only made a small fold of 1 cm since if I made it thicker it would cover the visibility of the screen.
Sew from an upper corner of the lining, ending at the upper edge, finishing the seam at each end.

Y así ya está listo el forro para laptop en plástico transparente, fácil y sencillo de realizar, espero les guste 😊
And so the transparent plastic laptop cover is ready, easy and simple to make, I hope you like it 😊

➿➿➿➿🔸➿➿➿➿
Eso es todo por hoy amigos, me despido deseándoles muchos éxitos y bendiciones para todos, agradecida por visitar mi publicación, hasta otra oportunidad 🥰
las fotos aquí compartidas son de mi propiedad tomadas con mi teléfono iPhone 11
That's all for today friends, I say goodbye wishing you many successes and blessings for all, grateful for visiting my publication, until another opportunity 🥰
The photos shared here are my property, taken with my iPhone 11 phone and edited in Canva.