Saludos amigos de HIVE DIY! 🥰❤️
Se acerca el cumpleaños de mi hija, y quiero hacerle un detalle sencillo pero diferente para obsequiárselo en su día, es por esto que hoy quiero compartir con ustedes una idea para hacer una linda flor eterna, acompáñame y te comparto el paso a paso:
Greetings HIVE DIY friends! 🥰❤️
My daughter's birthday is coming up, and I want to make her a simple but special gift. That's why today I want to share with you an idea for making a beautiful everlasting flower. Join me, and I'll share the step-by-step instructions:

MATERIALES
MATERIALS
Mi segunda hija es muy amante de las flores, siempre que andamos en la calle y ve alguna planta con flores, le toma fotografías y veo como siente esa atracción, en nuestra casa hemos logrado adquirir algunas plantas y hay una especial que a ella le gusta muchísimo, esta le llamamos acá en mi país Venezuela, bella a las 11, el tipo de flor es distinta, ya que ella es como muchos pétalos amontonados, esta también es de colores muy variados, tuvimos la suerte que una de las que compramos venía mezclada y en Momentos nos da esa gran variedad de colores de flores, es por esto que pensé en la idea de hacerle un modelo parecido de flor para obsequiárselo este domingo 22 de marzo, el cual será su cumpleaños número 21, el color escogido es el rojo, ya que este color representa el amor en su máximo expresión, y eso quiero que siempre tenga a su alrededor, muchísimo amor 🥰 ❤️, así que manos a la obra, aquí les dejo la lista de materiales a utilizar:
- cinta de Razo de 5 cm de ancho, en mi caso voy a utilizar roja para la flor y verde para las hojas
- Tijeras
- Cinta métrica
- Palitos de altura o palillos chinos
- Silicon, caliente
- Encendedor o Yesquero
- Envoltura de flores
My second daughter loves flowers. Whenever we're out and about and she sees a flowering plant, she takes pictures, and I can see how attracted she is to it. We've managed to get a few plants at home, and there's one in particular that she loves. Here in my country, Venezuela, we call it "Bella a las 11" (Beautiful at 11). The flower is different; it's like many petals piled up. It also has a wide variety of colors. We were lucky enough to buy one that was mixed, and in Momentos, it gives us that great variety of flower colors. That's why I thought of making her a similar flower to give her this Sunday, March 22nd, which is her 21st birthday. The color I chose is red, since this color represents love in its purest form, and that's what I want her to always have around her: lots and lots of love 🥰 ❤️. So, let's get to work! Here's the list of materials you'll need:
- 5 cm wide satin ribbon. In my case, I'm going to use Use red for the flower and green for the leaves
- Scissors
- Measuring tape
- Chopsticks or dowels
- Hot glue
- Lighter or lighter
- Flower wrapping


PASO A PASO
STEP BY STEP
Comenzamos, para el primer paso vamos a cortar los pétalos para nuestra flor, para esto vamos a cortar el tamaño tradicional, puedes guiarte con una tarjeta bancaria o puedes medirlos con tu cinta métrica, el aproximado es de 10 cm, vamos a cortar en total 12 pétalos, todo dependerá de qué tan grande lo deseas, para el modelo de este pétalo, ya que es distinto al de la rosa, busqué algo de Ayuda en Internet y por supuesto, le puse mi toque personal
Let's begin. For the first step, we'll cut the petals for our flower. We'll cut them to the traditional size; you can use a bank card as a guide or measure them with a tape measure. The approximate size is 10 cm. We'll cut a total of 12 petals, but it all depends on how big you want it. For this petal design, since it's different from the rose petal, I looked for some help online and, of course, added my own personal touch.
 |  |
|---|
Para el segundo paso, vamos a doblar nuestra cinta a la mitad a lo largo de cada recorte de cinta, cortamos en los extremos, dándole forma redondeada, esto lo vamos a hacer en ambos extremos, luego vamos a ir pasando el fuego por las orillas y deformamos con nuestros dedos, en mis imágenes les muestro cómo debe quedar, en este proceso les hago una confesión, mientras hacemos esta deformación en las orillas de las cintas, son muchas las quemadas que nos vamos a dar en nuestros dedos, ja ja, pero son soportables, igual debemos hacerlo con mucho cuidado
For the second step, we're going to fold our tape in half lengthwise along each strip, cut the ends, giving them a rounded shape. We'll do this on both ends. Then we'll run the flame along the edges and deform them with our fingers. In my pictures, I show you how it should look. I'll make a confession during this process: while we're deforming the edges of the tape, we're going to get a lot of burns on our fingers, haha, but they're bearable. We still have to do it very carefully.
 |  |
|---|---|
 |  |
Para el tercer paso vamos a doblar a la mitad cada pétalo haciendo coincidir, ambos extremos, pero vamos a tratar de que nos quede un poco disparejo, allí vamos a pasar el fuego para sellar la cinta y luego le hacemos un dobles en el centro como un pliegue y
Volvemos a quemar para fijar , esto es para que cada pétalo se vea como más arrugado
For the third step, we're going to fold each petal in half, matching both ends, but we'll try to make it slightly uneven. We'll then pass the ribbon over a flame to seal it, and then make a fold in the center, like a crease.
We'll burn it again to set it; this is so that each petal looks more wrinkled.
 |  |
|---|---|
 |  |
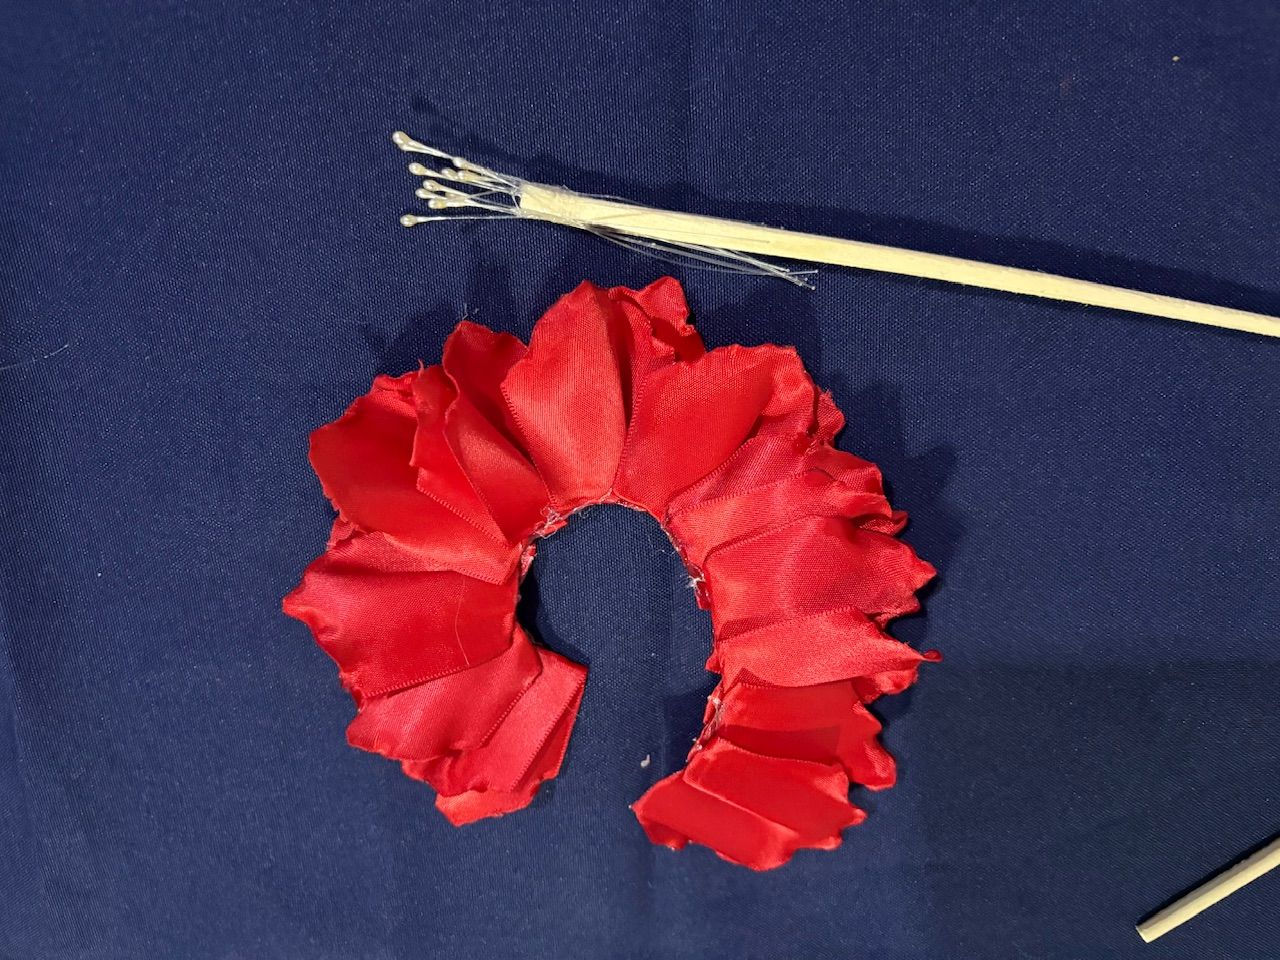
Ya tenemos los pétalos, ahora vamos a armar nuestra flor, para esto voy a utilizar un palillo chino, en la parte más gruesa lo voy a dejar para la orilla superior aquí voy a pegar con Silicon los pistilos para la flor, trato de dejarlos de largo como 1, 5 cm, luego pego todos los pétalos, uniéndolos entre sí, esto me va a formar como un espiral
We already have the petals, now let's assemble our flower. For this, I'm going to use a chopstick. I'll leave the thickest part at the top edge. Here I'll glue the flower layers with silicone, trying to make them about 1.5 cm long. Then I glue all the petals together, joining them to form a spiral.
 |  |
|---|---|
 |  |
Al pegar, todos los pétalos, vamos a comenzar a pegarlos a nuestro palillo, comenzamos cubriendo los pístilos y vamos enrollando hasta pegar por completo todo el espiral de pétalos, relleno con silicone la parte inferior del centro de la flor, hago unos pétalos con cinta verde, se los coloco por la parte de abajo, y luego comienzo a cubrir con la cinta verde de papel especial para flores, todo el palillo, en algunos tramos pongo algunos puntos de Silicon para fijar bien esta cinta verde y así ya está lista esta hermosa flor roja para obsequiársela a mi hija el día de su cumpleaños.
Once all the petals are glued, we'll start attaching them to our stick. We begin by covering the pistils and continue wrapping until the entire spiral of petals is glued. I fill the bottom part of the flower's center with silicone, make some petals with green ribbon, and attach them to the bottom. Then I begin covering the entire stick with special green floral paper ribbon. In some sections, I add a few dots of silicone to secure the green ribbon. And there you have it, this beautiful red flower is ready to give to my daughter on her birthday.
 |  |
|---|---|
 |  |
| --- | --- |
 |  |
Ame el resultado final de esta hermosa flor eterna, espero que a mi hija le guste muchísimo, me gustaría poder hacerla en variados colores o quizás colores combinados, se deben ver muy parecidas a las naturales, espero les haya gustado esta linda idea, es todo por hoy, me despido deseándoles muchas bendiciones, hasta otra oportunidad
I loved the final result of this beautiful everlasting flower. I hope my daughter likes it very much. I'd love to make them in various colors or perhaps a combination of colors; they should look very similar to real ones. I hope you liked this lovely idea. That's all for today. I wish you many blessings, and until next time.
 |  |
|---|---|
 |

las fotos aquí compartidas son de mi propiedad tomadas con mi teléfono iPhone 16, la edición fue hecha en Canva, para la traducción del inglés utilice el traductor de Google