
Comenzaré con una historia, mi mamá y yo conseguimos este paquete de masa flexible bastante economico, asi que decidimos comprarlo para crear figuras y colocarlas en cintillos, pulseras y llaveros. Al abrirla lo primero que notamos es que no es blanca, es un color mas bien gris claro, ahi entendimos porque era tan economica..
I will start with a story, my mom and I got this pack of flexible dough quite cheap, so we decided to buy it to create figures and put them on headbands, bracelets and key rings. When we open it, the first thing we notice is that it is not white, it is rather a light gray color, there we understood why it was so cheap..

Una de las cosas que no habia en la tienda y si habia igualmente no lo compramos era colorante. Asi que decidimos utilizar colorante alimenticio que tenemos en casa y realmente funcionó bastante bien aunque dependiendo del color hay que agregar mas o menos gotas, yo recomiendo agregar 2 gotas y mezclar para ver como queda.
One of the things that was not in the store and if there was anyway we did not buy it was dye. So we decided to use food coloring that we have at home and it really worked quite well, although depending on the color you have to add more or less drops, I recommend adding 2 drops and mixing to see how it turns out.

A este punto mi mamá sale del cuarto y me dice: "
At this point my mom leaves the room and tells me: "

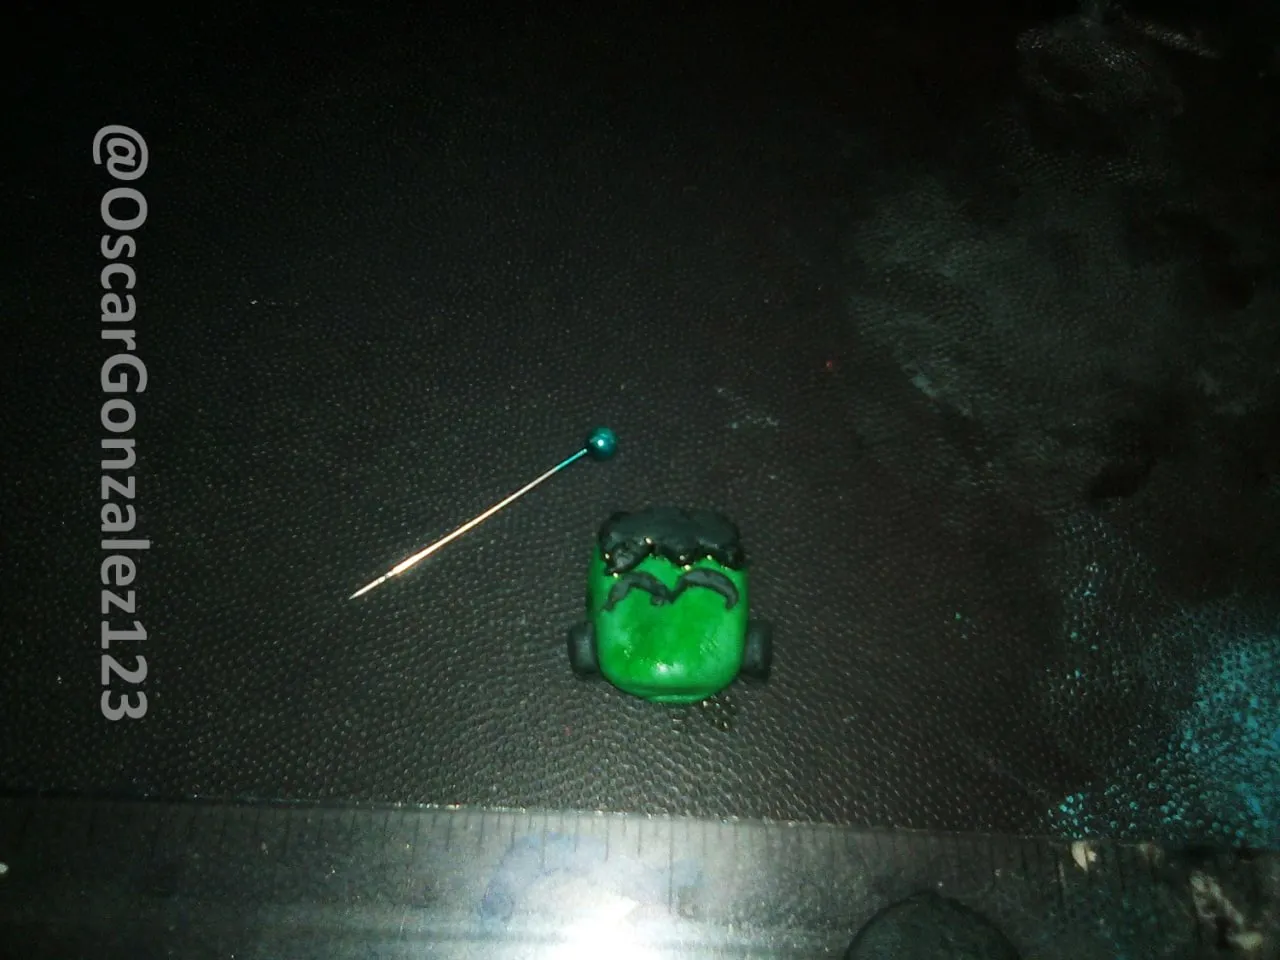
Mi mamá queria que hiciera una muñeca, flores o caritas felices y la verdad es que no lograba visualizar algo de eso con los colores que tenia a la mano, entonces me dejé llevar e hice lo primero que se me ocurrió, Un Frankenstein.
My mom wanted me to make a doll, flowers or happy faces and the truth is that I couldn't visualize any of that with the colors I had on hand, so I got carried away and made the first thing that came to my mind, a Frankenstein.

Con mi "herramienta especializada" tambien conocido como alfiler, fuí cortando las piezas que necesitaba y aunque no quedaban muy prolijas iba a funcionar.
With my "specialized tool" also known as a pin, I cut the pieces I needed and although they weren't very neat, it would work.
A este punto tenia que admitir que estaba quedando bastante bien, aun siendo la primera vez para mi haciendo algo como esto. Luego de sobre poner las piezas, coloqué una gota de agua sobre toda la pieza y asi fijar ambos colores
At this point I had to admit that it was coming out pretty good, even though it was my first time doing something like this. After overlaying the pieces, I placed a drop of water on the entire piece and thus fix both colors

Aca hago un pequeño parentesis, vi en varios tutoriales que utilizan pega blanca para pegar las piezas y puedo decirles que si funciona, pero queda mas debil, al tener la pega una consistencia espesa, tarda mas en ser absorvida por la masa flexible, en cambio si con el dedo humedecemos las piezas una vez puestas la masa se volverá mas pegajosa y es eso lo que hace que se peguen entre si.
Here I make a small parenthesis, I saw in several tutorials that they use white glue to glue the pieces and I can tell you that it works, but it is weaker, since the glue has a thick consistency, it takes longer to be absorbed by the flexible mass, on the other hand If we moisten the pieces with our finger once they have been placed, the dough will become stickier and that is what makes them stick together.

Otra cosa que yo hice y que no he visto en ningun tutorial, es colocar el diseño sobre una rejilla, en mi caso un clip soblado, esto para que haya circulacion de aire y se seque de manera pareja, es como poner a enfriar un pastel, no queremos que se seque por arriba y quede baboso por abajo.
Another thing that I did and that I have not seen in any tutorial, is to place the design on a grid, in my case a bent clip, this so that there is air circulation and it dries evenly, it is like putting a cake to cool , we don't want it to dry out on top and be slimy on the bottom.

Como vieron en la foto anterior, al secarse se empieza a volver opaco, es normal, no has hecho nada malo. Simplemente hay que aplicar un barniz, en mi caso simple pega blanca. Y si, a este punto la pega sirve para barnizar y para solidificar mas las uniones, aunque repito, para pegar entre si, se usa agua. Otra cosa es no preocuparse por expandir mucho la pega, esos sitios blancos desapareceran al secarse. Tal vez para una produccion en masa no estaria mal sumergir multiples piezas en la pega y luego colocarlas a escurrir, como glasear una dona.
As you saw in the previous photo, when it dries it starts to turn opaque, it's normal, you haven't done anything wrong. You just have to apply a varnish, in my case simple white glue. And yes, at this point the glue is used to varnish and to further solidify the joints, although I repeat, to glue together, water is used. Another thing is not to worry about spreading the glue too much, those white spots will disappear when they dry. Perhaps for a mass production it would not hurt to dip multiple pieces in the glue and then place them to drain, like frosting a doughnut.

Una vez pasadas 24 horas ya podriamos manipular la pieza sin miedo alguno, en mi caso yo la quiero para la nevera, asi que debia conseguir un iman. Como yo honestamente nunca he entrado a una tienda donde vendan imanes, rompí un auricular viejo y saqué este pequeño iman, en este caso se pega por ambos lados al metal, parece tonteria, pero es muy lamentable pegarlo a la pieza y que luego no se pegue al metal. (Me ha pasado, con los imanes negros)
After 24 hours we could handle the piece without any fear, in my case I want it for the fridge, so I had to get a magnet. As I have honestly never entered a store where they sell magnets, I broke an old earphone and took out this small magnet, in this case it sticks to the metal on both sides, it seems silly, but it is very unfortunate to stick it to the piece and then I don't know stick to metal. (It has happened to me, with the black magnets)

Aca noto que todos usan pistolas de silicon caliente, lo cual está bien por la rapidez en la que seca, la desventaja en mi caso, es que el tipo de iman que estoy utilizando no es poroso, entonces el silicon caliente se despegaba con facilidad. Por eso decidir utilizar silicon liquido y dejarlo reposar al menos 8 horas mas.
Here I noticed that everyone uses hot glue guns, which is good because of the speed in which it dries, the disadvantage in my case is that the type of magnet I am using is not porous, so the hot glue came off easily. That is why I decided to use liquid silicone and let it rest for at least 8 more hours.

Al final lo puse ahi, rodeado por dos cerditos y una vaca. Me gustaria agradecer a Frigilux por patrocinar este post con esta fabulosa nevera.. ¿Se imaginan si fuera cierto? Que genial seria un patrocinio asi.
In the end I put it there, surrounded by two little pigs and a cow. I would like to thank Frigilux for sponsoring this post with this fabulous fridge... Can you imagine if it were true? How great would be a sponsorship like that.