
Paper crafting is absolutely fun and also a great way to unleash our creativity and make beautiful and artistic projects. There are countless possibilities with paper, from simple origami and paper cutting to more complex paper crafting techniques like quilling and paper mache.
There was a time when I used to do a lot of crafting. I got this opportunity after many years when my son's school called for a cone ice cream craft. It was so fun to teach my son about this project.
Let me share the step-by-step process.
Materials I have used:
- Brown construction paper (for the cone)
- Colored paper (for the ice cream- I took yellow color)
- Scissors
- Glue stick or liquid glue
- Pencil/colored pencils
- Markers or crayons (for decorating, optional)
- Red and green color paper for the cherry and leaf and pink paper for the sticks.
Our first step was Cone Preparation. I have watched some youtube to get inspiration. But we did it all by ourselves with all new ideas and I believe it turned out really well.
If you want to make your own cone ice cream craft you can -
Take the brown construction paper and cut out a triangle shape. This will be the cone of your ice cream. The size of the triangle will determine the size of your finished craft, so adjust it according to your preference.
Roll the triangle shape into a cone, ensuring that the pointed end aligns with one of the bottom corners to create a cone shape.
Apply glue along the edge of the paper to secure the cone shape. Hold it for a few seconds to allow the glue to set.
Use a brown sign pen and ruler to draw a waffle-like surface on the paper.
(Sorry for the blurry photo)

Now for the ice scoop, you can follow different designs. I followed one from youtube.
Cut a big piece of colored paper into a rectangular shape.
Fold in four parts and roll them in different parts as I showed in the photos.
Use a pen to give the rolls a temporary effect.

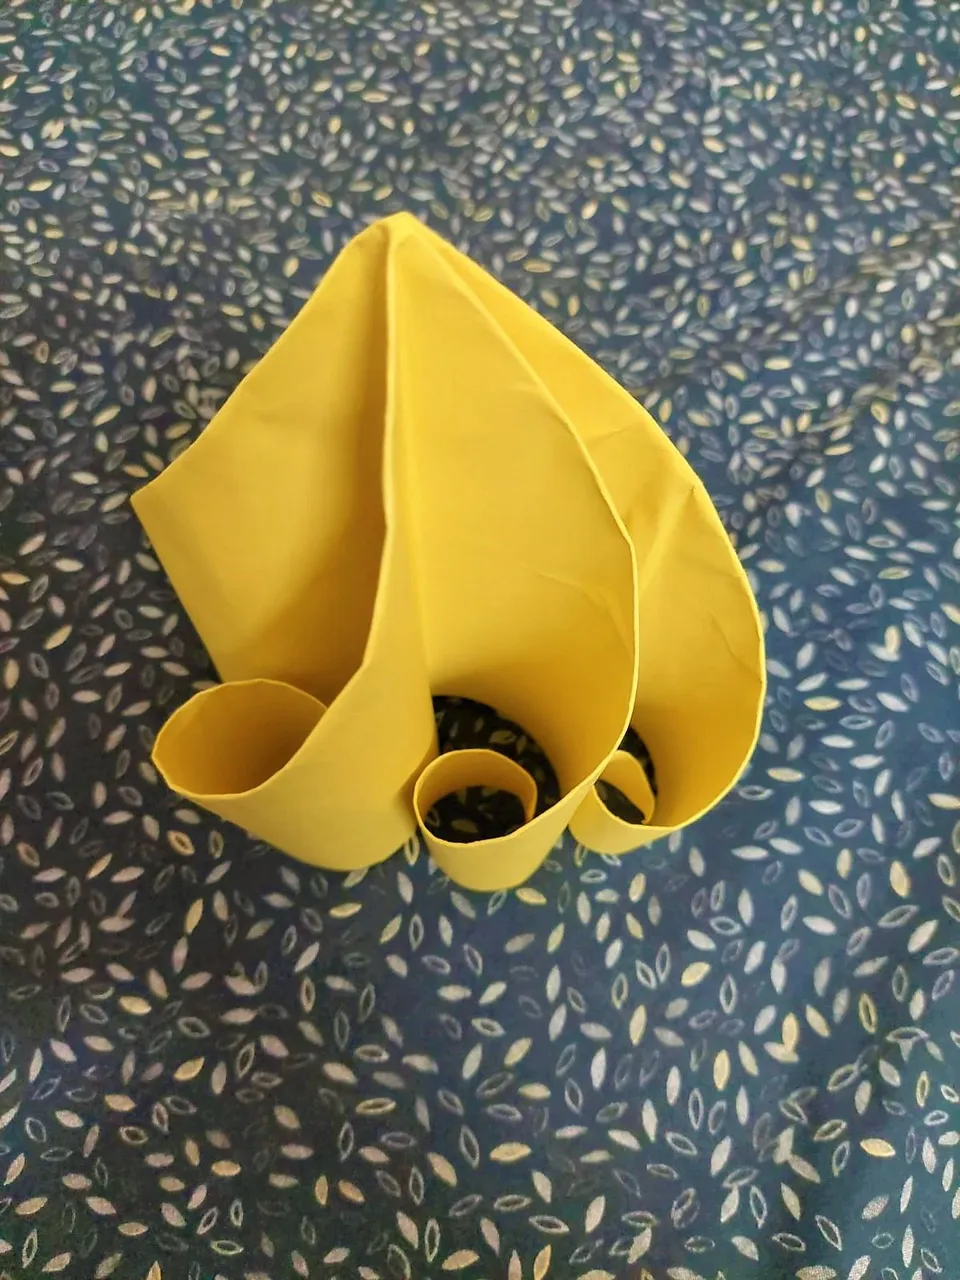
It was actually quite easy.
Attaching the Ice Cream Scoop was not that difficult as well.
Apply glue to the bottom side of the colored paper circle (the side that will face the inside of the cone).
Place the circle inside the cone, pressing it gently to adhere to the cone's inner surface.
Now the basic ice cream cone is ready. It's time to decore the cone. We choose to attach cherry, chocolate - strawberry sticks, and sprinkle them.


I made the strawberry sticks by attaching some glue and white thin cut paper on the top by rolling it.


This cherry origami turned out so cute. You will find this tutorial on YouTube as well. Or you can cut a small red circle for the cherry and a green stem from construction paper or colored paper. Glue them on top of the ice cream scoop.

This is what everything looks like together. Now it's time to attach them with glue.


This is how it turned out. Isn't it cute?
I later attached the cherry on top of the scoop and added a few sprinkles here and there with colored paper as well. If you like to be more creative you can add some whipped cream by gluing a cotton ball or white paper cut in a curvy shape on top of the ice cream scoop.

My son helped a lot in finishing the project. He has done all the cutting, gluing with my instructions. No need to he was super excited about the project. And the good news is, he got the start mark on the crating and we were so happy to hear that.
Whether you're a beginner or an experienced paper crafter, the joy of creating something with your hands and seeing your imagination come to life is truly rewarding.
I hope you will like this DIY and do it yourself too.
Have a good day.
