
Buenas tardes tengan tod@s ... Tenia días que no me pronunciaba, estaba un poco ocupada, pero ya estoy aquí para mostrarles algo que he estado elaborando y que me quedaron muy bonitos , se trata de dos lazos para el cabello de madre he hija, resulta que fueron a presentar su acto de fin de curso y necesitaban un adorno tricolor para el cabello... me dijeron que se podía hacer ?,.. y puse mi imaginación en acción y aquí les muestro mi trabajo... ellas quedaron encantadas!..
Good afternoon everyone... I hadn't spoken for days, I was a bit busy, but I'm here to show you something I've been making and that turned out very nice, it's about two bows for mother's hair Hey daughter, it turns out that they were going to present their end-of-year act and they needed a tricolor ornament for their hair... they told me it could be done?... and I put my imagination into action and here I show you my work... they were delighted!
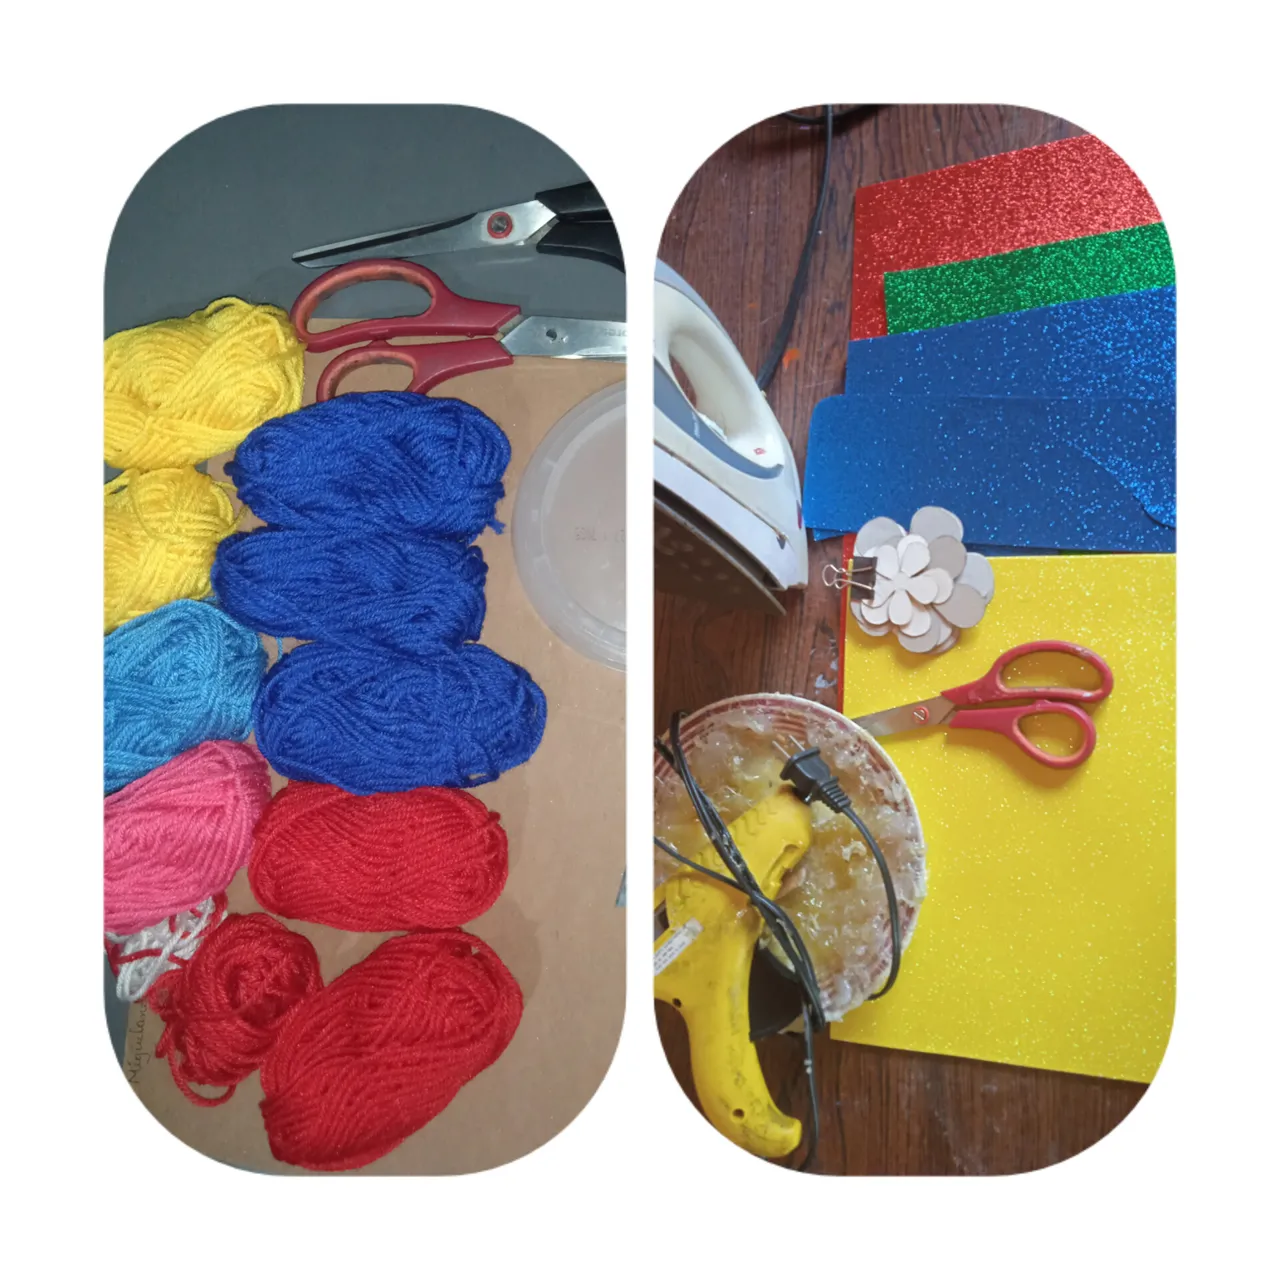
MATERIALES
*Estambre amarillo, azul y rojo.
*Foami escarchado amarillo azul y rojo.
*Trozos de cartón
*Silicon en barra
*Plancha
*pistola de silicon.
*Moldes de flores.
*Tijeras hojilla o exacto
*Pinza para el cabello.
MATERIALS
*Yellow, blue and red stamen.
*Blue and red yellow frosted foami.
*Cardboard pieces
*Silicon stick
*Iron
*silicone gun.
- Flower molds.
Scissors ,blade or exact
*Hair clip.
PASO 1
Tomamos un trozo de cartón y marcamos un circulo de unos 12cm aproximadamente y cortamos, luego en el centro marcamos uno mas pequeño como de 5cm y cortamos, nos va a quedar algo como una rueda, haremos un par de ellas.
STEP 1
We take a piece of cardboard and mark a circle of approximately 12cm and cut, then in the center we mark a smaller one of about 5cm and cut, we will have something like a wheel, we will make a couple of them.

PASO 2.
Ahora juntamos las dos ruedas y hacemos listones con el estambre con hilo de 8 vueltas y comenzamos a enrollar en el circulo . Para cada pompón se usaran dos madejas de estambre por cada color.
STEP 2.
Now we put the two wheels together and we make ribbons with the yarn with 8 turns of thread and we begin to wind in the circle. For each pompom, two skeins of yarn will be used for each color.

PASO 3.
Ya terminado de enrollar el hilo tomamos dos cartoncitos del tamaño del centro del enrollado para agarrarlo con presión y no se nos vaya a soltar, cortamos por la orilla con la hojilla de exacto o cutter con mucho cuidado... también se puede usar la tijera.
STEP 3.
Once we have finished winding the thread, we take two little cardboard the size of the center of the winding to grip it with pressure and it will not come loose, we cut along the edge with the exacto blade or scooter very carefully... you can also use scissors .

PASO 4.
Aparte tenemos listo un trozo de hilo estambre para sujetar con fuerza una vez terminado de cortar .Pasamos este por medio de los dos cartoncitos y sujetamos con fuerza y apretamos, luego los sacamos del hilo,..
STEP 4.
Separately, we have ready a piece of worsted thread to hold tight once finished cutting. We pass this through the two little cardboards and hold tight and squeeze, then we remove them from the thread...

PASO 5.
Nos quedara un pompon un poco desgreñado pero con la tijera, se quitan los excesos quedan perfectos .
STEP 5.
We will have a slightly disheveled pompom but with the scissors, the excesses are removed, they are perfect.
STEP 6.
Tenemos una pinza para el cabello usada (la reutilizaremos).
We have a used hair clip (we will reuse).


Vamos a amarrar los pompones en la pinza con el sobrante de cuando amarramos el hilo al principio.
We are going to tie the pompoms in the clothespin with the excess from when we tied the thread at the beginning.
Y asi nos quedara el primer lazo "POMPONES CON ESTAMBRE"
And so we will have the first loop "POMPOMS WITH YARN"
SEGUNDO LASO
SECOND TIE.
PASO 1.
En este lazo tomamos el foami y marcamos los modelos de flores que serán una especie de rosa y cortamos diferentes tamaños.
STEP 1.
In this loop we take the foami and mark the flower models that will be a kind of rose and cut different sizes.


PASO 2.
Ya tenemos todos los colores cortados, vamos a pasarlos por la plancha para darles un poco de forma a los pétalos de las flores y a las hojitas.
STEP 2.
We already have all the colors cut out, we are going to pass them through the iron to give the flower petals and the leaves a bit of shape.

PASO 3.
Y comenzamos a armar las flores desde los pétalos pequeños a los mas grandes y pegaremos con silicon caliente para que sujete bien.
STEP 3.
And we begin to assemble the flowers from the small petals to the largest ones and we will glue them with hot silicone so that they hold well.

PASO 4.
Le coloque cordones por detrás para sujetarlas a la pinza .
STEP 4.
I put laces on the back to hold them to the clamp.

Y asi queda el segundo lazo "ROSAS DE FOAMI".
And so is the second loop "FOAMI ROSES"

Les muestro como quedaron los dos lazos.!
I show you how the two ties turned out.!

Mi amiga y su nena quedaron muy lindas y encantadas con sus lazos!....

Me despido de ustedes sin mas... espero sea de su agrado.. hasta la proxima.!
I say goodbye to you without further ado... I hope you like it... until next time!
las fotos fueron tomadas por mi telefono xiaomi redmi 9A, editadas por Inshot app
the photos were taken by my xiaomi redmi 9A phone, edited by Inshot app